My name is Chas; and time spent in the mountains, rivers, lakes and sea; is time well spent.
I thought I would gather useful information, from our experts, for those who like outdoor activities such as water sports, snow sports, walking, climbing etc. Having 'had a go' at many of the sports, myself, I see things from the customer's perspective!
I trust the articles help, enjoy!
After years of testing and trying numerous different gloves and mittens I am happy to say I’ve finally found my perfect pair, the Planks Bro Down snow mitts! Not only are they a simple design but the glove liner within ensured all my fingers kept snug and warm whilst looking as though I was only wearing mittens. The 10K waterproofing and breathability meant my hands stayed dry all day and didn’t get too hot or sweaty whilst the quilted insulation kept them snug and cosy even when it was sub zero! They were easy to adjust and the glove leashes were great for when we stopped for a drink as I definitely couldn’t lose them.
I would definitely recommend these to anyone looking for a simple but effectively designed pair of mittens!
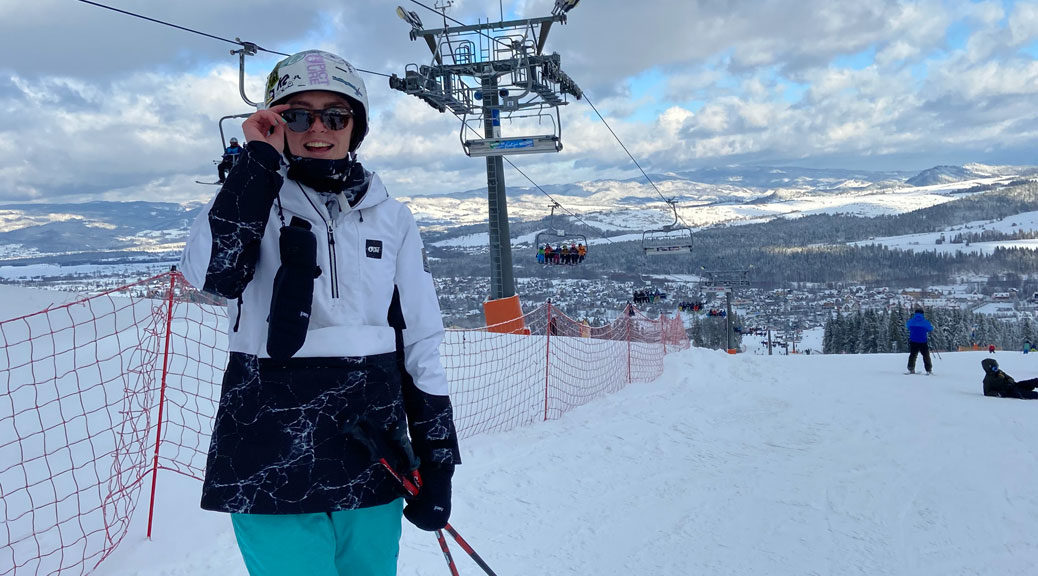
Before travelling to Poland for my ski trip I treated myself to a new ski jacket. I have always loved the Picture Organic Clothing designs – I just love the style and aesthetic – and particularly this year’s ‘marble’ range, so I decided to purchase the Tanya Marble snow jacket.
This is the first over-the-head jacket I have tried and the armpit-to-hip zip made it really easy to get on and off. The two-layer ripstop, with a crosshatch pattern, felt extremely durable and resistant to tearing, so I wasn’t worried about it getting damaged if I fell.
This outer fabric protects Picture’s DryPlay waterproof membrane and is covered by a durable water repellent (DWR) treatment, so the jacket is extremely waterproof. Even all the seams are sealed by tape to prevent water getting in!
The stretch snow skirt was brilliant for preventing snow (and cold) getting in, as were the wrist gaiters which were perfect for going over the tops of my gloves and keeping the heat in. The half zipper opening and underarm vents helped me regulate my body temperature when I was too warm however I stayed a perfect heat every day thanks to the breathability of the DryPlay membrane and the Coremax lining which insured I was cosy even when it got below 0 degrees.
I loved the front pouch pocket as it was great for my phone and sunglasses and even a snack for the mountainside, great size, and the magnetic poppers helped for quick and easy access.
I would recommend any of the Picture range as it is all beautifully designed and boasts multiple technical features! I absolutely loved this jacket, not only for its design but also the variety of qualities that made it perfect for my spring skiing holiday!
At Tallington Lakes our team tried and tested a variety of Falke ski and snowboard socks; this is what we thought…
Charlotte (Ski Instructor)
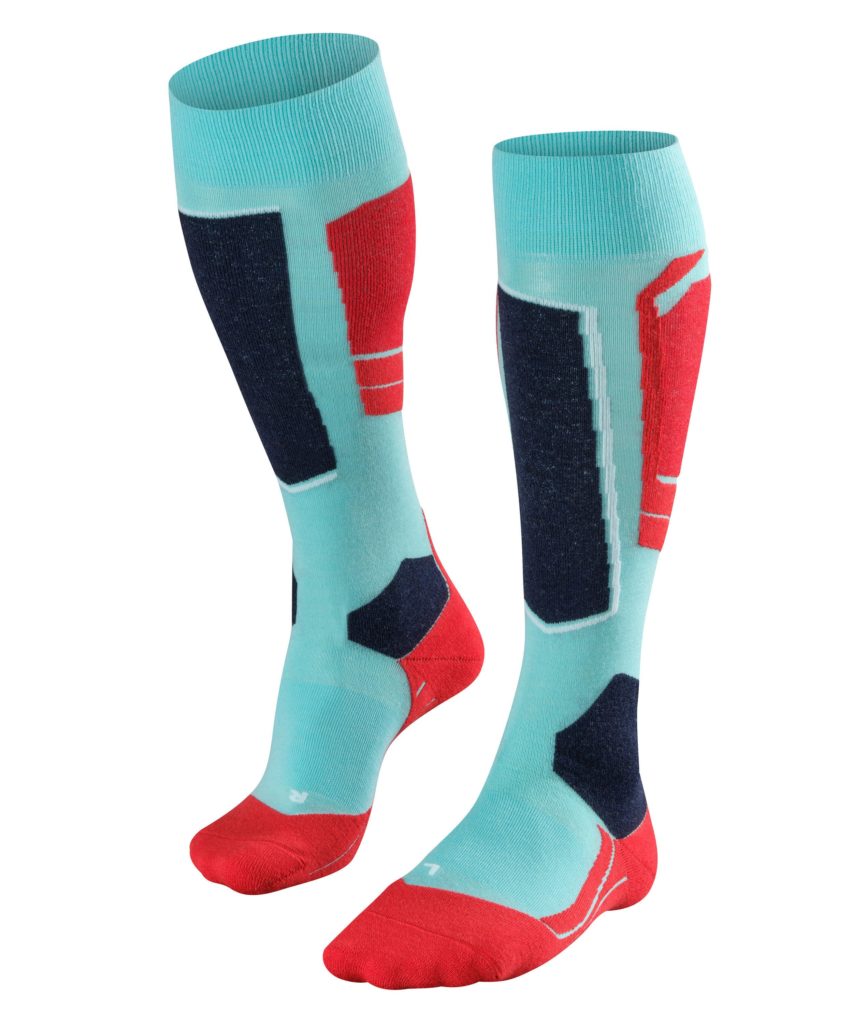
As a full time ski instructor it’s so important my feet are comfortable all day, every day; otherwise teaching becomes painful and I can’t focus or enjoy myself as much. After testing out different ski socks, both at work and on the mountains, I’ve never really found anything that I absolutely love…until now! The SK4 women’s skiing socks with their light cushioning instantly made my feet feel warm and padded; additionally the merino wool mixture felt soft and snug whilst also providing me with moisture wicking. So, even when out all day my feet stayed reasonably dry and cosy. What’s more is that I normally get really cold feet so I was slightly worried at trying one of the thinner-style socks in the range; but ultimately I was amazed at the heat they retained without building up moisture thanks to the air flow channels built in.
As someone who spends all day on the slopes, whether it’s here in England or in the Alps, I want socks that won’t have a negative impact on my performance, and with the SK4’s I found I have control and great power transmission credited to their thin cushioning and instep fit. They protect my feet from rubbing and blisters; whilst padding all the necessary areas without being too thick, meaning my feet have never been happier than in these Falke SK4’s!
Falke women’s SK4 skiing socks.
Chandler (Snowboard Instructor)
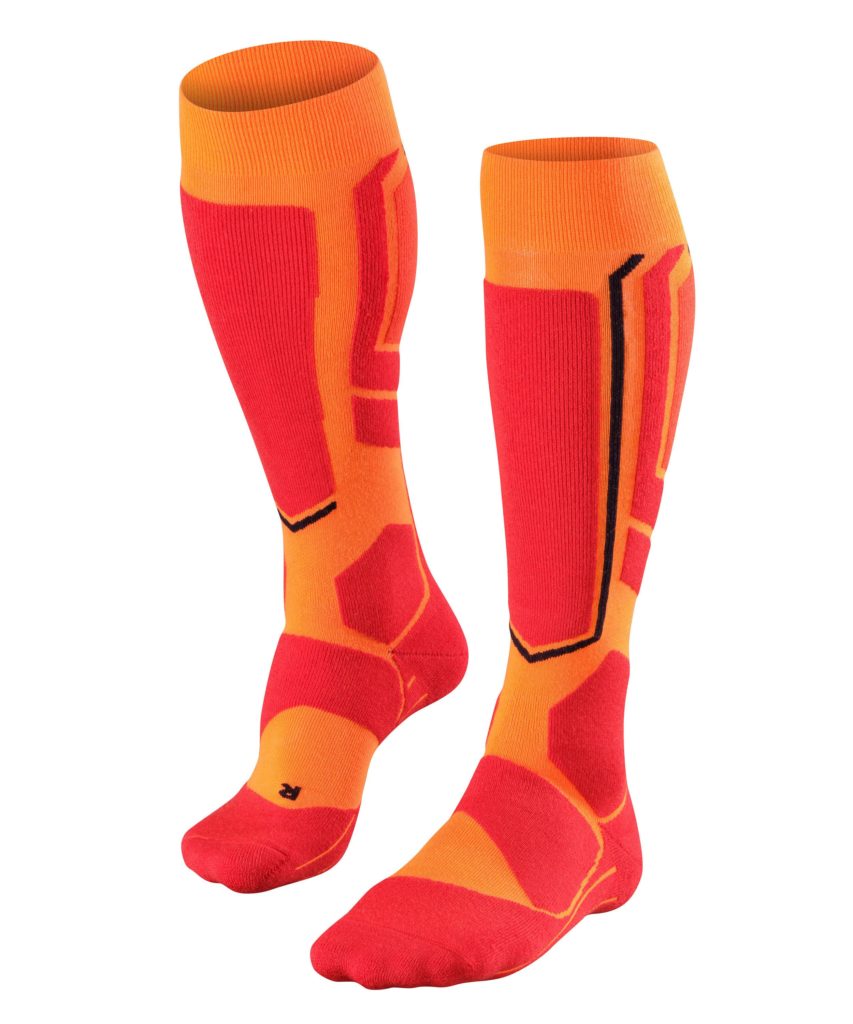
I don’t normally mind what socks I wear when I teach and yet after trying the Falke SB2 men’s snowboard socks, I will definitely be wearing them in the future! My favourite factor was the stretch and elasticity; it meant they were really easy to take on and off but still had a snug fit for maximum comfort and performance. Even after a few washes, and initial worries of the SB2’s losing their resilience, the socks still held their shape and kept the secure fit I liked.
The SB2 socks were definitely more comfy than others that I’ve tried before; they kept my feet warm and prevented sweat building up because of the air channels, which I appreciated when boarding all day. I’ll definitely be using these in the future!
Falke SB2 snowboarding socks.
Paul (Boot Fitter and Snowboarder)
My main role here at the Pro Shop is as a ski and snow boot fitter, so it’s important for me to understand the technicalities of ski and snowboard socks. The SB2 men’s snowboard socks are brilliant! The extra padding is great for the high backs and binding zones because it prevents rubbing and eases pressure points, whilst the merino wool kept my feet warm throughout the day. I also liked the fact that they are anatomically designed because it meant they are fitted perfectly to the feet; which is great for boot fitting. Besides this, my favourite feature has to be the hydrophilic insides which draw moisture from the feet and the hydrophobic outsides which push the moisture out and away; keeping my feet dry, warm and comfortable!
In December I headed to Chamonix to take the AAIRE Level 1 Course and AAIRE Rescue Course ran by the Chamonix Experience. The Level 1 Course is a is a 3-day introduction to avalanche safety and hazard management, combining classroom and field work, focusing on decision-making skills in avalanche terrain. The Rescue Course is an extra day bolt on at the end of the course that is focused on rescue practice including the transceiver skills, shovelling methodology, single and multiple burials and rescue response drills.
My motivation for seeking out the courses was two-fold. Firstly, from an academic point of view I am always keen to find out more about how the geography and weather are going to affect the quality of my annual ski trip. And secondly because my skiing has improved (or certainly my confidence not necessarily my technique!) I find myself looking further afield for more challenging routes, or for a fresh stash of powder. With increased attention on avalanches and the dangers of venturing off piste, especially following recent tragedies even in resort, my ignorance of my decision making is no longer bliss!
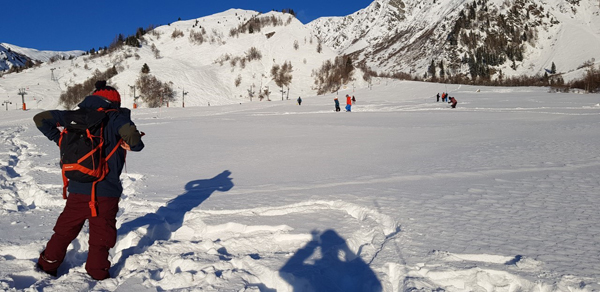
Day 1. We spent the first morning in the classroom, being introduced to the “Ride Safely” framework for planning and organising trips into the backcountry. The main emphasis was on introduction to different types of avalanches (there are nine different types!), what conditions they form in and what the warning signs are (if there are any!). As well as monitoring weather and snow reports throughout the season to get a feel for what’s going on in the snow before you even arrive on site. In the afternoon we headed up the Chamonix Valley to Le Tour and spent the afternoon learning how to use beacons, probes and shovels to find backpacks buried in the snow. This included the best practices for how to use each piece of equipment but also, what to watch out for in terms of good and “not-so-good” equipment.
Le Tour learning how to use beacons, probes and shovels to find backpacks buried in the snow.
Day 2 was again split 50:50 with the morning in the classroom and the afternoon out on the mountain. During the morning we continued to learn about how different weather conditions influenced the snow pack, but also on how to identify avalanche terrain and warning signs when out in the field. We also looked through some case studies of historic avalanches, as well an example of a situation where one of the instructors had a near miss on a day that was a level 2 on the scale. This really hammered home to me how naive I have been previously with my decision making. It turns out being in the wrong place on a level 2 day can be the same or worse than being somewhere on a level 4 day. This is probably my main taking from the course. How can you have enough information to be safe based on a scale that runs from level 1-5. Different parts of the mountain can be different levels on the same day, the scale only says the highest risk.
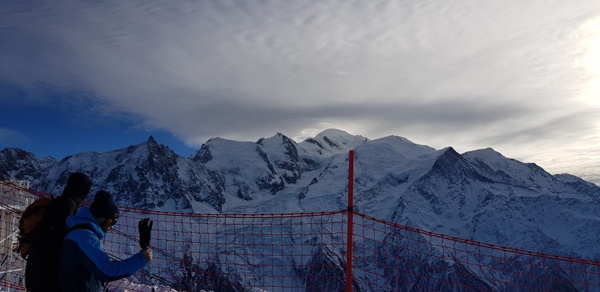
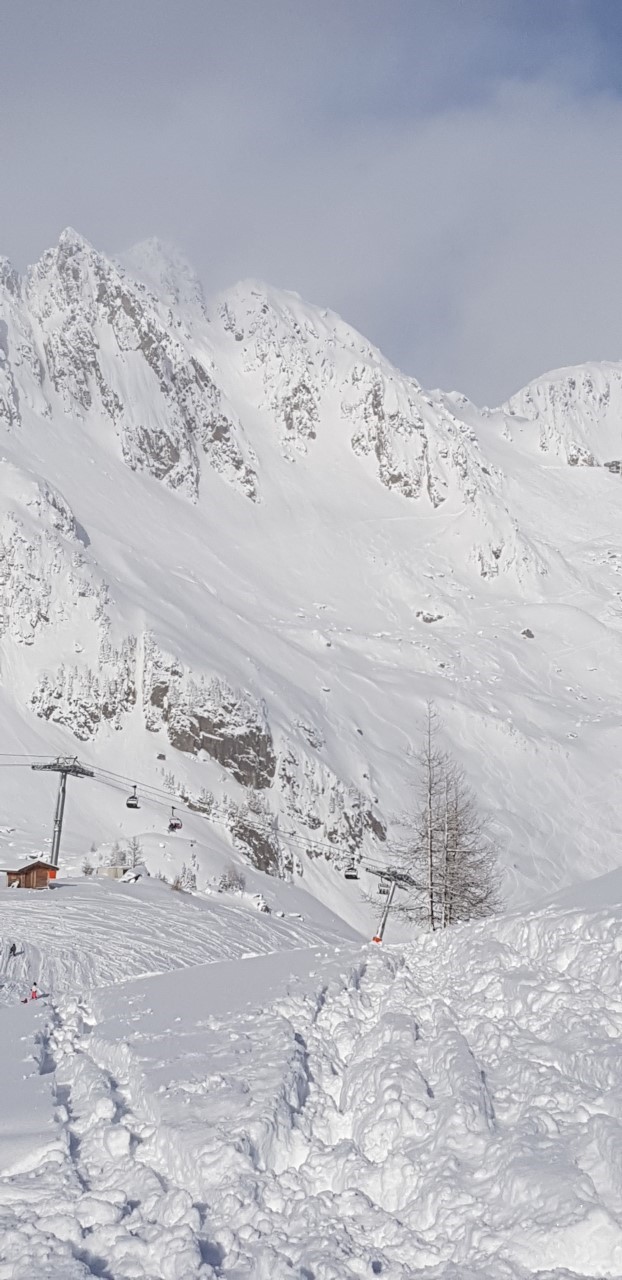
We spent the afternoon at the top of the cable car at Le Brevent, looking for avalanche terrain and trying to find the safest touring routes through avalanche terrain.
Mont Blanc, in the back ground, looking for avalanche terrain.
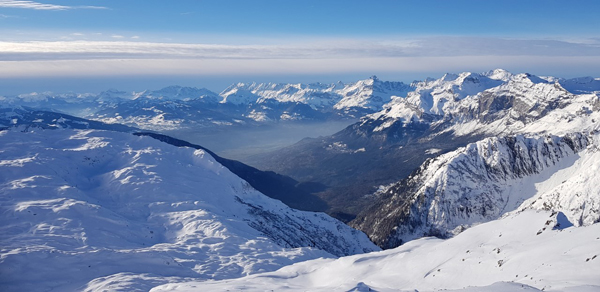
View north-west from Le Brevent, which is a popular ski touring route. Can you see the areas to avoid?
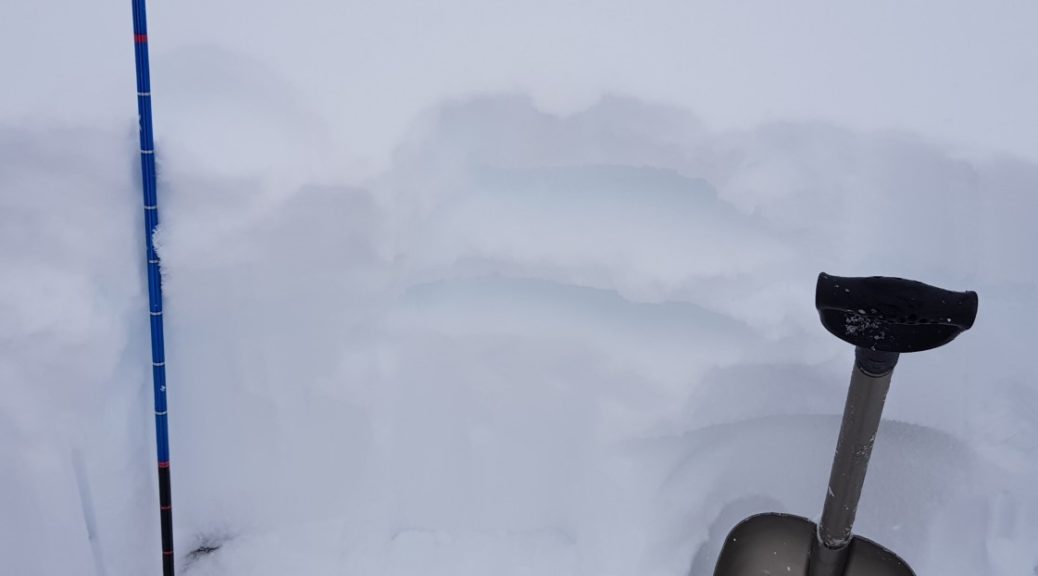
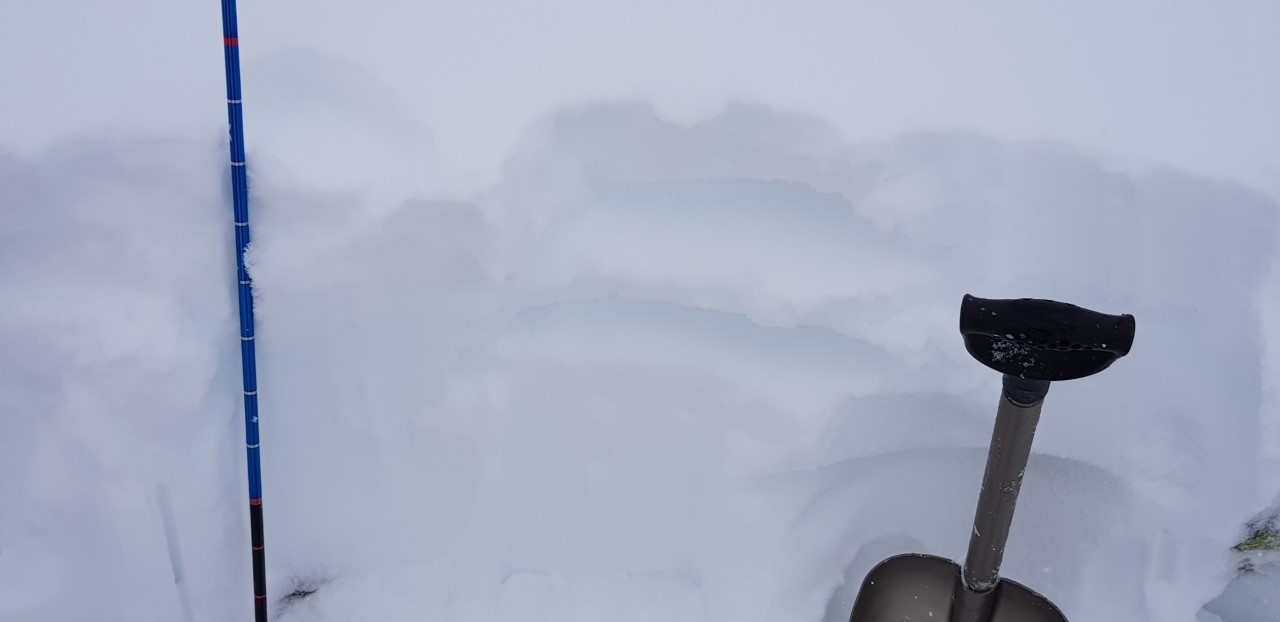
We finished the day digging snow pits to look at the make up of the snow. Digging snow pits is the part I was probably the most looking forward to, however it’s a bit too advanced for the level 1 course. Having spent a lot of time talking about “weak layers” and “facets” over the previous couple of days, it was really interesting to see these terms first hand.
Snow pit!! You can see where we have used our gloves to mark different strength layers in the snow-pack.
The final day of the Level 1 was spent touring. The class split into two groups and we had to plan and execute a safe tour for the day. The avalanche risk was level 4 (high) and the visibility was extremely low so this severely limited what we could do safely. However we managed a full day touring in relative safety by minimising our exposure to avalanche terrain. This was the first time I have ever been touring, and whilst we did not do anything overly challenging, it was an awesome experience. It was also a great opportunity to put everything we had learnt in the classroom to good use.
I spent the last day doing the optional Rescue Course. I nearly didn’t stay on for this course, especially having spent a little time on the other course practising some some basics rescue techniques, but I am so pleased I did. We spent the whole day in the field going over different search scenarios and practising. I have to say I was blown away but how quickly you are able to land a “probe strike” on a bag hidden a metre down in snow after learning different techniques. By the end of the day we were getting down to having found buried bags in little over one minute, that’s how good the techniques and equipment were.
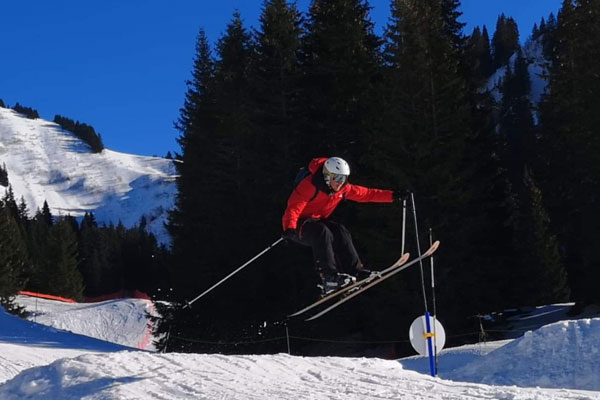
The last day also allowed us to continue honing our skills from the Level 1 Course. Having checked the weather and avalanche forecasts before heading out on to the mountain, we knew roughly where to look for areas at risk to avalanches. During a one hour period at lunch we witnessed seven or eight small avalanches going off in a steeper section of terrain in between two pistes. Not only that people were still following tracks and skiing off piste in this section whilst it was happening, completely oblivious. I couldn’t help but think how many times that had been me. The terrain in question is in the picture below:
Can you see the ski tracks and all the avalanche activity on the terrain? (look above the tree). The lift to access this terrain was just off the picture to the right.
Overall, both courses were incredibly enjoyable and informative. Although quite expensive, the instructors and guides you gain access to were incredible and the whole experience has hammered home how naive I have been on all my previous ski trips. I was definitely the least experienced person on the course but I left the course feeling like I did it at the right time in my skiing journey. To give you a sense of my level, I ski once a year on holiday (twice if I am lucky), on some all mountain skis and spend my time on piste, on the side of the piste or getting a guide for a day if the weather is good. I’ve never been touring until the course. If you are staring to venture off the side of the pistes and are considering venturing in to the off-piste world with a guide, I would definitely recommend doing these courses.
www.chamex.com/trip_courses/aiare-level-1-chamonixwww.chamex.com/trip_courses/aiare-avalanche-rescue-course
Thanks Will
by
Remember: you are probably going to be flying and will have
to fit everything into your ski bag and holdall. So, this is my ultimate guide
after massively over packing for my own season!
Firstly, keep in mind that you will, hopefully, be skiing everyday for five months so invest in your kit wisely! The number one piece of kit on your list should definitely be boots, whether that is ski or snowboard. We’ve all worn rental kit, which is just about passable for a week but these need to be comfortable from the moment you step onto the slopes on your first day to the last day of the season. Go to a shop, and get your boots fitted properly. A simple solution is to get a footbed, get them heat moulded, and wear them in before you go. Then you’re not wasting your precious slope time trying to make sure your feet don’t hurt! Get several good pairs of socks too; this will ensure your feet stay warm and provide all the necessary padding in all the important areas.
Secondly, get yourself a tray, or two! Investing in a snowboard or skis will mean you can have exactly the right kit to meet your needs. Remember, you are there for five months so you have to think about what you can achieve in that time; even as a beginner you can progress to be riding powder (which will happen) to free-styling within a month or so. Since you are riding every day make sure you get yourself something you can have fun on everywhere as well. An all-mountain set up that’s not too stiff will mean you can venture anywhere on the mountain, including the park, but won’t hold you back on the fresh corduroy. With your hardwear now covered, don’t forget your head. Never ride without a helmet, protect yourself!
Get yourself a comfortable pair of goggles that fit well with your helmet. Having the choice of lenses is also a good idea: the Oakley Prizm Rose are ideal for cloudy-to-low-light days but will cover you if the sun decides to shine; paired with the Oakley Fire or Sapphire Iridium and you’ll be covered for all levels of ability.
For the duration of your season, one pair of salopettes is
plenty but ensure that they have leg vents. Bib pants are a great choice since
you get more pockets and they keep all the snow out, especially on a powder
days. They are also fantastic for summer slush laps as they provide all the
important cover without the need for extra layers, not to mention they look
pretty cool too.
Clothes and layers are equally as important, since you will see all sorts of weather throughout the season; where sunburn is possible and but so is frostbite. You’ll need t-shirts and sun cream when riding in 12°C sun and also a number of thermal tops and leggings for those really cold days. Remember, layering is more than just one massive coat, so grab a riding hoodie or fleece (or three), plus a thin waterproof jacket. This will benefit greatly as you can then mix and match your apparel depending on the weather – so you don’t get too hot or too cold! What’s more, a cheap spare coat that you are happy to get a little dirty is a must-have for your nights out.
With all your technical equipment accordingly sorted, now to
decide what to wear when you’re off the slopes! The mountains are surprisingly not
a fashion show you don’t need a new top every time you go out; a couple of
spare jeans and tops will do you fine, just make sure you stay on top on your
washing!
Finally, my top seasonaire tip – make sure you pack yourself
a 4-way plug because you can be sure that you’ll need to charge several things
at once. This way, not only have you got a bit more extension but there won’t
be any arguments over plugs!
For more information about any equipment please see our other blog posts or visit us in-store.
However, as great as my sunnies are, they’re no match for alpine skiing conditions, which is why I’ve upgraded to the big guns. Tallington Lakes were kind enough to let me test out a pair of Smith I/OX snow goggles as I embarked on my adventure to the French Alps. When I first opened the box a bright smile was looking back at me, it was my own reflection cast from the pristine conditioned ‘ChromaPop’ lenses.
I’ve
been skiing now for the best part of twenty years and I’ll be honest, I’ve
never really invested too much into my snow goggles. Comparing my old pair to
these I/OX goggles, it’s clear to see there’s no competition. It’s like trading
in your old banger of a car, that’s just about managed to get you from
point A to point B; for a souped up, all singing, all dancing teched out super
car!
If I knew it wasn’t impossible, I would have placed a bet that Tallington Lakes had rigged the weather system in order to really allow me to test these goggles. In the one week I was there, I encountered harsh snow blizzards, gale force winds, torrential rain, depressingly overcast to extreme dazzling sunshine without a cloud in sight.
These I/OX goggles come equipped
with two different lenses in order to combat the diverse weather you can
clearly come across whilst in the mountains. Do not fear though, unlike other interchangeable
lenses where it feels as if you are solving a rubix cube for hours, the lens
swapping process here is very straight forward.
The first lens provided is the ‘ChromaPop Sun Platinum Mirror’ with a VLT (Visual Light Transmittance) of 13%. In English, it means only 13% of light passes through the lens. 13%?! I’ll do the maths for you, that means your eyes are shielded against a whopping 87% of all light particles trying to shine through. You will be correct in thinking, that’s an astronomical amount of light being blocked – however what you need to realise, is the UV rays from the sun are more powerful when you’re stood on top of a mountain. Those rays are then reflected from the snow which create the super annoying blinding-glare effect. Therefore a 13% VLT rating truly is a remarkable feat and not only does it work, it works brilliantly. I never once felt myself squinting from the sun glare. The goggles allowed me to easily pick out my turns in order to avoid the treacherous trees and murderous moguls.
The first lens provided is the ‘ChromaPop Sun Platinum Mirror’ with a VLT (Visual Light Transmittance) of 13%.
For extreme low light
conditions, such as the total white out blizzard I unfortunately ended up in,
Smith have designed the ‘ChromaPop Storm Rose Flash’ with a VLT rating of 50%.
If you’ve ever been unlucky enough to ski in a white out, you will remember the
dreaded feeling of being lost, lonely and confused as you vision becomes
extremely impaired. You’ll remember trying to pick out those piste pole markers
you took for granted as you attempt to safely escape the mountain – the skiers
and snowboarders who were only a few feet away completely disappear and all you
end up saying on repeat is “I can’t see a thing in these goggles”. Sound
familiar?
Without those low light lens on,
I think I’d still be stuck on that mountain top.
An important issue with snow
goggles is the potential fogging up of the lenses. This can be due to a number
of different reasons from the change in air temperature to difference in
altitude to simply the hot panting breath you produce when working your legs
overtime to get those turns in.
Thankfully Smith have countered
all these problems by installing an incredible feature called the ‘AirEvac’. It
allows for a constant air flow in order to reduce the risk of foggy goggles. On
top of this amazing feature, the Smith lenses are equipped with 5x anti-fog
inner lenses which provide five times the fog absorption compared to anything
else on the market!
I’m a wimp when it comes to the cold so I always wear my neck-warmer around my face and over my nose to stay warm. Therefore every time I breathe out, the hot air rises and attempts to pierce through my goggles defences. If I were in my ‘old banger’ goggles I surely would have fogged up and skied off a cliff. These goggles didn’t even slightly fog up once during my entire week!
The extra-large spherical lens
of the I/OX allows unparalleled peripheral vision which is absolutely vital
when you’re skiing on a busy slope surrounded by potential collisions.
To top everything off, the
goggles are perfectly designed to fit comfortably on your face whilst attaching
easily to the back of your helmet.
With the weather forecast ahead still predicting a huge amount of snow this season, it’s not too late to book another ski adventure. I cannot recommend these ski goggles enough – imagine a ski holiday in ultra coloured HD, it’s there and yours for the taking!
Our Chief Instructor Lotti had a chance to put some question to GB snowboarder Sam Turnbull:
Q1) What’s your perfect breakfast to set you up for a big day on the mountain?
My go to breakfast before a big day on the mountain is a sausage, bacon & egg sandwich, followed by fruit and some porridge if I’m really hungry.
Q2) What’s your favourite song to ride to?
Surprisingly I don’t actually listen to music while I ride. But If I need that little bit of motivation and drive my usual go to is AC/DC , Camo & Krooked or a cheeky bit of Jess Glynne on the way up the mountain.
Q3) What’s the most epic moment of your snowboarding career, so far?
There’s has been so many epic moments throughout my career from landing a trick for the first time to winning contests it’s hard to choose. I think the best thing about my career though is the opportunity I’ve had to travel the world and experience things not many people have had the chance to do.
Q4) How do you think dry-slopes influences the snow industry, and do they have a place on the ‘big scene’?
I think that the dry slope has massively influenced the snow industry and has helped the scene grow to what it is today, I believe it also gives the younger generation a platform to start from and to showcase their skills and not have to spend excessive amounts of money travelling to the mountains to train. It definitely has a place on the big scene, I mean some of the best UK skiers & snowboarders have all grow up riding the dry slope including myself.
Q5) What’s your favourite mountain day, hot park laps or powder days?
As much as I love Powder days it’s got to be Park Laps for me.
Q6) What’s your favourite set up: board, bindings and boots; and why?
My snowboard I ride is the Space Echo 154, it’s such a good all round board from smashing out park laps to cruising the deep powder of the back country. For my boots I ride the Judge boots because they do exactly what i need them to do, they are a super comfy for riding and hold my foot and heel down nicely when cruising around the mountain and doing what I do. And Salomon defender bindings as I’ve ridden these for years and have never faulted me yet, they seem to last forever.
If you have read it; you’ll know how important your first
layer of clothing is, in maintaining your core-body temperature, while skiing
or snowboarding in the mountains.
However, what about ‘compression’ base-layers? I think most of us have heard about the benefits of ‘compression’ clothing:
Reduce injury by keeping muscles warm
Improved blood flow
Stabilising joints
Aid recovery from muscle stiffness and soreness
And we’ve seen athletes using them, even people on long-haul flights wearing them, but are they any good for skiing or snowboarding?
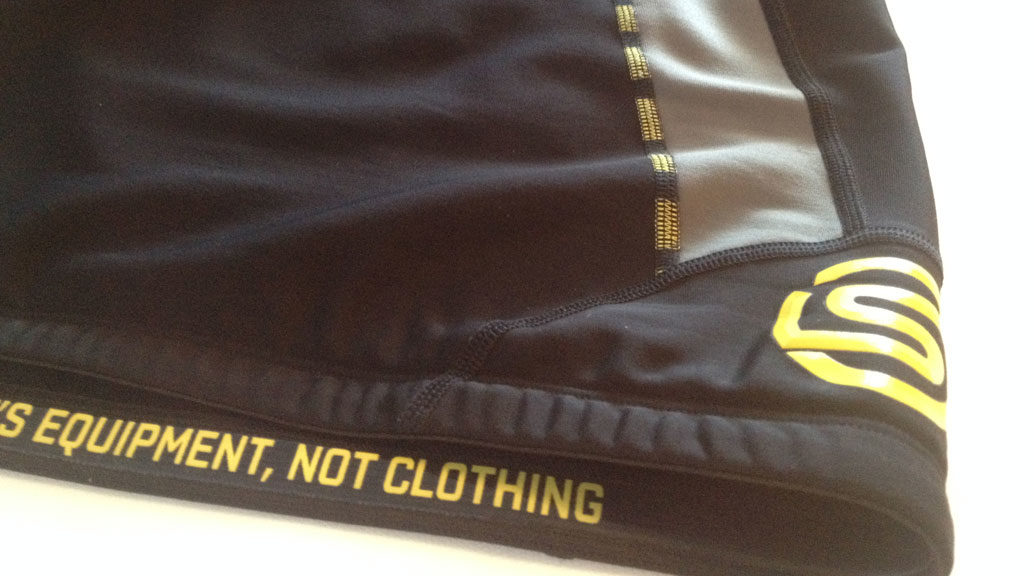
This winter I tried some ‘compression’ base-layers from Skins, both the Skins DNAmic long sleeve base-layer and three-quarter tights. I chose the three-quarter tights, over long-johns, because these would not affect the fit of my ski boots – less crease points! I have invested in quality socks and a custom boot fit, so why would I add another layer inside my boot to mess things up?
First thing first; these are
‘compression’ garments – so they are a very snug fit, if not a little difficult
to get on. At first you could feel the ‘tightness’ or ‘support’ the garment gives
you – it felt quite good, ‘superhero-like’!
I donned my other layers,
and quickly headed out into the cold, because I was starting to get hot in the
chalet.
As a base-layer they did
their job; keeping me at a comfortable temperature all-day long. Moisture
(sweat) generated on the exhilarating decent was wicked away, helping maintain
a warm core-body temperature on the cold chairlift ascent. Early morning ski
touring was cosy, without overheating.
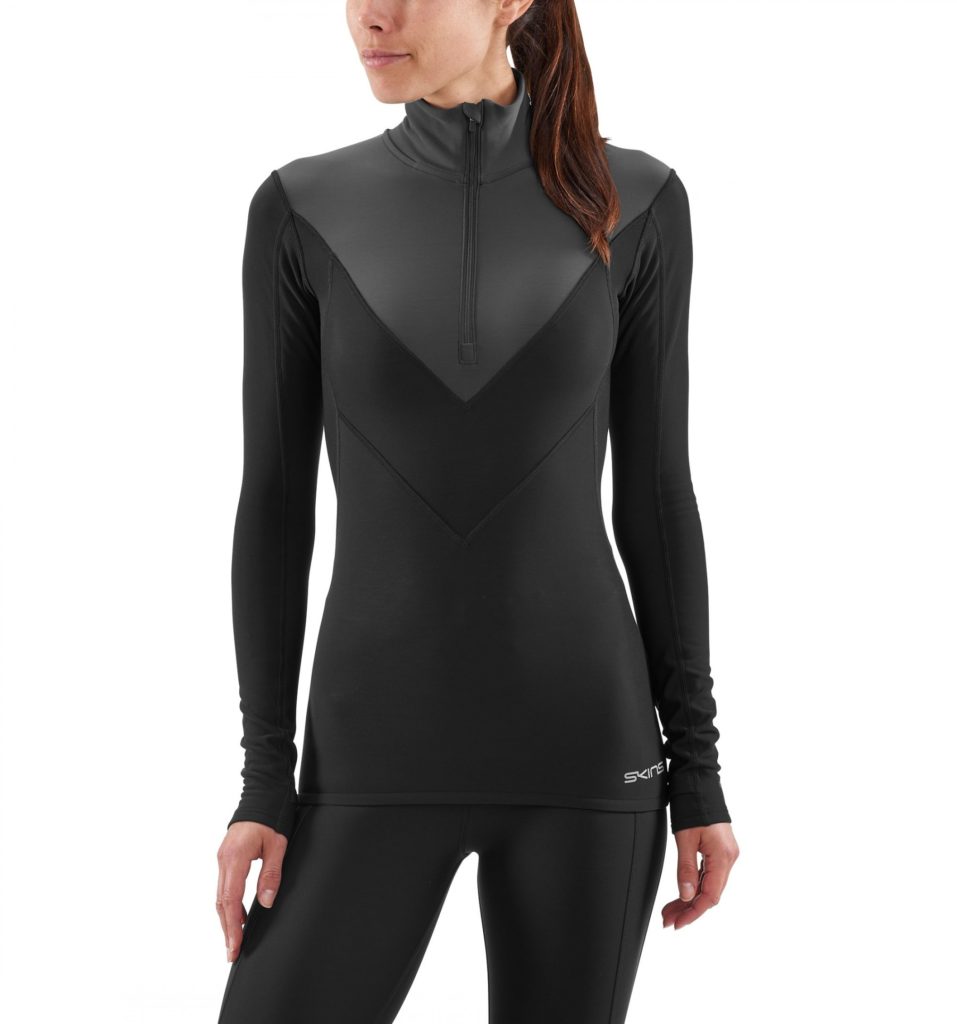
Skins Womens DNAmic Thermal Mock Neck Half Zip Baselayer
As the days, and week of skiing, progressed I was pleased with my fitness/endurance. Yes I had prepared for the holiday, by going to the gym beforehand; but I do believe the ‘compression’ of my leg muscles, by the three-quarter tights, had made a difference. Also, after a few stretches and enjoying tea and cakes, sitting around in the ‘compression’ tights helped recovery for the following day’s skiing. I generally suffer with lower back pain; but once again because my hamstrings, glutes etc were ‘supported’ this was eased too.
As for the torso; I felt
more stable. Yes I had done some core exercises at the gym, but once again the
garment assisted.
So, what about ‘compression’ base-layers? I think they are good, and as a quinquagenarian I will certainly wear them (especially the three-quarter tights) when skiing.
PS The wearing of ‘compression’ clothing does NOT negate the need for exercise/fitness training for your chosen sport!
Hazard: During falls, the binding’s retention rate can outperform the strength of the ski, causing breaks and delamination of the ski.
Remedy: Refund Consumers should immediately stop using the Performer Pro Combo Skis and contact O’Brien Watersports Inc. for a store credit or refund.
Consumer Contact: O’Brien Watersports Inc. at 800-662-7436 from 8:00am to 4:00pm PT, Monday through Friday or online at webcontact@obrien.com.
RECALL DETAILS
Units: About 3,560 (in addition, about 700 were sold in Canada)
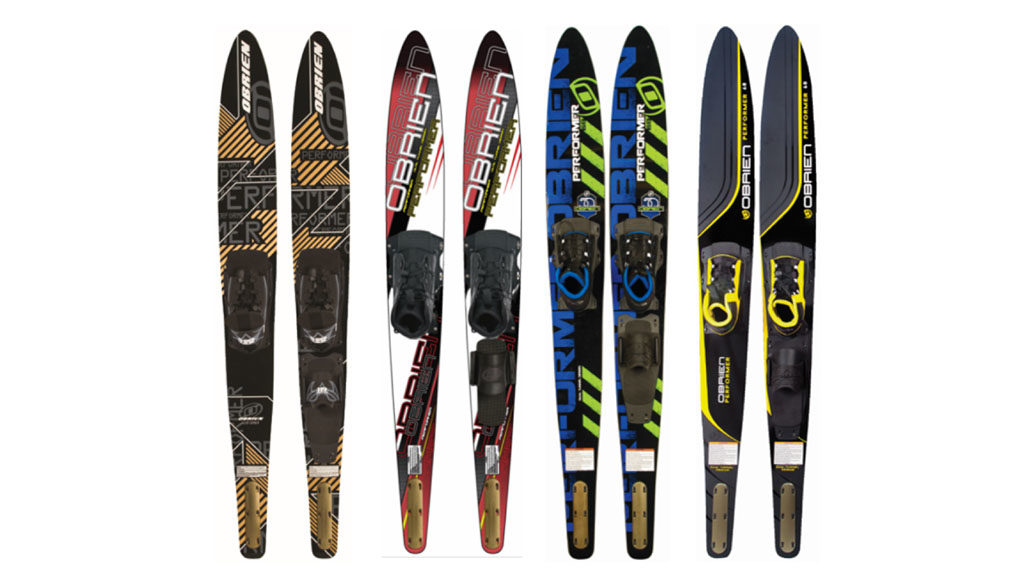
Description: This recall involves O’Brien Performer Pro Combo Skis. These skis have a binding mounted to a plastic plate that is then mounted on the ski top. From 2011 to 2017, the skis were equipped with O’Brien’s “X9” binding. In 2018, the skis were equipped with O’Brien’s “Avid” binding. The skis are also equipped with an aluminum fin. O’Brien’s Performer Combo Skis, which are equipped with a plastic fin and O’Brien’s “X8” binding, are unaffected by this recall.
Item Number
Product Name
2111112
Performer Pro Combo Skis in black/gold
2121100
Performer Pro Combo Skis in red/white/yellow
2141102
Performer Pro Combo Skis in blue/green
2141102
Performer Pro Combo Skis in blue/green
2161102
Performer Pro Combo Skis in black/grey/yellow
2181104
Performer Pro Combo Skis in black/grey/yellow
Incidents/Injuries: O’Brien Watersports Inc. has received three reports of leg injuries associated with skis breaking or bindings pulling off the ski during falls while slalom skiing.
Sold at: Overton’s, watersports and sporting goods stores nationwide and online at Amazon.com from January 2011 to April 2018 for about $300.
Importer/Distributor: O’Brien Watersports Inc. of Snoqualmie, Wash. Manufacturer: Playmaker Co. Ltd. of Taichung, Taiwan, and CHN Mawei, Fuzhou Playmaker Co. Ltd. of Fujian, China Manufactured in: Taiwan and China
ABOUT U.S. CPSC:
The U.S. Consumer Product Safety Commission is charged with protecting the public from unreasonable risks of injury or death associated with the use of thousands of types of consumer products under the agency’s jurisdiction. Deaths, injuries, and property damage from consumer product incidents cost the nation more than $1 trillion annually. CPSC is committed to protecting consumers and families from products that pose a fire, electrical, chemical or mechanical hazard. CPSC’s work to ensure the safety of consumer products – such as toys, cribs, power tools, cigarette lighters and household chemicals – contributed to a decline in the rate of deaths and injuries associated with consumer products over the past 40 years.
Federal law bars any person from selling products subject to a publicly-announced voluntary recall by a manufacturer or a mandatory recall ordered by the Commission.
For more lifesaving information, follow us on Facebook, Instagram @USCPSC and Twitter @USCPSC or sign up to receive our e-mail alerts. To report a dangerous product or a product-related injury go online to www.SaferProducts.gov or call CPSC’s Hotline at 800-638-2772 or teletypewriter at 301-595-7054 for the hearing impaired.
CPSC CONSUMER INFORMATION HOTLINE
Contact us at this toll-free number if you have questions about a recall: 800-638-2772 (TTY 301-595-7054) Times: 8 a.m. – 5:30 p.m. ET; Messages can be left anytime Call to get product safety and other agency information and to report unsafe products.
MEDIA CONTACT
Please use the phone numbers below for all media requests. Phone: 301-504-7908
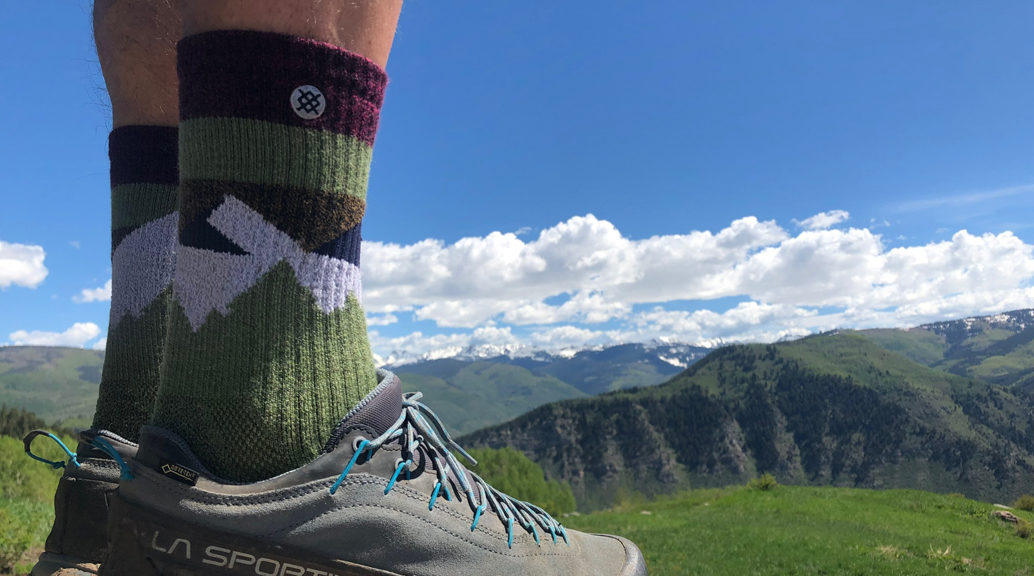
We are all encouraged to get outside more, and reap the benefits of the great outdoors – both physical and mental. Walking is one of the easiest ways to do this; whether a simple stroll in the park, a walk in the woods, or a hike up a mountain!
So when it comes to walking the first thing we think about is what walking shoes or hiking boots to put on our feet. We may even think about insoles to give support and comfort. But how much do we think about the interface between our feet and our footwear? Yes I’m talking socks!
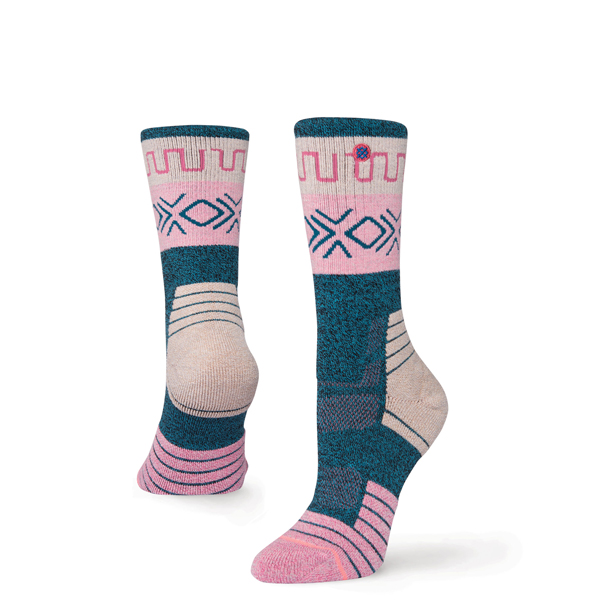
Stance Women’s Hike Timber Multi Coloured Socks.
An inadequate, poorly fitting sock will negate all the money spent on your hiking shoes/boots; making them uncomfortable, they may even give you blisters, and therefore unlikely to get you outdoors more!
So what about their walking socks? The ‘Adventure’ range from Stance consists of the following socks, for both men and women: the ‘Outdoor’, the ‘Hike’ and the ‘Trek’. The socks are made of an ‘uncommon blend’ of fibres to produce a sock which is durable, temperature-regulating, moisture-wicking, and comfortable. Price varies between the three, as the socks get a little more technical, but there is a sock for everyone.
But what are they like to wear? Well let me tell you about the ‘Hike’ socks I recently wore, in both walking shoes and hiking boots, on a resent walking holiday. The mountainous area presented a variety of terrain: dusty rocky trails, a few marshy bits, boulder fields, and snow; and the weather was predominantly warm and dry, mid twenties degrees C.
I’m a UK 9.5 and selected a size large (UK 8.5-11.5). The first thing you notice when putting the socks on is the fit. As you pull the ‘L’ sock onto your left foot you feel the sock securely encase your toes, support your arch, encase your heel and reach the base of your calf. It’s a snug comfortable fit, like a second skin. Once in your shoe or boot, and you start to tighten your laces, the sock interfaces between foot and footwear to give a secure and comfortable fit. Whilst walking the sock didn’t move, and my feet didn’t get too hot – keeping them dry – thanks to the breathable nature of the socks. And when the socks did get wet, through the occasional deep snow, they were still comfortable and dried out quickly!
Having camped out over night, I had to wear the socks for a second consecutive day, and was pleasantly surprised they maintained the comfort of the first day; and didn’t smell (too bad).
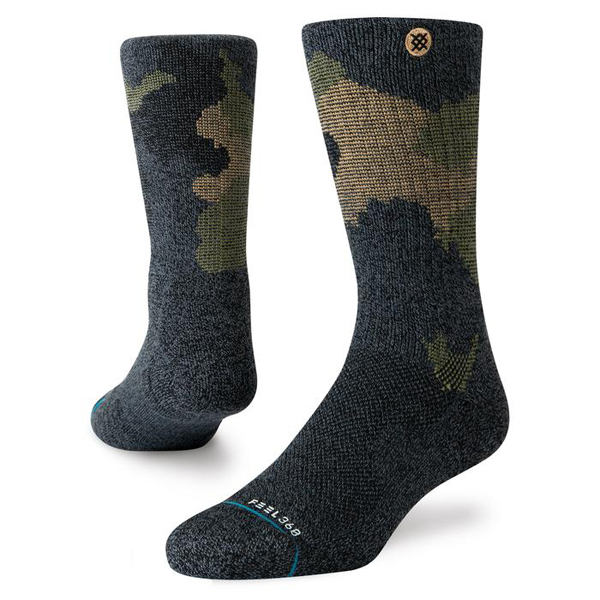
Stance Men’s Pennell Hike Black Socks.
So if you’re wanting to get outside more by walking, ladies and gentlemen, you won’t be disappointed with a pair of these socks – whether a casual stroll in open park land in the ‘Outdoor’ socks or a full-on walking holiday in the ‘Hike’ or ‘Trek’ socks. Basically “these socks were made for walking”.
Note 1: the classic socks do not have a left and right indicator, like the more technical snow or adventure socks. However they are still ergonomically designed/manufactured; therefore there is a left and a right sock for you left and right foot. Although not essential to have the correct casual lifestyle sock on the appropriate foot; they will be even more comfortable if you do. So when wearing the classic Stance socks, remember the ‘Stance icons’ to the inside!by