When you think of the brand DC, snowboards may not be the first item that jumps out to you. DC are more well known for, where their roots lie, the skateboarding industry. So what are the DC Focus and Mega snowboards like?
DC History
Damon Way and professional rally driver Ken Block, with the vision of creating a leading actions sport shoe and clothing brand started the company in 1994. In 2004, Quicksilver acquired the brand for just $87 million and since then it has gone from strength to strength. They sponsor some of the biggest names in the various industries including Travis Pastrana, Robbie Maddison, Torstein Horgmo and Travis Rice and in 2012 they released their first women’s range of products.
DC have been in the snowboard market for some time and have some quality products out their for all abilities. When our staff decided to go on their ski testing road trip, DC was at the top of the list of products to put through the paces. Thankfully, the guys at DC sent us the Mega and the Focus Snowboards.
DC Focus Snowboard
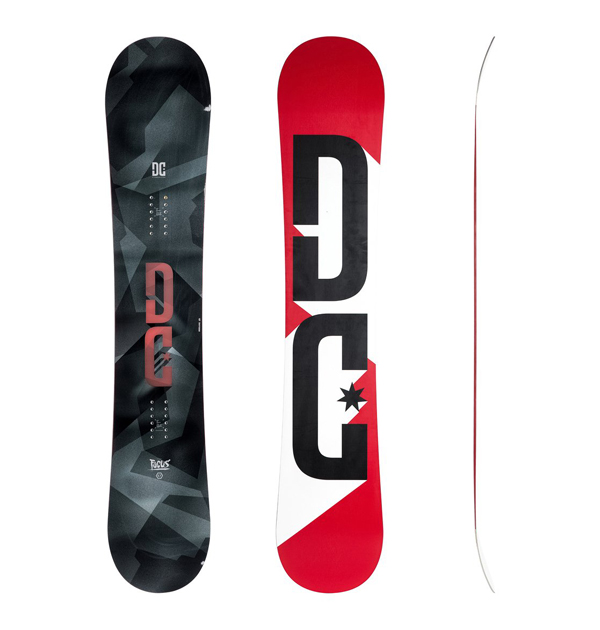
The DC Focus is a perfect soft and forgiving board and is ideal for any first timer snowboarder or if you’re looking for something to help you in the park. When we tested the board we found it quite responsive on edge however when the heat was turned up it did slightly chatter; something that is quite normal with softer boards. If you are the type of rider that is looking to increase your ability in the park then this board could also be a hit. It boasts a true twin shape that helps for riding regular and switch, an extruded base that will take impacts from rails and boxes and a poppy Astro core that will definitely get you riding to a higher level. Overall, an excellent value snowboard for money priced at only £224.99.
The DC Focus is a perfect soft and forgiving board and is ideal for any first timer snowboarder or if you’re looking for something to help you in the park.
DC Mega Snowboard
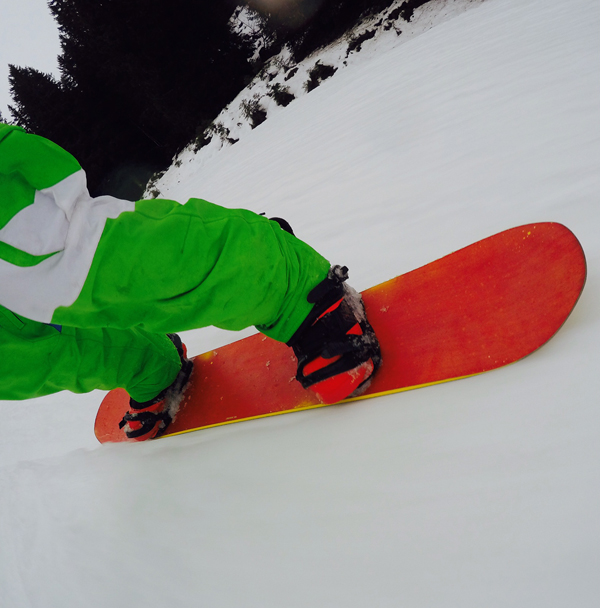
The DC Mega was new for 2016 and is something else that stems from their roots of skateboarding. The first thing we noticed, before we had even ridden it, was the board comes with a pack of stencils and a blank top sheet allowing you to customize the board to your very own liking. When we took the board for a test, we were very surprised to say the least. The board had awesome response thanks to its ‘lock and load’ camber. This basically means the board is cambered between your bindings and has sweet spots on the nose and tail; altogether it helps with stability. DC has also added their radius to flat design to this board that helps with flotation and lift in the powder. All round, this board proved a hit but having a wooden top sheet may prove a negative if, like on our test, it continues to soak up water in the wetter conditions!
All round, this board proved a hit but having a wooden top sheet may prove a negative if, like on our test, it continues to soak up water in the wetter conditions!
Competition
We are giving you the chance to win the DC Focus 157cm Snowboard, we reviewed. Yes it might have been used, and have a few scratches, but its in excellent condition and will be fully serviced.
All you have to do is ‘like’ or ‘follow’ us and share this article on either Facebook, Twitter or Google+, making sure you tag our username or #TallingtonLakes, and if we see it will enter you into the prize draw. Will pick one lucky winner on the 29th Feb 2016*.
Arguably the most well known of the resorts within the Portes Du Soleil (PDS), Morzine is located in a valley with ski areas either side, around one hour from Geneva airport or roughly eight hours from Calais. It was the venue of our ski test in December when unfortunately the snow wasn’t fantastic. Even though it sits at a lower altitude than other European resorts, it is still favored heavily with British skiers due to the extensive ski area. The PDS’s motto of 12 resorts one pass highlights the 600km of skiing available. I have stayed in a few different areas within the PDS and always prefer to stay in Morzine as it is roughly in the middle.
Morzine itself is a very picturesque ski town with a variety of activities to do whether skiing is your primary activity or not. The town itself has plenty of bars like Coyotes’ and restaurants like L’etale; and if lager is not your preferred beer, it also boasts the first real ale bar in the Alps. At Le Bec Juane, all the ales are brewed in house and a 4 pint pitcher and a very large plate of Nachos will cost €20.
Skiing wise there is plenty to do for everyone. Out of Morzine itself you have the Pleny Bubble, which takes you up the South side of the valley and connects you with the tree line runs of Les Gets, Nyon and Mont Chery. On the North face, you have the Super Morzine Bubble that takes you across the valley and up towards Avoriaz, which is the highest resort in the PDS and is part of the Helly Hansen Ski-Free campaign. A short bus ride away you have the L’ardent Bubble that will connect you up to the Linderet Goat Village where there are nursery slopes and several lifts connecting you with Avoriaz, Chatel and Switzerland. Off piste is incredible when it’s on in this area. Happy Valley and Hidden Valley are located around the Chatel side and offer perfect powder bowls. Switzerland also offers a vast area of off piste with Les Gets offering some real hidden tree runs.
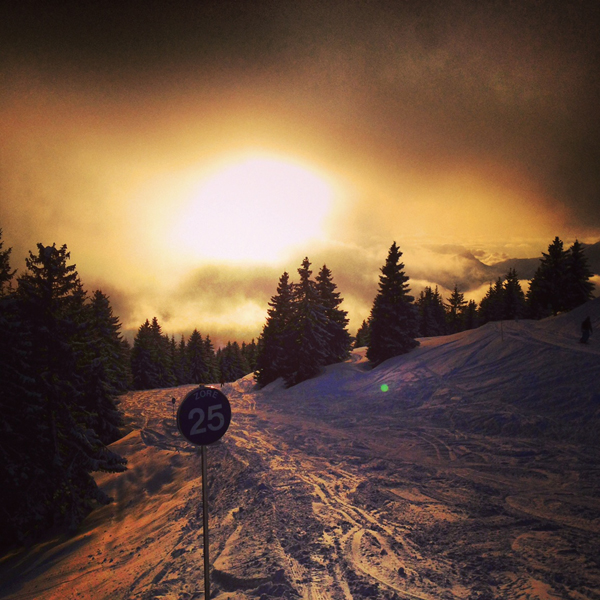
The Zore run, a gentle blue that takes you back to the Super Morzine bubble and down into the town itself!
Overall, the town of Morzine is a perfect base if your looking to explore the second largest ski area in the Alps. It literally offers something for everyone from complete beginner to top end skier or boarder through to powder bowls and tree runs to immaculate hard packed pistes.
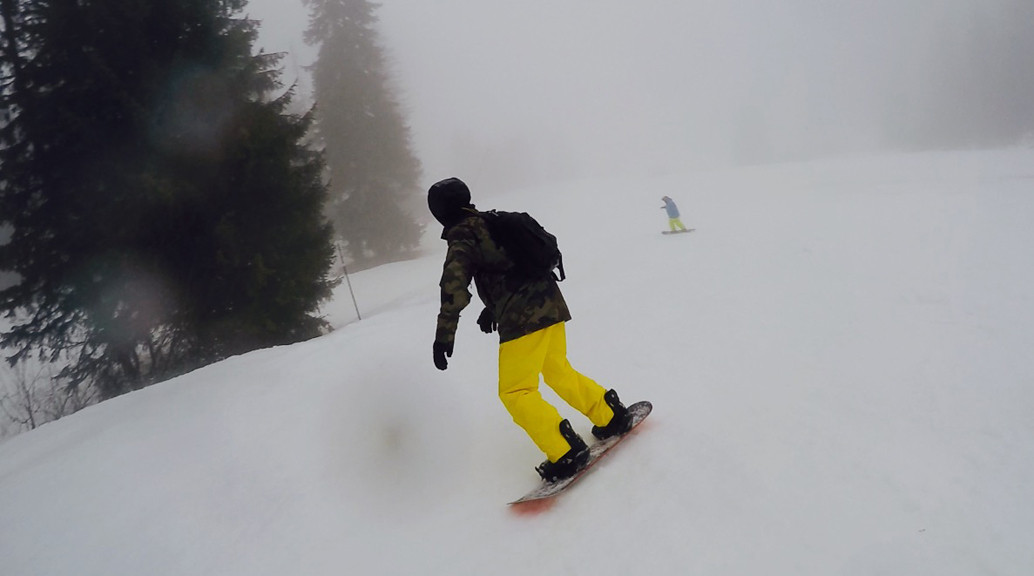
Ever fancied a crazy road trip to the Alps to test some skis and snowboards in three days, on a tight budget?
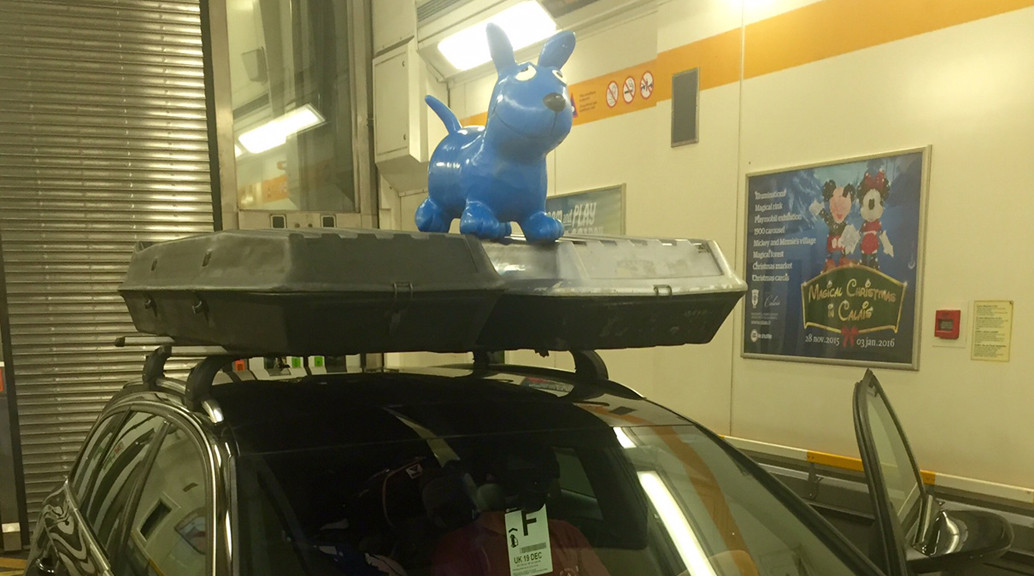
That’s exactly what Tallington Lakes Pro Shop staff did the third week in December. Leaving work at around 12:30 on the Saturday before Christmas; two very eager members of staff, along with Bernard the Blue Dog, collected their soup from the Edelweiss Mountain Café, Tallington Lakes and hit the road. Armed with two roof boxes full of kit – thanks to Atomic, Volkl, Salomon, Lib Tech skis, and DC snowboards – they hoped to find fresh pre Christmas powder in the moutain resort of Morzine! Here’s their account of the trip:
The drive to Folkstone was smooth, and we even managed to jump on an earlier train via the Euro Tunnel. Once on the other side we started the eight-hours, 540 mile trip across France. Having stopped for a steak dinner, and a fuel break, we arrived in Morzine to the stare of a friendly Gendarme pointing his rather large assault rifle at us and asking us to stop. Having been breathlysed, and laughed at for driving to Morzine for 3 days, we arrived at the Ardent Lift car park at around 04:30. We rolled out the sleeping bags and tried to get four hours sleep.
The morning came too quickly, with the sun beaming though the car windscreen, and the sound of other cars parking up for the day. We were ready for a black coffee, omelette, and to go and shred the “interesting” conditions that awaited us.
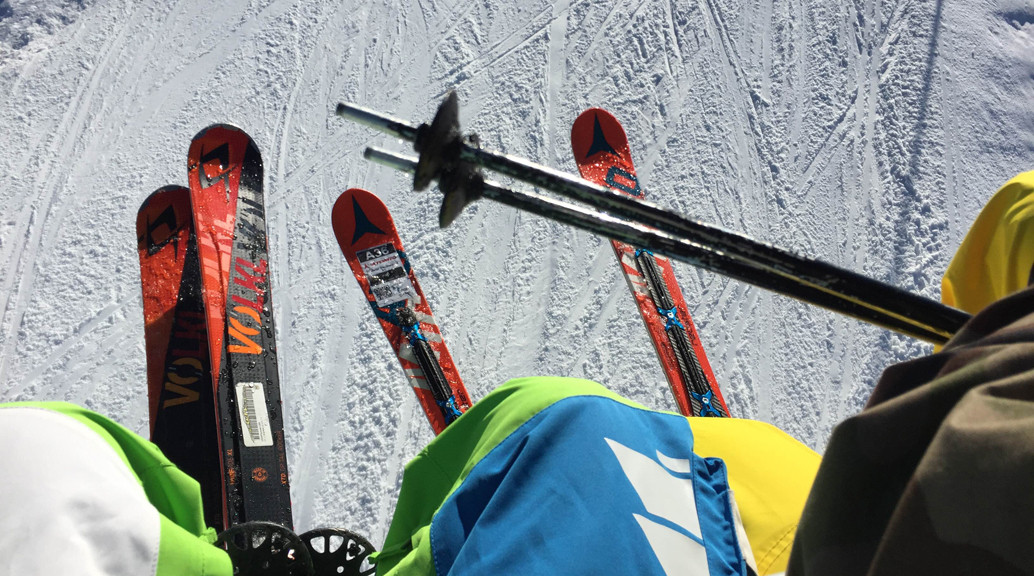
The first skis out the box were the Volkl RTM and the Atomic Redster Double Decker SG. The morning conditions of packed ice proved positive with this type of ski. The afternoon’s conditions of slush and bumps proved a hit with the Volkl Kendo, Atomic Vantage 95c and the Volkl One. Having more width underfoot enabled them to be very happy to pop over the mounds but still maintain very good edge hold.
The afternoon’s conditions of slush and bumps proved a hit with the Volkl Kendo.
Tuesday didn’t start to plan as we woke to the sound of rain and wind; but being Brits we still went up onto the non-crowded pistes. Unfortunately conditions weren’t fantastic to be able to test the skis, so it was time for the snowboards to make an appearance. The DC Mega and the DC Focus proved another success. With the afternoon proving a little softer, the Lib Tech Skate Banana made a very brief appearance.
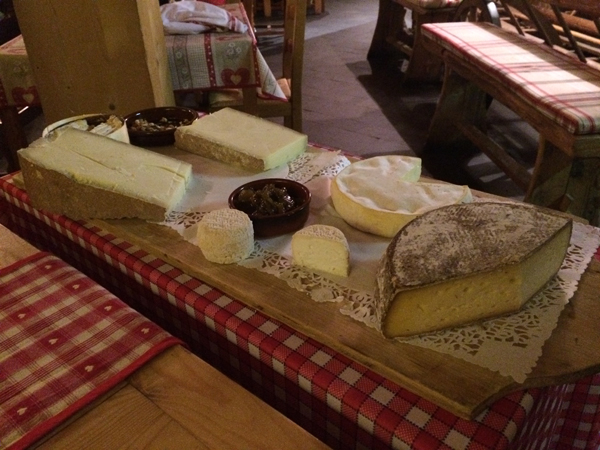
Tuesday night it seemed fitting to head out to Chez le Pere Bill for a French meal to prepare us for everything to come on Wednesday. As always, the meal had to finish with a few large glasses of red wine and a very well received Cheese Sledge.
The cheese sledge – Chez le Pere Bill, Morzine.
Wednesday started well with sunshine but still no fresh snow. We raced up to the car park and jumped on the Salomon X-Drive 8.0 FS and the X-Drive 8.0 Ti for a couple of runs. The conditions were proving bullet proof and it seemed fitting to break out the Atomic Redster Double Decker SG again. This is certainly a ski that has to be carved.
With the afternoon getting bumpy again we headed up to the Chaux de Rosee lift and to our favourite slope. It was a blue run that was very narrow, very slushy and very bumpy. As it was the last afternoon we chose our favourite ski from the trip and proceeded to ‘bounce’! Our review of the skis, and snowboards, will follow shortly.
Finally, after packing up the car, the boxes and sinking another two black coffees we were on the road back to Calais. We arrived at the Euro Tunnel for 02:00 and even with the current situation managed to jump on an early train. With a quick three-hours sleep we strolled back into work all bright eyed and bushy tailed with Bernard the Blue Dog!
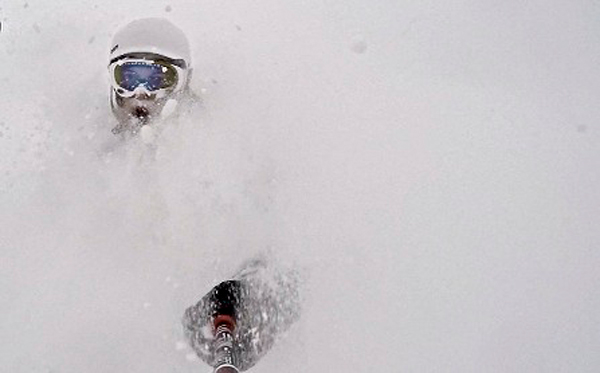
On the 2nd of December 2015 I left the UK heading for the northern island of Hokkaido in Japan. The region is known for having some of the biggest recorded snowfalls in the world and offering fantastic tree lined powder skiing. Skiing in Japan has been a dream for the last ten years and I cannot wait to explore the skiing and culture of Japan this winter.
Skiing in Japan has been a dream for the last ten years!
Arriving in Grand Hirafu at the base of Mt Annupuri you cannot help but be overwhelmed by the amount of snow that has already fallen. Tree branches and buildings appear to be frozen in time whilst storms just continue to roll through this remote region. The first 5 days of our trip we rarely got to see past the first 20m due to the snow and certainly didn’t get a view of the surrounding valley. The snow itself is unlike any powder I have skied, it has an incredible spring to it that projects you out of each turn. The first few days were amazing we hadn’t started work and enjoyed fresh snow everyday.
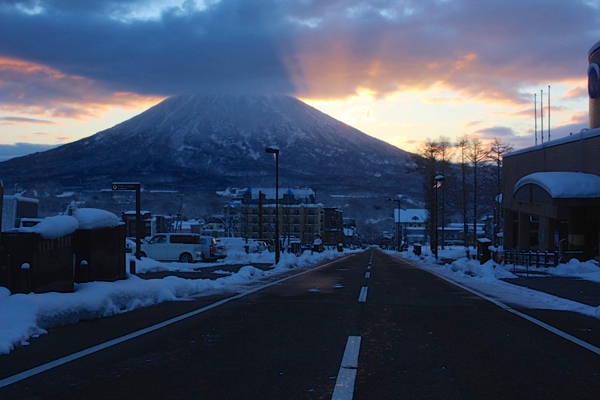
When the storm finally passed we were able to see the dominating view of MT Yotei that towers over the valley; it is an active volcano that rises from 200m above sea level to 1800m. It is by far the biggest peak in the area and is commonly referred to as Little Fiji, in Japan. This peak will be one of the goals for my touring this season, in the right conditions you are able to climb the peak and ski down into the crater of the volcano a truly once in a lifetime experience.
Land of the rising sun; Mt Yotei.
The following clear days we took some treks out to the base to explore the National Park and started to get our legs ready for the first tour of the winter. Having seen most of the fresh snow ‘skied out’ in resort we decided to head into the backcountry. We set off at the resort of Annupuri and ventured into the valley behind the mountain with the aim of getting to the peak a solid 1000m vertical warm up. Touring is actually easier here due to not having to deal with high altitudes and we enjoyed cruising up through the bamboo and silver birch forest to the first ridge. With the peak in our sight we estimated we had maybe another two hours to go, however, another blizzard rolled in making the final 200m some of the snowiest conditions I have been in. Despite the conditions, and with some good route planning, we found the refuge on the peak and sheltered from the storm. It was impossible to go back the way we came due to the weather so dropped back over the front down to resort. It was great to get the legs back in but a shame we didn’t get to do the descent we wanted. However it certainly opened our eyes to the quality and expansiveness of the terrain in this area.
The storm that hit us on our tour stuck around for four days so we have been again enjoying fresh turns every morning. The consistency of snow here gives you a different perspective on skiing as you can wake up everyday knowing that you will be riding powder. The potential to improve that side of your riding is amazing and I hope this winter I will be able to do just that; skiing in Japan.
I will keep you all posted on the Japanese adventure in the coming months, Rob.
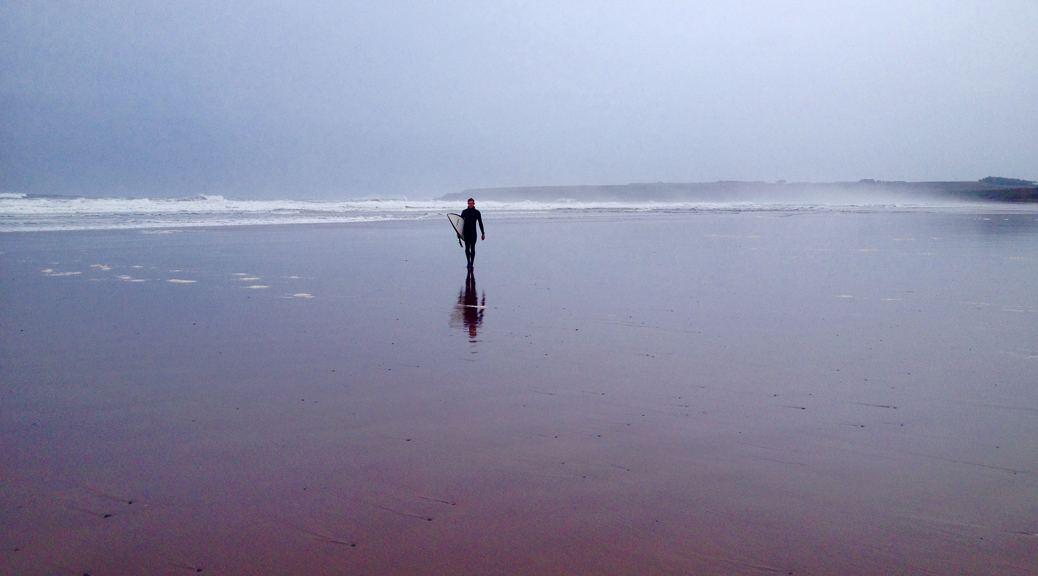
Surfing in Scotland. Tallington Lakes Pro Shop kindly armed me with an O’Neill Psycho 3 wetsuit for the trip and I was keen to push it to its limits in the cold seas that surround Scotland.
On the Wednesday and Thursday there was a large swell on the east coast so we decided they would be the best days to head to the surf. We travelled towards Aberdeen and made our way south finally jumping in at Lunan Bay. This was a great reintroduction to Scottish surfing; it is a wild and rugged country and the seas around it seem to reflect that. The surf on the east coast were generally messy but it was great to get some water time before we headed to the reefs and slabs of the north.
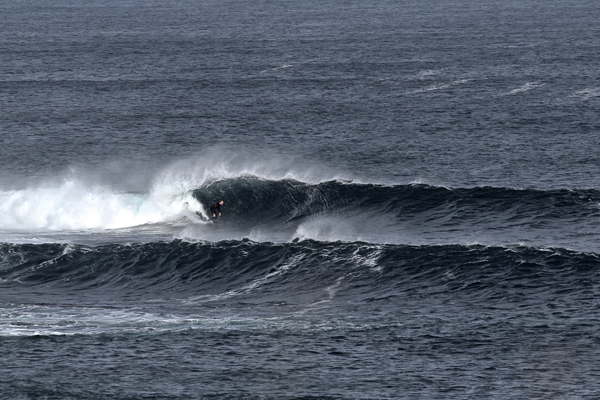
From the Cairngorms we made our way along the coast to Inverness and then started the long drive to the northern tip of Caithness. The surfing in this area in my opinion is world class. It offers a huge variety of waves from long mellow points to thick heavy slabs. Having already done two trips to this region we also explored further west into Sutherland and again found plenty of empty line ups to keep us entertained.
To say the trip was ideal testing conditions for a winter wetsuit would be an understatement.
To say the trip was ideal testing conditions for a winter wetsuit would be an understatement. The weather is constantly changing with rain and gale force winds. The water temperature despite being relatively friendly in October compared to deepest darkest January is certainly cold enough to put this O’Neill wetsuit through its paces.
The first thing you notice about the O’Neill Psycho 3 wetsuit is how light it is. The new TechnoButter technology, which is a honeycomb neoprene, means that the suit is not dense and has a light foamy texture. The weight of the suit is actually comparable to a 3mm/2mm summer suit when dry. As I got changed I noticed that the suit is extremely flexible; however it is worth noting that with this flexibility you have to be careful when putting the suit on because it feels like you could easily over stretch it or tear it if you pulled too hard.
The seams and seals on the suit are extremely impressive and even through some pretty heavy wipe outs I didn’t find that the suit flushed. The majority of the waves we surfed were over granite slabs and plenty of times you find yourself being dragged along the bottom. Fortunately the suit never split or tore in this situation. Obviously there is a certain degree of luck in the way you fall; but plenty of people did tear their suits on the reef. So I would conclude that the TechnoButter neoprene is tough as well as light.
Actually surfing in the 5mm wetsuit was pleasurable, as surfing can be in such a thick suit. I found due to the flexibility and lightness of the wetsuit, I didn’t tire as quickly paddling as I have in previous suits, and was able to surf for the best part of 5-6 hours most days. These benefits also extend to your ‘pop up’ and surfing; and you feel incredibly nimble for being in such a thick suit.
A secret reef somewhere in the North, Scotland!
Overall I would highly recommend the O’Neill Psycho 3 because it made surfing, in Autumn, in Scotland an easy task and handled the conditions better than the suits I have worn on the previous two trips. However I would advise if you purchase this suit to treat it with care, similarly to most top end suits you are paying for flexibility but with this they can easily be pulled or stretched. So always hang the suit from the waist on a hanger and always take some thing to change on, especially in gravel car parks, as it would be a shame to ruin suit before you even got in the water.
Note: O’Neill discontinued the Psycho 3 for winter 15/16 and replaced it with the Psycho Freak ZEN and Psycho Freak FUZE wetsuits. They are the same suit just different ways to climb in! The wetsuit technology is almost 100% the same as the Psycho 3 but O’Neill have extended the ‘fire wall’ inside the suit all the way to the bottom of the legs – toasty!
The British Association of Snowsport Instructors (BASI) have a qualification structure for skiers who aspire to work, as a ski instructor, in the ski industry. The Alpine Level 1 course would be the first step to enter into this type of career, and is aimed at experienced skiers who feel they are at a level where they can start to teach beginners of the sport.
Before You Start The Course
Your skiing level is the most important thing to work on before starting the course. I would recommend talking to someone you know who has passed the BASI Level 1 course, and getting them to have a look at your skiing and tell you if you are at the required level. If you don’t know anyone, book a private lesson at any of the dry ski slopes or snow domes in the UK (and make sure your instructor has at least the BASI Level 1 qualification).
You don’t need to own your own skis yet as it’s possible to hire a pair (this was the case at Milton Keynes SnoZone – it would be best to check with the slope before arriving). However, I would highly recommend buying your own boots. There is a huge difference between a hired pair and your own – your own boots can be heat moulded to the shape of your foot, and custom-made foot beds can be added, to give excellent performance and comfort.
Day One
Our group (nine of us) met our instructor in the cafe next to the ski slope at 9 am. The skiing kicked off immediately with some rider improvement exercises, which covered body positioning over the skis, different types of turns (short rotational turns and longer carved turns), and how to use the feet to push on the skis and improve turning.
After lunch, we were briefly shown the Central Theme, which is the name given to the steps BASI instructors use to teach new skiers from beginner level, up to turning using parallel turns. There are seven steps, which were explained to us, told why they were useful to the student, and shown how to demonstrate them. We also practised the demonstrations ourselves, which in my opinion also helped my own skiing.
For the last hour we continued with more rider improvement exercises, in which we focused on torso positioning in short radius turns – in which the torso must be facing downhill while our legs turn beneath us; and larger carved turns – in which we looked again at pushing down with our feet while turning.
The skiing finished at around 4:30 pm, at which time we went into a small classroom to discuss the day’s activities. We were then set a task of planning a very short lesson (around 15 minutes) to teach the next day, and given some questions to answer at home regarding class safety.
Day Two
We met again at 9 am in the classroom, where we talked through the homework questions given to us the day before, which took no more than half an hour. Straight afterwards, we went onto the slope, and each of us gave a 15 minute practice lesson to the rest of the group – the one we had planned the day before. My lesson was looking at turn sizes and how they affect speed: smaller turns make skiing slower whilst larger turns make skiing quicker.
We had some rider improvement, similar to day one, which was related to our short radius turns. For myself, the main aspects I was trying to improve were my posture and my upper body position. After going through a few drills, we each had a run of short radius turns filmed by our instructor. After lunch we watched the videos of our short radius turns, and the instructor slowed them down to give us detailed and personalised feedback.
The Central Theme was briefly run through again, with a few new possible tactics shown to us which could be used in lessons.
The rest of the day on the slope was used to practice the larger carved turns. The main parts of our turns worked on were keeping the skis the same width apart throughout the turns, and managing pressure with our legs during the turns. Again, we had some large carved turns filmed by the instructor, and the day was finished with some video analysis.
Day Three
Day three was much the same as day two: rider improvement, including video analysis, took up most of the day; running through the Central Theme aspects was also a major part of the day.
Near the end of the day we went into the classroom to plan the lessons that we were to give during day four. These lessons form the teaching portion of the assessment for our Level 1 Ski Instructor exam.
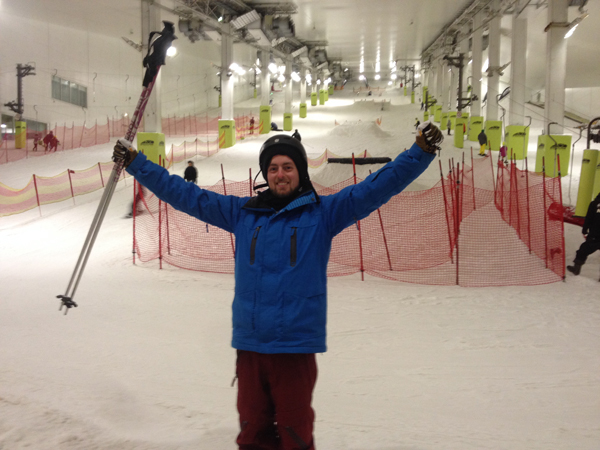
Celebration! Jake passed BASI ski instructors course.
Day Four
This day was the teaching assessment day, in which we each “taught” our peers in a 20 to 30 minute session. We were given some time the day before to plan our lessons, which were to be any part of the Central Theme. I chose to teach snow-ploughing, which is the first step in learning speed control.
Most of us were quite nervous on this day as it’s quite daunting knowing you will be pretending to teach advanced skiers the basics. Even though I have been teaching snowboarding for a few months, I was still not looking forward to it. However everyone’s lesson went well enough to pass. When assessing the teaching sessions, the main criteria were that we understood the Central Theme; had an effective way in which we got the information across to the students; managed our students in a safe and efficient way; gave relevant feedback; and moved on to further exercises relevant to the feedback.
Day Five
The final day of the course! For myself this was the most important day, as it was the assessment for our skiing ability. At this point I was still ironing out some aspects of my short radius turns, however by the end of the day they were at the required level to pass – what a relief!
Other aspects of the the skiing ability we were assessed on were the longer radius, carved turns, and our demonstrations of beginner turns (for when teaching the Central Theme).
This day was the shortest of the week, and we finished at around 2 pm, once we had been given our results (all of us passed!). We went back into the classroom, where our instructor gave us a de-brief of the week. This included running through with us what we needed to do next for our BASI Level 1, possible future courses and training we could enrol on, and general information regarding life as a ski instructor.
After The Course
Once the course has been completed, there are a few other small things that are needed from BASI before you receive your Level 1 certificate:
35 hours of snowsport experience: this can include shadowing ski lessons, working in the ski hire area, or even on reception at a ski school.
First Aid Certificate: Must be a minimum of a 12 hour course
Working with Children module: an online course
Criminal Record Disclosure: available online
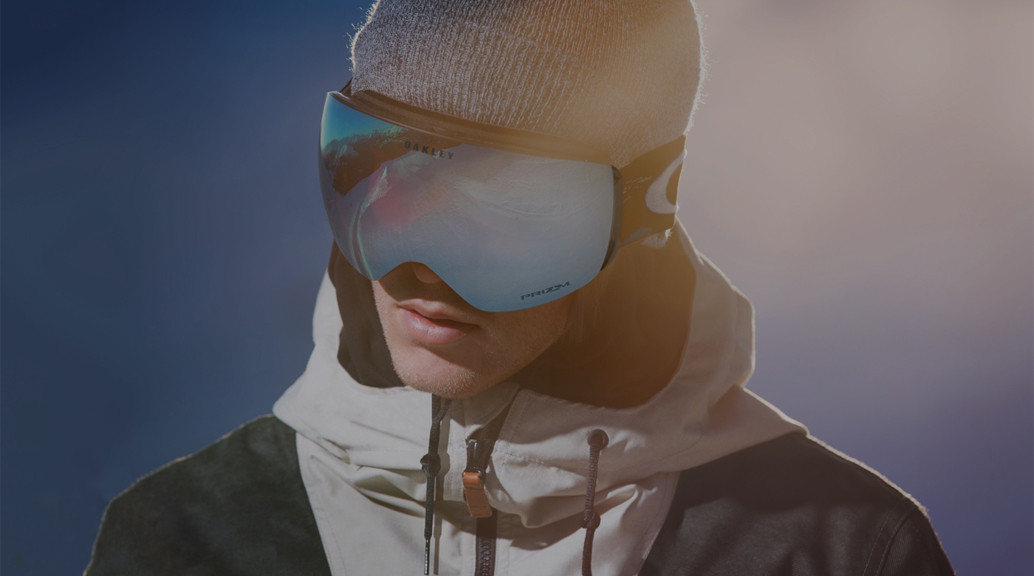
Oakley is arguably one of the most recognised sports gear and eyewear brands the world has ever seen with its history dating back to 1975. Defying all the sceptics Jim Jannard started his own company with $300 with one simple goal; make products that work better and look better than anything else. Based in his garage Jim developed a new style of motorcycle grip that increased grip with sweat, capturing the notice of many top riders.
With the company orders in decline it led Jim to create the O Frame goggle that was praised for its clarity and wide peripheral view being used in MX for the new 17 years. Drawing on his previous innovations Jim set himself the challenge of reinventing sport sunglasses creating the ‘eyeshades’, a revolution in eyewear design becoming a vital piece of equipment for world class competitors.
Decades of research and development has been focused on a single, unwavering goal; to provide snow athletes the highest level of protection and optimum visual clarity possible. This goal has allowed Oakley to find that perfect blend of art and science leading to 600 patents awarded worldwide. Today Oakley is seen as the go to brand for sophistication and performance within the sportswear industry!
Oakley Goggle Technology
HDO (High Definition Optics)
Ever wanted a truer picture of the world? Oakley’s HDO technology gives a lens virtually free of distortion and fine tuned with patented technologies that retain extremely high levels of clarity at any angle and any condition.
The American National Standards Institute put Oakley lenses through three rigorous tests:
Clarity (measures sharpness of images view through the lens)
Refractive power (measures how inferior lenses distort vision by magnifying images)
PRISM, not to be confused with Prizm, (measures how lenses bend light to make objects appear shifted from their true position)
These tests prove how inferior lenses can compromise your vision. Don’t compromise, stick with Oakley lenses!
Impact Protection
Oakley lenses don’t just meet, they exceed ANSI impact-resistance standards! These lenses have undergone high-speed and high-mass tests, giving the ability to be pushed to its limits with no risk of breaking.
Anti-Fog Technology
Plutonite lenses are an innovation in their own right, combined with Oakley’s unique F3 anti-fog coating allows the inner lens to absorb a minimum of 2ml of moisture to help preventing fogging during the most intense physical activities.
Lens Coatings
Iridium
A lot of people think the composition of the lens itself is iridium, but in fact it’s a standard lens with a special metal oxide coating that gives the lens a unique set of properties. This Iridium coating allows you to tailor your goggle to any condition you may face up in the mountain.
Oakley provides a large variety of lens compositions and colours allowing you to fine tune; glare, reflection, light absorption and light transmission. The ability to fine tune how much light reaches your eye makes this exclusive coating a favourite with riders around the world.
Polarised
Ever get that uncomfortable glare in bright sunlight? Oakley polarized lenses are made from an exclusive permeate Plutonite material coated around an integrated polariser. The unique combination of coatings helps to provide clear vision, minimises deformation and helps protect the filter from everyday wear and tear.
Additionally Plutonite performs extremely well as a barrier against harmful UVA, UVC and UVB rays as well as harmful blue light protecting your eyes even on the brightest of days.
Ever felt the urge to clean your lens with anything other than the cloth supplied? Resist the urge! Tissues, tops and sleeves are highly abrasive and if used will permanently scratch your lens. The supplied cloth is a special microfiber material that will clean but not scratch.
Your lens will no doubt get wet during its use but it is advised that you only clean your lens when dry. So even if you take a fall in the snow, allow your lens to dry first.
One last piece of advice you may not heard of is try to avoid wearing goggles on your head. Many goggles have anti fog and venting properties but the heat and moisture from the top of your head increases the chance of this still occurring.
Following these simple but important rules will ensure your Oakley goggles stay high performing and scratch free for years to come.
Vents
Due to the amount of moisture your face emits goggle ventilation is important in helping to reduce fogging. Although Oakley goggles feature an anti-fog coating more ventilation is always better when it comes to goggles. Be sure to check the compatibility with your helmet as the vents can sometimes be covered reducing the performance of your goggles.
Foam Layers
Getting a perfect seal around you face is important for reducing fogging and adding comfort. Oakley has designed their goggles with a triple layered polar fleece foam which ensures the cold and snow stay out whilst following the curvature of your face without giving uncomfortable pressure points.
Glasses Compatible
If you have prescription glasses finding the right goggle can be a challenge! Some Oakley goggles feature OTG (Over the Glasses) technology which means you can still wear your prescription glasses underneath without the expensive need for prescription goggles.
OTG goggles tend to be deeper than regular goggles and feature a channel to allow your goggles to fit perfectly with no movement or pressure points.
Helmet Compatible
It’s important to have a good fitting goggle and helmet for both aesthetics and performance. Known as the goggle gap this gap between the helmet and goggle is best avoided through a helmet compatible goggle as it can give you brain freeze.
Oakley produce goggles with varying levels of helmet compatibility with many of their designs featuring strap outriggers to give a better strap position when wearing a helmet.
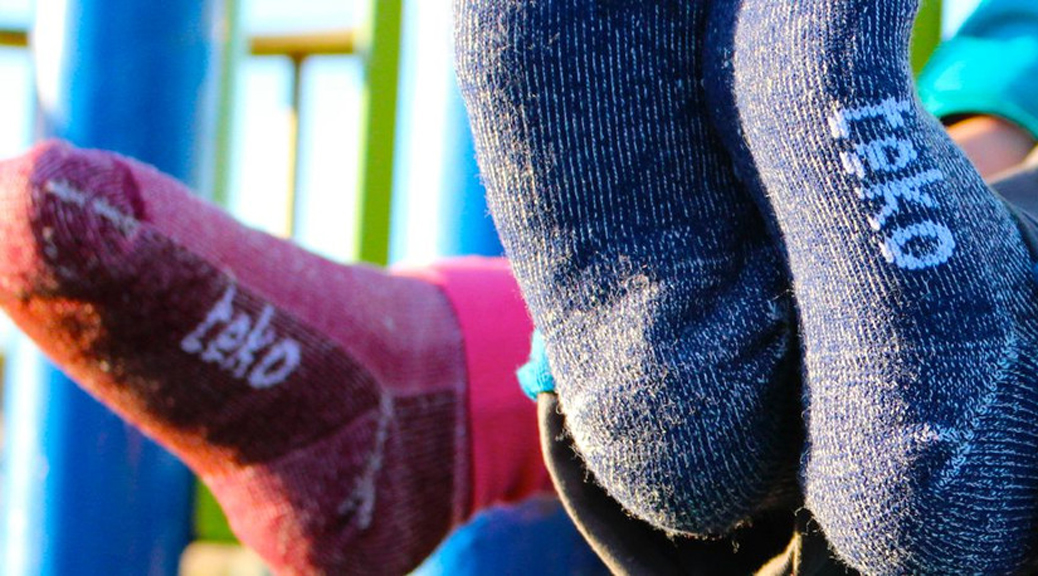
You might think that ski and snowboard socks are very much the same, and while this can be true some of the time, when it comes to well known snow sport brands they then start to vary with different features, materials and construction. Below is a short guide on the different socks and how they are tailored to a specific sport.
When it comes to choosing that sock, whether skiing or snowboarding, the two following statements are important:
Look at the material and make sure you don’t choose one with cotton in. Although it’s great for a nice looking shirt it doesn’t have very high moisture wicking properties causing your feet to stay damp from sweat in turn getting cold.
Some say the thinner the sock the better but this is really down to personal choice, some agree with this statement and others don’t.
Sock Size
Choosing the correct size is paramount as a sock that’s too big can sag giving an uneven feeling in your boot whereas a sock too tight can cut the circulation to your feet causing them to become cold which nobody wants. To help determine the correct size go off your ski boots or have your feet professionally measured.
As a general rule of thumb when it comes to choosing the weight (thickness) of your sock its probably best to go with either a medium or light weight sock as the thicker higher density socks combined with the insulation from your boot could create too much sweat and heat.
Materials
Wool – Merino wool in particular is a natural fibre which has excellent levels of warmth and moisture wicking properties keeping your feet warm and dry. Being a natural fibre means it doesn’t have high levels of elastic memory causing the sock to lose shape overtime yet doesn’t absorb odours which is great for a week’s holiday needing only a couple pairs of socks.
Synthetic – There are numerous synthetic materials the more common materials are polyester, nylon, acrylic and elastic. These materials retain their shape very well, have moisture wicking properties and give high levels of comfort.
The Perfect Blend – Many modern day ski and snowboard socks are a blend of natural and synthetic fibres combining the best characteristics from both worlds for the ultimate sock.
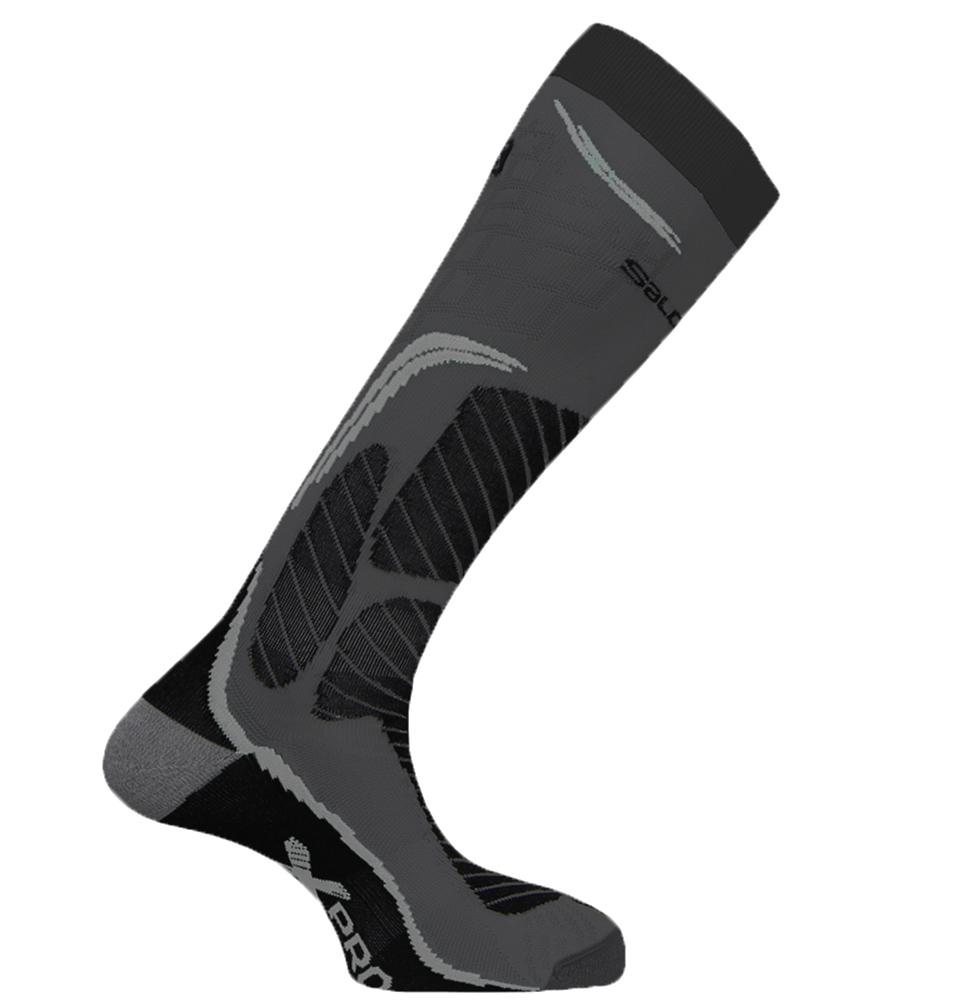
Ski Socks
Ski socks tend to be much taller (over the calf) in height so to accommodate the much higher profile of ski boots. Modern ski socks have additional padding in areas such as the shins due to the increased pressure from pushing on the boot tongue and in other areas it’s much thinner for a more performance orientated fit and helps prevent blistering around the heels.
These Salomon ski socks have additional padding in areas such as the shins due to the increased pressure from pushing on the ski boot tongue.
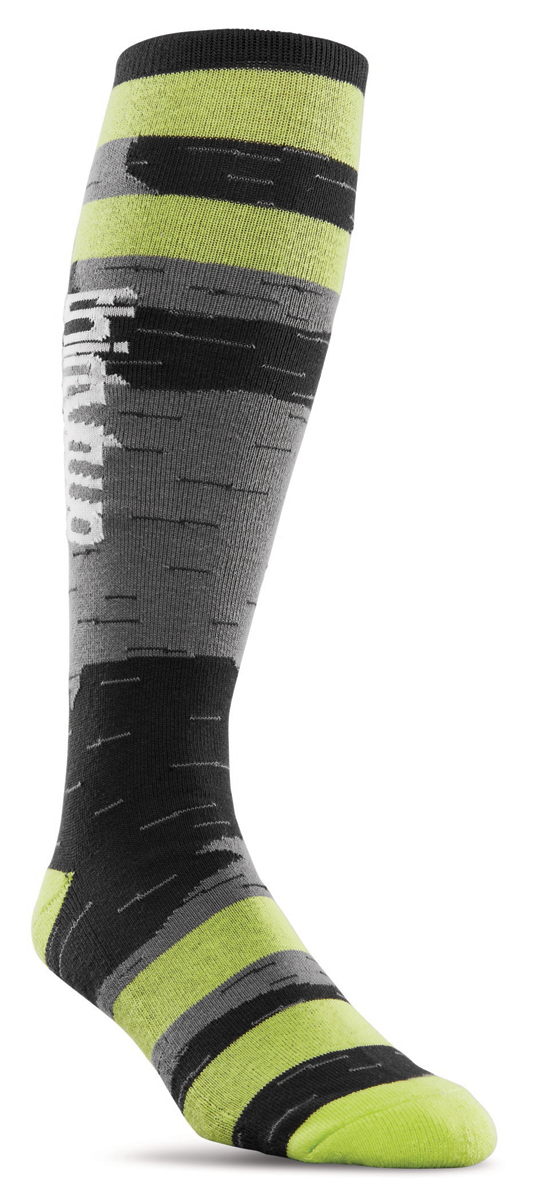
Snowboard Socks
Many snowboard socks have been specially designed to have forward lean built in which helps prevent the sock from bunching under foot giving a much more comfortable days riding. Unlike ski socks snowboard socks tend to have more uniformed cushioning rather than smaller specific areas due to going from toe to heel edge on a regular basis.
These ThrityTwo snowboard socks tend to have more uniformed cushioning.
If your still unsure as to what type of sock you need after reading this blog why not pop into store where our passionate and highly qualified staff can give you some advice.
It’s getting to that time of year again. Ski trips may or may not be booked or you may be going away as a large group and that question may be returning, “Should we drive to the alps this year?” My first thought when thinking about this subject is “ROAD TRIP……….”
When searching for flights, you can obviously find that bargain that everyone is searching for. Personally, I have found flights from Stansted to Salzburg for £70 return.
Flights are certainly cheaper but if you’re adding your skis and snowboards then it can be more expensive.
If you have the time available, and there are three or more of you, then the cost will always look more favorable to drive than fly. Also cars can carry another 75kg, of ski/snowboard gear, on the roof (with bars and a box) so it looks even more appetizing.
To break it down, the main costs involved are crossing the Channel, fuel and tolls or ‘tax vignette’:
Crossing the Channel
Whenever I have looked into the crossing DFDS Seaways have normally been the cheapest. They offer services roughly every hour from Dover to either Dunkirque or Calais. It can add on time though which is why the Channel Tunnel can be more accommodating.
Fuel
I have only taken diesel vehicles across and depending on where your final destination is, can normally do it from Calais in just over a tank of fuel. Fuel normally is also cheaper in mainland Europe, but always worth looking before you go.
Tolls or Tax Vignette
The French use ‘tolls’ across all their major roads going south which can add around €70 each way in costs. The Austrians impose a ‘tax vignette’ for driving which is normally around €15 for a week. Our friends, the Germans, are currently the only country that does not enforce a cost to use the lovely Autobahns – ya das its gut!
Other Costs To Consider
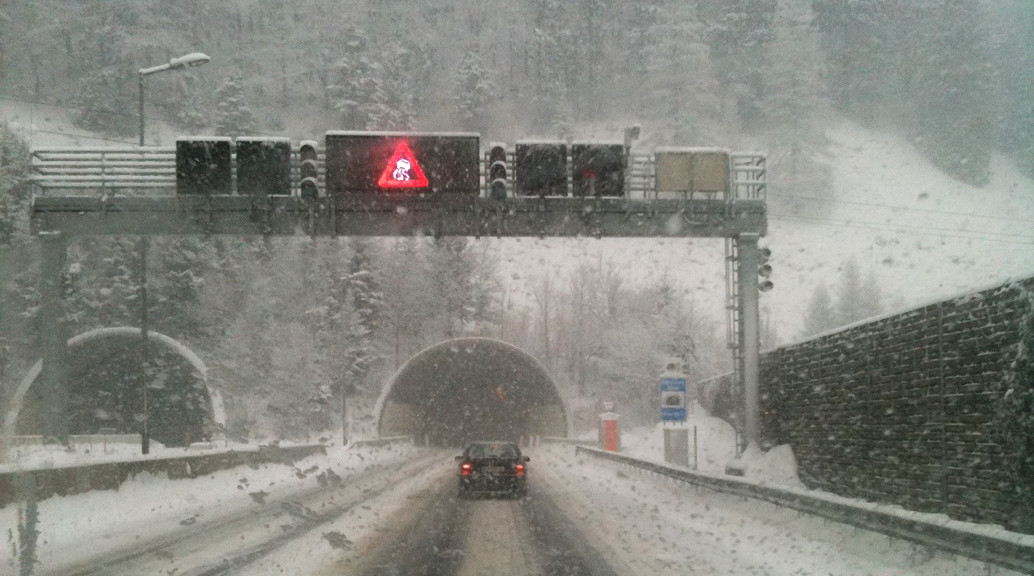
Depending on where your final destination is will also determine if you need any compulsory items that certain countries enforce, such as snow tyres, snow chains or breathalyzer kit.
Not going to go into too much detail here but these are important factors to consider for European driving:
Full original documentation must be presented if required; photocopies will not be accepted
Head light converters
Warning Triangle
GB Sticker or GB badge on number plate.
Bulb kit
Hi-Viz jackets; one must be assigned for each person in the vehicle, and make sure these are in the vehicle and not in the boot France
Snow Chains must be carried in all vehicles from 1st November through to 31st March. When the snow gets heavy, the police will stop you and enforce they are put on
Breathalysers must be carried within the vehicle Austria and Germany
Snow chains are not compulsory in Austria or Germany however snow tyres are, and all vehicles from 1st November must have snow tyres fitted
Driving
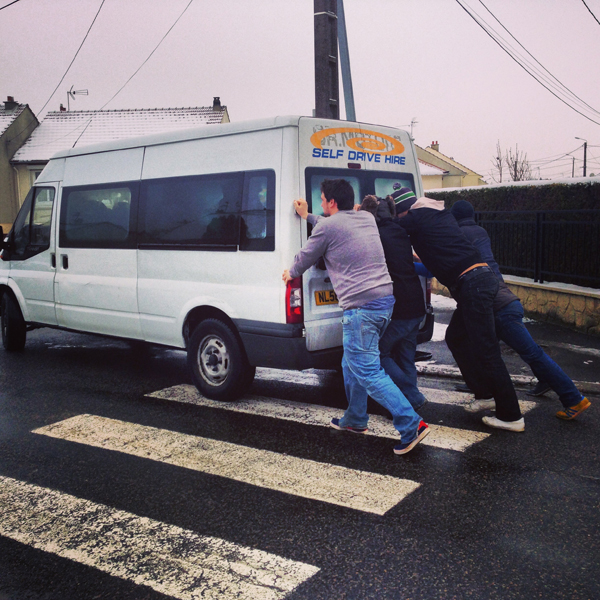
Obviously driving in Europe can be a lot different to that in the UK. The laws are different, the speeds are faster and the police can, and will, pull you over if your car doesn’t look like it will make the journey. As with any driving, always consider and look for your rest stops along the route. All the main roads I have driven on in mainland Europe always seem to be well kept with the services clean and tidy. Fuel stops are sometimes hard to come by as the roads are so long, so don’t be worried if you haven’t seen a fuel sign for at least a 1oo miles.
The driver seemed to think that when the dash said ‘o miles’; it actually meant he had another 50 miles in the tank. Oops!
Pros:
You can take more kit; the only restriction is the size of your vehicle and how much kit you own
You ave the flexibility of a car when you’re in resort to go and explore areas
Cons:
More time consuming and can cut into your trip and potentially your ski time
Initial equipment costs such as snow tryes, snow chains, roof bars, roof boxes, etc
Routes I Have Personally Driven
Calais to Meribel (Le Troi Vallees)
A very simple route south. The towns of Saint Quentin and Dijon offer places to stop for the night. The hardest part will be the gentle mountain route up to Meribel. If it has been snowing at any point during the day then you can bet the Gendarmes will be out enforcing the use of snow chains. At the height of season, it isn’t uncommon that it can mirror the M25. Roughly 900 Km with a driving time of just under 10 hours.
Dunkurke/Calais to Flachau Ski Sportwelt Amade
Having worked in Austria for a couple of seasons, this is the route I have driven most. I would always recommend taking the slightly longer route through Belgium, The Netherlands and Germany when heading to Austria as it saves the Tolls through France. It will add around 25 minutes onto your journey, which in the grand scheme of things isn’t that much. The drive is pretty straightforward and once in Germany the speed can be picked up on the Autobahns. You may hit some traffic around Munich at any time during the day but then heading to Salzburg is easy. Just remember your Tax Vignette at the border. Roughly 1100 Km with driving time of just over 10 hours.
Calais to Morzine (The Portes Du Soliel)
Again a pretty simple drive. Straight off the ferry and it follows the same route as Meribel and all the other ski resorts. The differences being you need to turn off at Geneva to head up to the mountains. Geneva is a beautiful city if you get the chance to pop in or stay there. Roughly 800 Km with a driving time of eight and a half hours.
When leaving your car for a prolonged period in the snow. Pack salt or grit into the tread of the tyre. When you come to pull away it will give you just enough grip to get moving.
Things to Remember When Driving in Europe
Remember that Europeans drive on the “wrong” side, and its probably the most enforced as you get straight off the ferry or train.
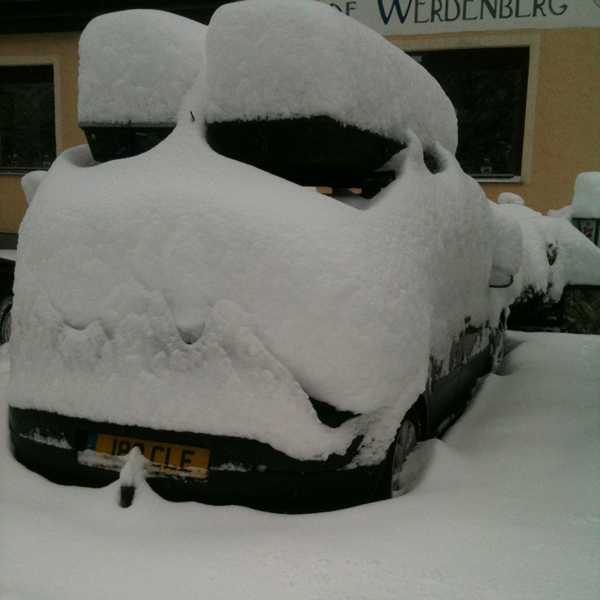
Most of Europe shuts on a Sunday. A very important note to remember when driving. Apart from the main shopping centre’s and anything in a large holiday resort, everywhere does indeed close. Again, as the photo suggests, even petrol stations in local towns are closed.
European police can seem to be more heavy handed than UK Police. As long as everything is in check regarding your vehicle and what to carry than you have nothing to worry about. Although driving a UK plated vehicle does attract attention so beware!
When driving in Europe, it is the responsibility of the driver to enforce everyone is wearing seatbelts. The driver will be liable for a fine. Something I have found out.
Drink drive limits mainland Europe are higher with the fines heavier. My advice would be not to risk it at all. The French base it on how long you have been driving. E.g. if you have been driving for 3 years or less then the limit is 0.02%.
Devices that can detect speed cameras (Road Angel) are illegal in Europe.
Practice fitting snow chains back in the UK. It is not fun when it is minus 5, cars are whizzing passed you and everyone else is in the car nice and warm. A set of gardener’s gloves is always handy!
When leaving your car for a prolonged period in the snow. Pack salt or grit into the tread of the tyre. When you come to pull away it will give you just enough grip to get moving.
Keeping a shovel and a bag of soil (being serious) in the car is a definite. You never know when you will need to dig yourself out and packing soil just underneath the tyre can help you get out of deep snow.
For me, it’s a definite YES. If I have the option when looking at booking a trip to the alps then I will most certainly take the car across. However, I do understand that it isn’t for everyone and that flying across is a lot less stressful and can sometimes get you there faster.
In a nutshell alpine ski bindings are a vital piece of equipment; not only securing your ski boots to your skis but also giving you additional safety features to prevent dreaded injuries. Getting the correct bindings is important and is specific to your skill level as heavier more aggressive skiers require bindings with a higher DIN whereas lighter beginners would require a lower rating.
Various binding manufactures have different safety features that help release your boot in the event of that embarrassing crash that you hoped nobody saw; from vertical toe release and sliding anti friction pads. On top of the safety aspect bindings form the bridge between you and your skis transferring every little movement directly to the skis. There are two way to mount your bindings:
Track (Rail) Mounted Ski Bindings
The most common way of mounting bindings is either on a track or rail where the heel and toe piece simply slide on, generally found on Piste orientated skis. These bindings are mounted onto the skis at the factory meaning they are ready to be used straight away.
Pros
Mounted and adjusted numerous times
Generally allows the ski to flex more naturally
Cheaper than buying drilled bindings
Cons
Makes your set up heavier
Less choice with bindings
Generic binding position
Drill Mounted Ski Bindings
The drill mounted method although less popular is becoming the way to go with many people turning towards all mountain skis as riders start to venture off Piste into the powder fields. A qualified technician would then fit these bindings to the ski with a few additional pieces of information which this guide will cover later.
Pros
Wider choice of bindings
Can be tailored to your ability and ski
Lighter and sometimes stronger
Choose where the bindings are mounted
Can be customised with ramp angles
Cons
Have limited amount of times it can be repositioned
Tends to work out more expensive over track mounted bindings
Less adjustment for varying boot sizes
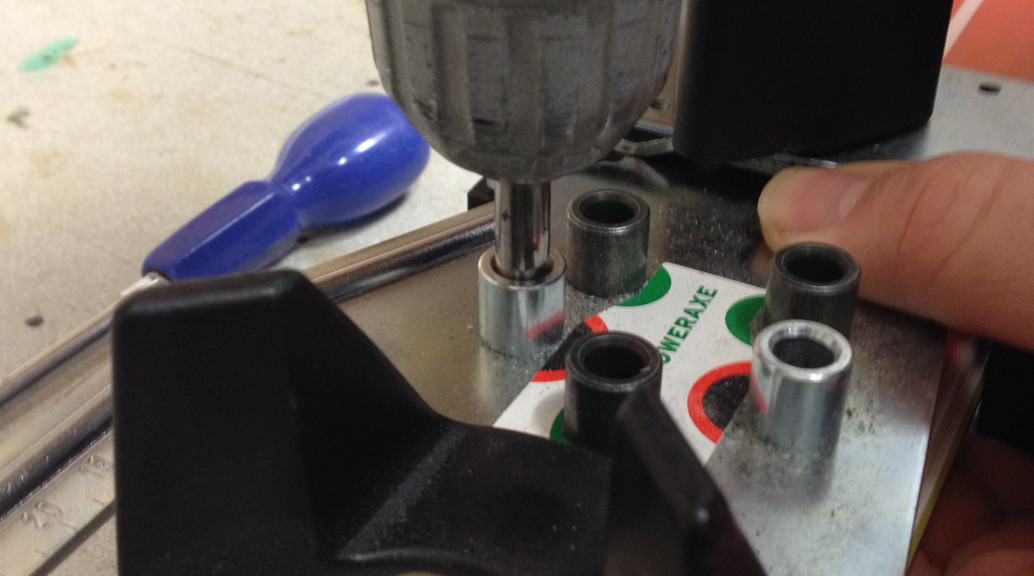
Process of Drilling Skis
The process behind drilling skis is relatively straight forward for a trained technician; and before you ask “no we don’t drill freehand”. We use special jigs and drill bits that come directly from the binding manufacture to ensure the correct drilling, every time! The technician will use your ski boot to adjust the jig length and then that crucial decision of where to have your binding mounted ski centre, ski forward or ski back. We know this can be a hard decision to make so below we go into detail on the different positions.
Choosing The Binding Placement
So you have chosen the ski and bindings now it’s time to make another decision where to mount your bindings! There are lots of different factors that need to be taken into consideration and questions to be answered. The first question to ask yourself and one that requires an honest answer is ‘what terrain am I going to be skiing on?’ Generally the answer will be all mountain, in this case its best to follow the ski manufactures recommended position.
This recommended position will have been determined by many extensive tests and gets the best all round performance out of the ski. Although this is the ‘recommended position’ you don’t have to follow this; for example the Line Afterbang can be mounted further back if you will be riding all mountain.
Park and powder skiing are two extremes where the correct mounting position is vital. Park skiing generally requires the bindings to be mounted ski centre due to completing aerial tricks where equal balance is important to performing the trick successfully and safely. Whereas powder skiing requires the bindings to be mounted back from the centre allowing the front of the skis to remain elevated naturally floating on top rather than under the snow.
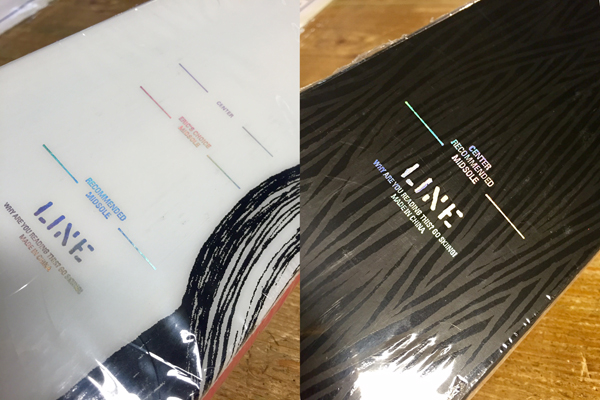
Eric Pollard (left) prefers his mounting line to be slightly forward due to his unique skiing style. He likes to use this ski in the freestyle category, back country and for touring.
Using Line Skis as an example it’s easy to see how they believe there skis should be mounted. Above on the left we have the Mr Pollards which is a powder ski and on the right we have the Afterbangs ideal for park rats. You can see on the Mr Pollard that there are three mounting lines: at the front ski centre, in the middle Eric Pollards preferred line*, and at the back we have Line recommended. However on the Afterbang there is only one line, the centre line.
*Eric Pollard prefers his mounting line to be slightly forward due to his unique skiing style. He likes to use this ski in the freestyle category, back country and for touring.
The brands, in their own way, will mark on the ski where the centre of the ski is and also the recommendation for drilling. Where it gets interesting is when the question is asked “I want to buy this big ski but want to ski it all over the mountain including the powder, piste and possibly use it in the park” The short answer is that it is possible but you won’t get the full benefit. In an ideal world, you would have a powder, piste and park set of skis but in reality this is not the case.
At Tallington Lakes Pro Shop we have highly knowledgeable staff that are passionate about snow sports. They are always on hand to assist and advise, so why not pop along and have a chat with us? We also boast an extensive workshop with highly trained technicians that can get those skis and bindings mounted to get you on the slopes ready for this season!