I’ve been skiing for 24 years, and for the last seven years I’ve been teaching at Tallington Lakes Ski & Snowboard Centre so I believe I’m a fairly competent and confident skier, happy to tackle any slope, including the Swiss Wall and launch myself off big jumps or over rails. I’ve taught many adults, mainly women who haven’t skied since having kids and are looking to get back into it.
The main thing I noticed was a lack of confidence, and skiing without confidence makes it harder, your body will probably hurt a lot more from all the tensing, and you won’t have any flow.
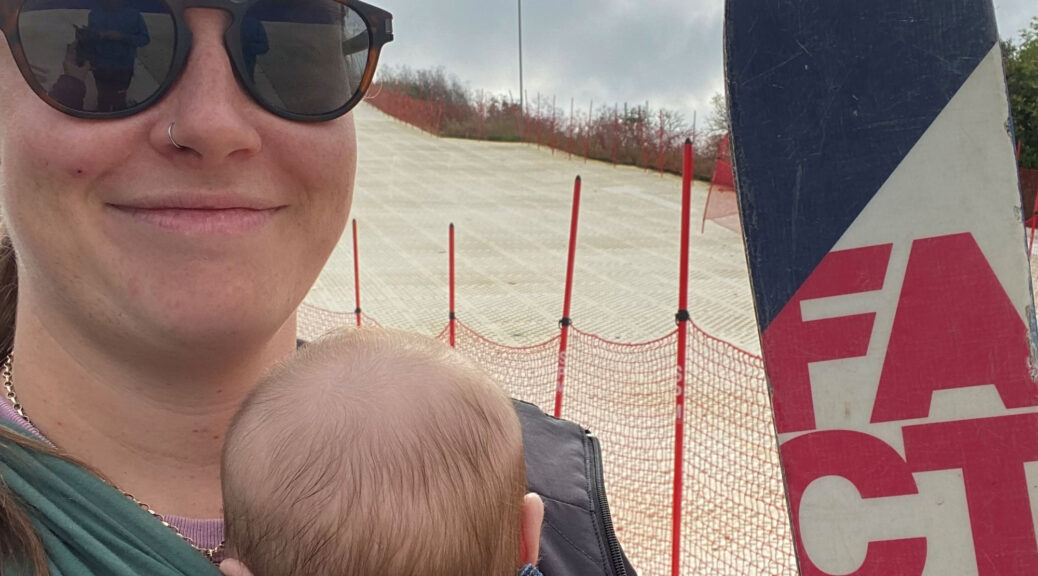
While I was pregnant I skied and snowboarded until I was roughly 6 months pregnant, all the time being very safe and staying within my easy limits and had cut down the amount of time on the slope. My baby is now three-and-a-half months old and since he was born, I’ve skied and snowboarded at Tallington several times, however the main different between now and pre pregnancy riding– confidence! Although still very confident in my own abilities there’s now a feeling that if I get hurt, I have someone who is relying on me.
Doing flat 360’s on the slope, or even 180’s aren’t as smooth, I’ve been doing these since I joined Tallington Lakes and never had a second thought but now I have to think about it – what if I catch an edge. Trying to link turns on my snowboard has now become way more difficult because what if I fall over and get injured?
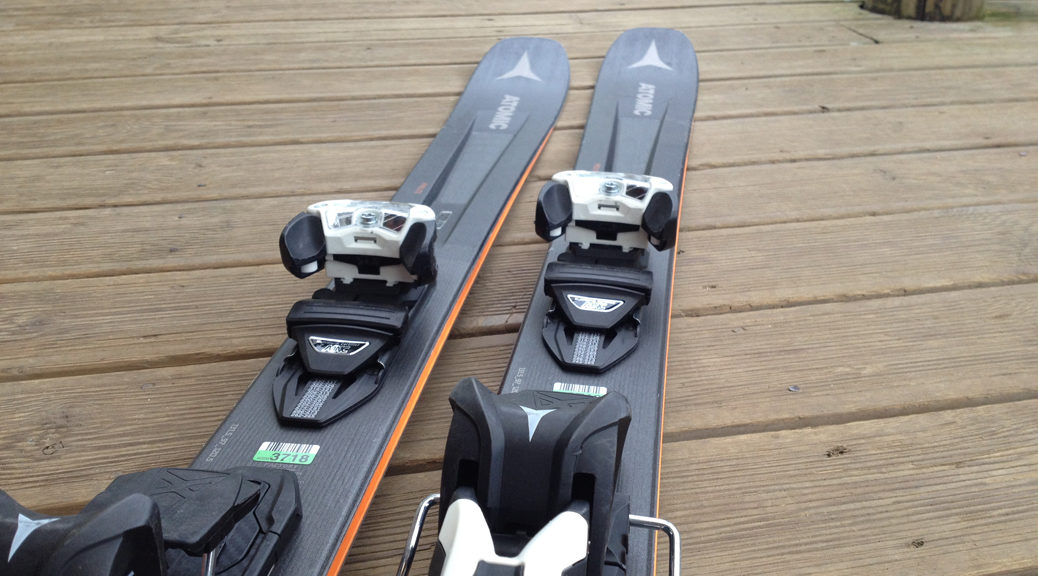
I had the Atomic Vantage 97 Ti skis for a week and used them in varying conditions on piste which was hard packed and icy in the morning with soft spring condition snow in the afternoon. And after a dump of over a metre of snow I used the skis off piste too.
The first thing I noticed was how surprisingly light they were for 180cm ski. However these were the widest skis I had ever skied on so I was a little concerned about how they would react.
I shouldn’t have worried as they were excellent: high speed carving turns were a dream, very stable with great acceleration out of the turns. It was like being on rail tracks.
Shorter turns were also very easy and controllable. Just get in the rhythm and you are bouncing from edge to edge which seemed to take the skiing to another level.
Moguls were great fun, bashing the tops off and sliding down the back. Due to the sidecut I did not try the fall line route.
When on off-piste powder it was exhilarating, just like floating on a cushion of air.
The heavier slushy stuff towards end of the day was never a problem. The skis coped really well.
I really enjoyed skiing on the Atomic Vantage skis. They never let me down but to get the best out of them you have to work them and not be a passenger. By being aggressive with your skiing you will get so much out of them. They really are a dream for an advanced skier.
Ski touring can mean different things to different people – depending on the desires of those participating. According to Google dictionary, the defining features include ‘skiing across open country, walking uphill on skis as well as skiing downhill’. With this in mind; there are multiple options of how you can spend your day ski touring – depending on your own priorities. Many people use ski touring as a means of fitness. Some are captivated by the ability ski touring gives you to escape the crowded slopes and travel into the wilderness. Meanwhile, others use ski touring as an effective method of transport on the snow, ultimately to get to a destination. This destination could be anything from a mountain hut, to a line you have been dreaming about skiing for years, or even the finish line of a race. Therefore, to answer your questions of what gear is best; first you will need to prioritise your own ski touring desires.
There are two extremes within the ski touring world. At one end of the spectrum you have the lightest skis and minimal pin bindings, combined with extremely lightweight, soft boots. And at the other end there is the freeride setup, which uses heavier and fatter powder skis, with a more performance binding and stiffer boots. The lightweight setup is perfect for those hungry to push their limits on the ascent; by beating time records, increasing their distances, or simply for anyone wanting to make walking uphill on snow as effortless as possible. This is a good option for endurance ski tours, such as multi-day or hut-to-hut trips where you need to save your energy. Plus, for ski tour racing the lighter the gear the better. On the contrary, the heavier setup is designed for those really prioritising the decent and wanting to charge down a line with the best equipment for exactly that. This freeride setup tends to be used for shorter ski tours due to its weight, but what it does best is allow you to ‘earn your turns’ in most snow conditions, especially fresh powder. Also this setup is perfect for side country access skiing, where you may need a short walk to get to a line or even just to skin out from the bottom.
When choosing what gear to buy, there will always be compromises to make, but with technology constantly improving, those compromises seem to keep getting smaller and smaller.
However great each of these setups are for their purpose, choosing between them will subsequently mean compromising the ascent or decent. For example, super lightweight skis with pin bindings are not going to give you as much control or float in powder as a fatter, stiffer setup. On the other hand, climbing up with heavy gear will naturally slow you down and use up more energy. This limits the distance you can travel in a certain amount of time, and time is a critical factor when travelling in the mountains. Therefore, if you are looking to enjoy all aspects of ski touring, you may want something a bit more ‘middle ground’.
When choosing what gear to buy, there will always be compromises to make, but with technology constantly improving, those compromises seem to keep getting smaller and smaller. In fact Atomic (and Salomon) have released a brand-new binding, which is the ‘first compromise-free binding’. Whereas before you had to make a big decision of pin or freeride touring bindings, now the Atomic Shift binding perfectly combines the two systems. The many benefits include being lighter under foot for each step you climb, being securely locked in for charging the decent and importantly being able to release if you crash. Plus having brakes make transitions slightly less worrying when taking your skis off; unlike many pin setups which do not have such luxuries. These bindings are compatible with all Multi Norm Certified soles on the market today: Gripwalk ISO 9523, WTR ISO 9523 and Touring Norm ISO 9523 ski boots when in ski mode, as well as most ‘pin binding’ touring boots. The only sole not compatible with the Shift binding is the Non Touring Norm sole. Fundamentally, this makes tehn the ultimate all-round ski touring binding currently on the market.
The Atomic Backland skis are a great example of a versatile, lightweight ski, which can handle a range of conditions and terrain.
Touring skis are also closing the gap between what’s good going up and what’s good skiing down. The Atomic Backland skis are a great example of a versatile, lightweight ski, which can handle a range of conditions and terrain. Their ultra-light wood core and carbon backbone make climbing a doddle, while their HRZN tech tips, cap sidewall and all-mountain rocker increase float and give great edge control for ripping through the powder, crud or on piste. Furthermore, Atomic have an extensive range of their Backland skis, which include women specific models, and range from 65 to 107 under foot to cater for everyone’s needs. For the ultimate balance of up-and-down the women’s Backland 85 and the men’s Backland 95 are perfect. Combine these skis with the Atomic Shift binding and you will be well on your way to the perfect all-mountain touring setup.
To top it off, ski touring boots keep getting lighter, stronger and stiffer for you to really make the most of your time on the snow. If you are looking for a boot that can really do it all, look no further than the trusty Atomics, to complete your own ultimate touring setup. For both men and women the Atomic Hawx Ultra XTD is the perfect balance between a freeride boot and a touring boot. With the pin system and lightweight shell ready for cruisey ascents, and a stiff flex for shredding at speed, you can enjoy one pair of boots for all your mountain adventures.
To top it off, ski touring boots keep getting lighter, stronger and stiffer for you to really make the most of your time on the snow.
So, hopefully you will have a broader understanding of the different meanings of ski touring, and have a better idea of what will ‘tickle-your-fancy’ in the mountains. If you are at each end of the spectrum and want to push yourself in either the ascent or the decent, then size and weight are both critical factors when buying gear. If you see yourself as an all-mountain ski tourer, you will seek the perfect balance with the least compromises. The aforementioned Atomic setup (Backland skis, Shift bindings and Hawx Ultra XTD boots) will provide you with comfort, control and enjoyment in all aspects of ski touring.
Also this set-up is perfect for those new to ski touring, because it’s very user friendly and great value for money. So, if you are looking for one pair of boots and one pair of skis with bindings that you can truly take anywhere and have a good time, this is for you!
Finally, when ski touring in the backcountry, choosing your gear is only the beginning of all the important decisions to be made. Take no unnecessary risks and be snow avalanche aware; but most importantly have fun and enjoy the freedom!
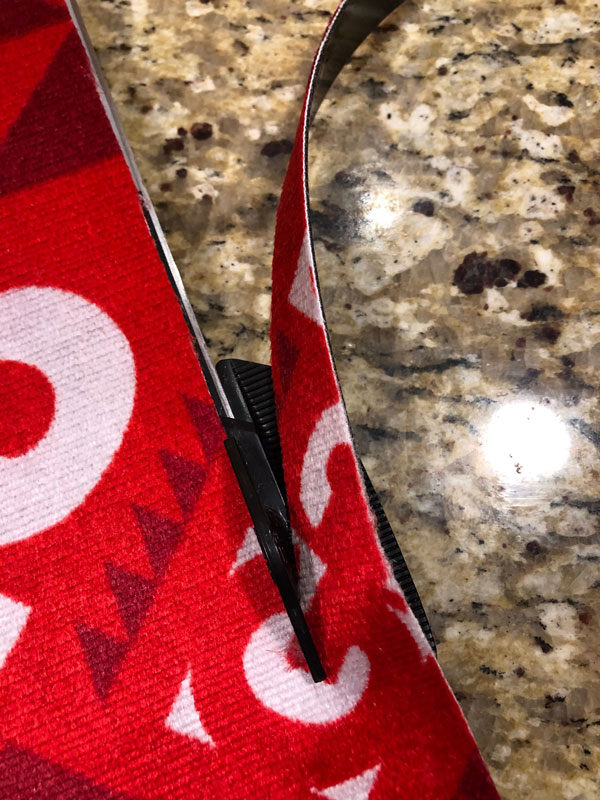
Cutting ski touring skins can be on of the biggest nightmares when getting a touring set up dialed; especially if you have a little OCD like myself and want a perfectly symmetrical skin cut.
After cutting my first skins, a set of Marker Universal, and a buddy’s Black Diamond Ascension; I can say with out a doubt G3 make it far easier and less stressful! The skins themselves are not only one of the best on the market but the attention they have put into the cutting process sets them in a league if their own!
So you may have seen or know how to trim skins by cutting one side, then move the skin over – guessing the amount of edge to reveal – then cut again. I don’t know about you but I feel this a rather inaccurate method!
What G3 have created is a trimming tool that lifts the skin off the base, spaces the cutting blade just the right depth in from the edge, and trims the skin all in one pass. So with this process there is no need to move the skin and try match up the edges; simply attach the skin centred on the ski and cut both edges – brilliant!
What G3 have created is a trimming tool that lifts the skin off the base, spaces the cutting blade just the right depth in from the edge, and trims the ski all in one pass.
So once trimmed it was ‘in-at-the-deep-end’ with a skin up to the Birthday Chute – a 1.2 km, 30-45 degree couloir in the Colorado Rockies. The skins preformed faultlessly with excellent grip in the steep kick turns and a super easy transition in gusting winds on the summit. The light weight cheat sheet and stuff sack kept the skins in great condition, to re-attach for the skin out. On previous trips I’ve had issues with glues not sticking and icing over; but not this time! So if your in the market for some new skins this winter season stop by the Pro Shop and check out G3 skins – you won’t be left disappointed.
As a ski instructor, I recommend that ski lessons should be factored into your ski holiday. Ski lessons aren’t just for beginners and can help everyone to get the most from their holiday, whatever their goals.
However, some things are even more fundamental than the technique or tactics that instructors can pass on – equipment.
Along with your physical capabilities, the equipment you use will determine what you can achieve on the slopes, and how much fun you will have whilst trying. Equipment includes clothing and protection, but in this piece we’ll just look at ski hardwear.
A good boot fitter will match your foot shape to a particular boot (not all boots are the same shape on the inside). If there are any further modifications needed to accommodate your feet, then the boot fitter will be able to re-shape the inside of the boot to make them comfortable, they may also recommend a footbed which can help to keep the foot comfortable. If you suffer from very cold feet, then heated insoles are possible.
A good boot fitter will also match your skiing ability and power to the flex of the boot. An off piste boot will have different forward flex, lateral flex, delta angle, forward lean and insulation levels to piste boots. Balancing all of this can be tricky, that’s why we use boot fitters.
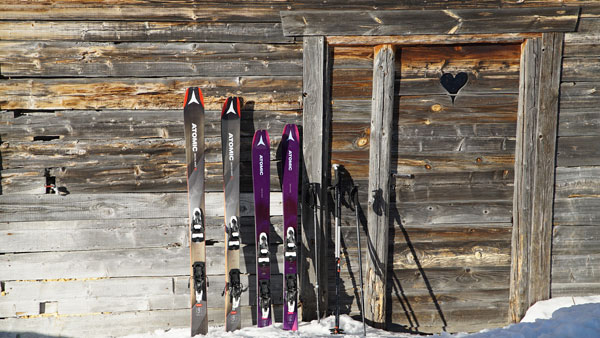
The Flash Bits – Skis
Pick a pair of skis for what you do, rather than what you dream of doing. If you’re doing something exceptional, you can hire something different.
Piste skis need to be stable on their edges. Fat skis don’t do this, and can create some awkward leverage on the boot and the lower leg.
Pure piste skis will be 70 mm wide underfoot, and off piste skis over about 100mm. Anything in between is a compromise. If you want skis to perform well in powder and grip hard on the piste, you need two pairs of skis.
The few that have kept skiing, even when the lifts have stop turning to ‘earn their turns’, spring has been a quick and warm few months! The ski season is well and truly over with the last of the spring snow gone; and now the skis are serviced and the batteries are removed from our trackers it’s time to reflect. Here are my thoughts on Black Diamond’s Mission Shell Jacket and Sharp End Pant
Coming into this year’s ski season I was super keen to increase the hours I spent touring; so a nice lightweight breathable outer shell setup was going to be a must. However, moving to Vail Colorado, one of the world’s largest ski resorts, with ‘day in day out use’; protection from the elements and durability where going to be a key factor.
I have not personally used any of the extensive clothing range from Black Diamond, but I am familiar with their climbing gear. And I was confident that their commitment to producing excellent climbing hardware would be transferred to their clothing; so I decided to try the Mission Shell snow jacket and Sharpe End snow pants.
Being almost 6ft 4in tall I often find that technical apparel never quite fits right; having to wear larger sizes to accommodate for the extra length, but then finding it way too baggy everywhere else. With Black Diamond I settled on ‘large’ for both pant and jacket, although I could have been a medium in the pants. The large pant gave an extra 2.5cm inseam, and with the integrated belt system tightening up the waist, the large was the better fit. The large jacket was a great fit right from the start, with the under arm gussets giving a great range of movement. The super adjustable cuffs, powder skirt, and Cohaesive cord-lock technology hood all contributed to sealing up the jacket from the elements. Full Gore-Tex construction gave both the jacket and pant excellent waterproofness and breathability, needed to keep the metres of powder snow at bay and disperse all the heat from those warm spring days or sweaty mid winter ‘pushing-the-envelope’ moments!
Full Gore-Tex construction gave both the jacket and pant excellent waterproofness and breathability, needed to keep the meters of powder snow at bay and disperse all the heat from those warm spring days or sweaty mid winter ‘pushing-the-envelope’ moments!
After six months of clattering through tree runs, being stuffed in a bag, ploughed through countless feet of snow, and some rain, this setup has proven its worth many times over. And still now, all be it not smelling quite as fresh, it looks as good as it did when it came out of the packaging.
So if you’re looking to progress into the off-piste and earn your turns, ski groomers all day, or go get buried waist deep and send powder shots overhead this Black Diamond Mission Shell jacket and Sharpe End pant combo will keep you dry and warm on the way down; and well vented and breathable on the way up. From freezing chair lift rides, to climbing across cornices, it’s great to have 100% belief in the kit you’re using – and Black Diamond didn’t disappoint. And not having the extra worry of being too cold or too warm; you can just focus on the objective in front of you.
If I’m honest, I reached a plateau in my skiing some years ago; I kind of accepted that I’d reached the limits of my body. I wasn’t too unhappy with this as I felt that my skiing was quite good, at least for my age. But wouldn’t it be nice to get just a little bit better? Which is why I was attracted to Carv Digital Ski Instructor.
I’ve been skiing for almost 40 years – and, no, unlike my 14-year old son, I didn’t start at the age of 3! Perhaps I should have, as he’s now far better than me. I look at my son’s skiing with unashamed jealousy and wonder why I can’t be as good as him. Well, I’m not the kind of dad who simply rolls over and lets the younger generation through! No sir, I’ll try anything to regain my dignity and rightful place in the family hierarchy!
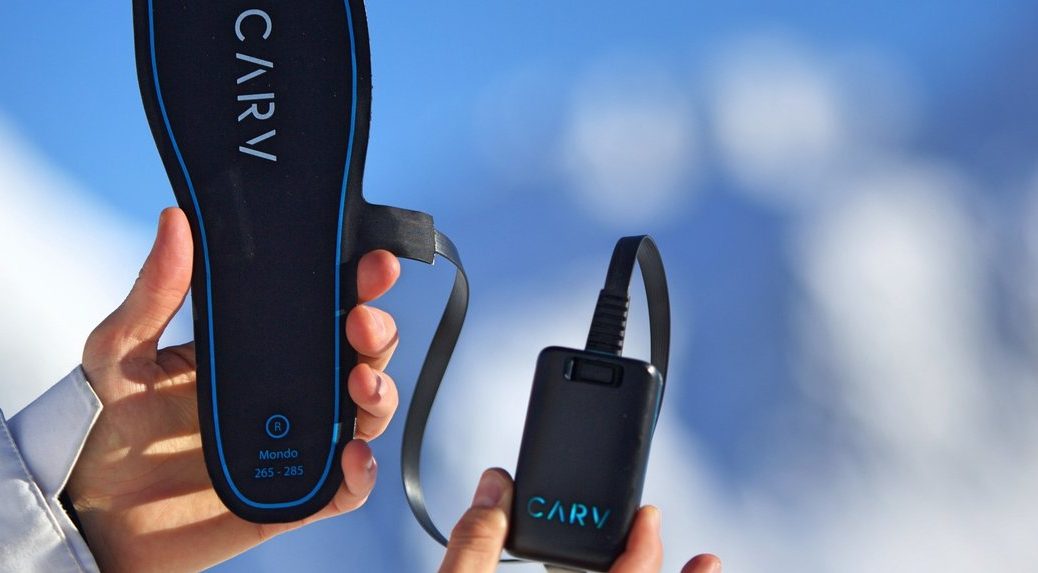
Carv Digital Ski Instructor
I think I’m right in saying that our sets were from the first full-scale production run for the product. I say ‘we’ because my son was so impressed by the concept that he also had to have a set – bah, there goes my secret weapon. At £250 a set, it wasn’t exactly an easy decision to commit to, especially as there were no independent reviews out there. But the concept was just so enticing (as was the desire to improve my skiing).
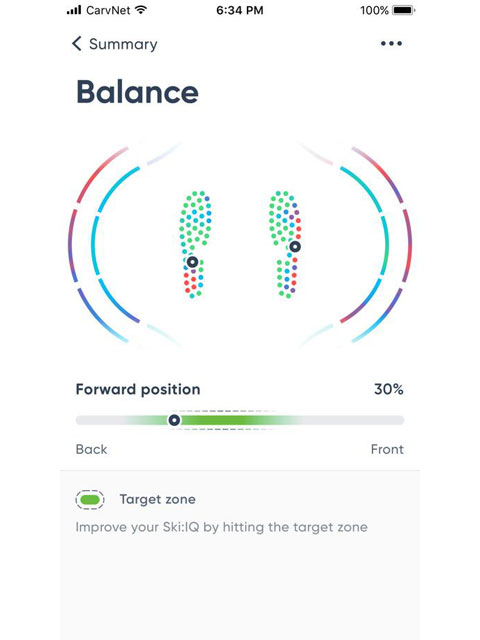
Carv is exactly what it says: it’s a digital ski instructor. It monitors your skiing performance turn-by-turn and talks to you as you’re skiing (of course, you can switch this off). Unlike a human instructor, who will tell you afterwards that you’ve done it all wrong, Carv tells you in real-time, so you can, on the next turn, change what you’re doing and get it right. Carv works with you on separate parts of your skiing: balance, angle, pressure, etc, but it doesn’t overload you with advice and information.
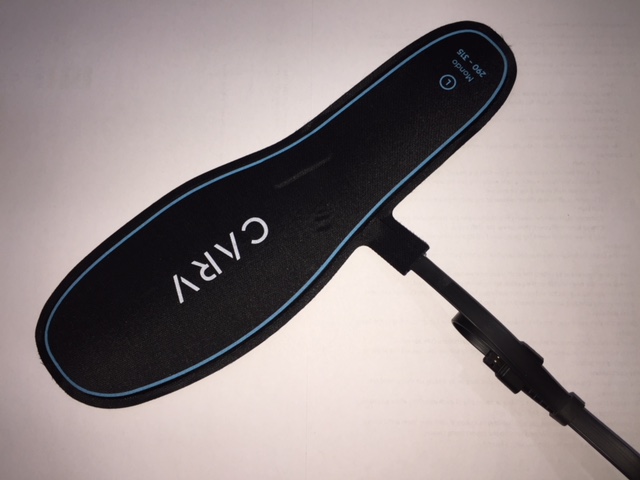
Carv comes in 3 parts: the insole (the core of the product), the tracker (essentially a battery and a communication device to connect to your smart phone), and an App. Let’s take a look first at the insole.
Carv Insole
This is the clever part of Carv. The insole is packed full of sensors that monitor various parameters of your skiing: edge angle, balance, pressure, G-force, and others.
The insole is packed full of sensors that monitor various parameters of your skiing: edge angle, balance, pressure, G-force, and others.
Because it’s sized to your ski boot, if you had a crazy idea of sharing it with someone else they’d have to have a similar Mondo size boot. The insole doesn’t appear to have been designed to be moved regularly from one person’s boot to another –the setup video mentions to take care not to bend the insole excessively when fitting it, suggesting that it might not like being moved between boots frequently.
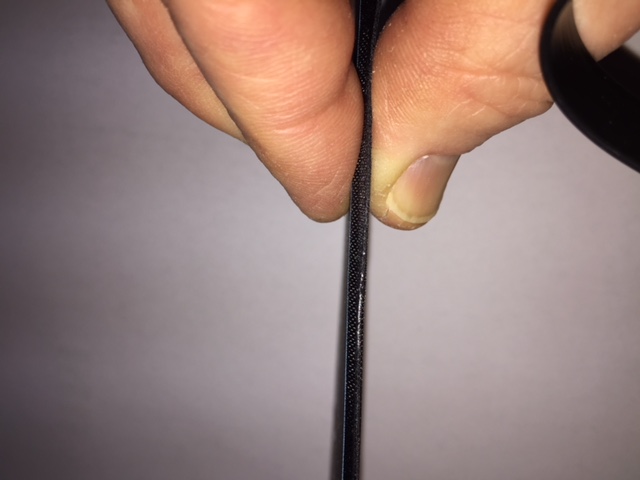
The insole fits between the boot shell and the liner. Before I took delivery, I was a bit worried about this as my son’s ski boots are fitted for racing and are therefore very tight. I was concerned about the insole raising the foot up and therefore squeezing the top of the foot against the boot. Well, that wasn’t an issue; the insole is amazingly thin, so thin that you don’t know it’s there. If you have moulded insoles (as I do) then don’t worry, they won’t conflict.
Well, that wasn’t an issue; the insole is amazingly thin, so thin that you don’t know it’s there.
Carv Tracker
The insole connects to the tracker (one for each boot) via a hard-wired cable to the insole. The cable needs to be disconnected from the tracker to allow it to be recharged. We recharged the batteries every evening so didn’t really road test its endurance. Suffice it to say that it wasn’t a quick charging process, so to avoid losing power when skiing I’d recommend recharging them daily.
The insole connects to the tracker (one for each boot) via a hard-wired cable to the insole.
Carv App
The brains of Carv is the App. We were using iPhones, but there is an Android version. The App provides you with lots of functionality, from drills, to challenges, to monitors, to free sessions. I started with the drills, but quickly (in my dreams) progressed to the free sessions.
I found the drills and challenges a mix of annoying and inspiration. The annoying bit for me was the Super Mario type sounds that resulted from achieving the goals, and not achieving these. But, this pales into insignificance when compared to the improvements to be had in skiing ability. It genuinely does up your game to another level – and beyond. I was able to work on those things that had held me back for years – remember my plateau comment? – and seriously improve my skiing. In fact, I’d honestly say Carv exceeded my expectations.
The annoying bit for me was the Super Mario type sounds that resulted from achieving the goals, and not achieving these. But, this pales into insignificance when compared to the improvements to be had in skiing ability.
Carv analyses your skiing and awards you a skiing IQ from each of your runs. This IQ is averaged and can be uploaded onto a leaderboard so you can see how good, or bad, you really are. It was very pleasing to see my IQ progress steadily as I worked through the drills and challenges. It was less pleasing to see my son improve faster and move into the top 25, leaving me down in the 80s!
I can see the Carv team continuing to develop the functionality as they learn more about the product. I just hope they don’t get it to the stage where it tells you that maybe you’d be better off trying some other sport – I’ll leave that to my son!
So, who is Carv suitable for. Well, I’d rule out beginners, novices and those improving to intermediate. You need to have become ‘one with your skis’ for Carv to be a benefit; besides, when you’re learning it’s so much fun in a class sharing each other’s experiences – Carv would simply get in the way, and it doesn’t laugh when you fall over. So, I’d suggest Carv is suitable for intermediate/advanced, and even expert. My son is using them to improve his racing skills to great effect.
Overall, Carv is for the dedicated and capable skier and it really is as good as their website claims.
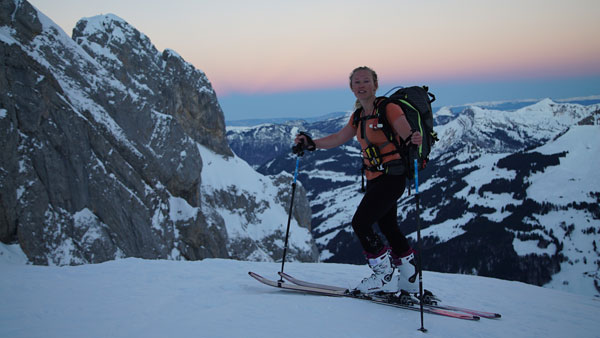
There has been a lot of press about the new S/Lab Shift ski binding from Salomon. After nearly a decade of R&D Salomon has produced a ski binding that can deliver downhill performance with touring capability. A ski binding that gives today’s freeride skiers a chance to “earn their turns” by touring uphill and then charging ‘big lines’ on the descent!
Salomon can tell you all about the ski bindings here; and, as previously mentioned, the freeride peak hunting athletes’ are screaming “Holy Shift”. But what does a novice, rookie, greenhorn, virgin ski tourer think of the Shift ski bindings? Well read on.
Having never ski toured before I was both excited and apprehensive when Shep, Salomon’s friendly ski tour guide, introduced me to ski touring. First the safety kit, including a transceiver which was very reassuring. And then the 99mm underfoot QST skis with S/Lab Shift bindings, and skins. All I will say is; “if you are into Transformers you’ll love these bindings”. A ‘click here’ and a ‘click there’; and you transform a touring binding into an alpine binding, and visa versa – “simples”.
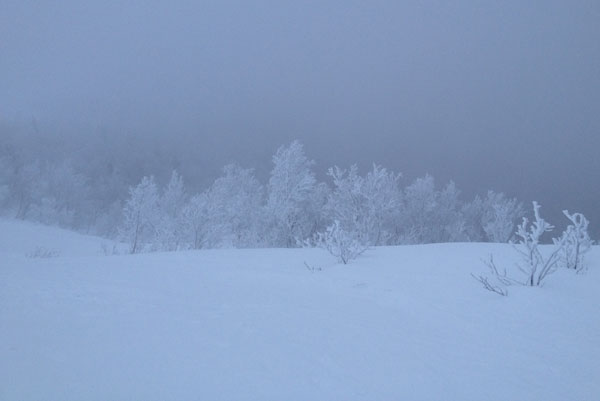
It was cold, windy, and in cloud; which gave my first experience of Sweden a rather ‘monochromatic’ outlook.
So with the skins attached and the bindings in touring mode, I managed to locate my boots securely. It takes a bit of practice, but I would have experienced that with any ‘pin binding’ – and you soon get the ‘knack’! We set off, nothing too adventurous at the side of the piste, but enough to understand the technique of going uphill with skis – without the aid of a button or chair lift. Needless to say it was more tiring, but it was also more rewarding – I now understand the term “earn your turns”.
It was now time to, ‘click here’ and ‘click there’, and transform the bindings into alpine mode. This I am familiar with, and they felt as good as the bindings I have had on any of my piste/all-mountain skis!
The whole experience was great, and I managed to impress Shep enough to allow me to join a more adventurous trip the following day.
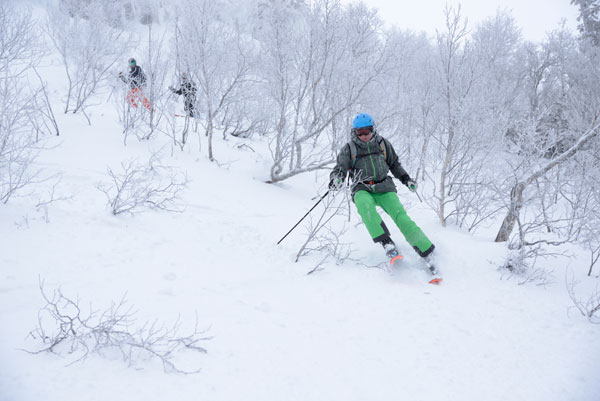
Again it was cold, windy, and in cloud; which gave my first experience of Sweden a rather ‘monochromatic’ outlook. We skinned up much steeper terrain, with a customary ‘zig-zag’, and once again the bindings performed brilliantly in touring mode. Once again the pleasure of being away-from-the-crowds, that ski touring gives you, was delightful. But as Sir Isaac Newton eloquently said; “what goes up must come down”!
I felt sorry for the trees, as we descended the powder fresh tree line. A twig here, a branch there; we became close friends.
If you have read my review of the Salomon XDR skis, you will know I’m not the most proficient off-piste skier; so with a ‘click here’ and a ‘click there’ I was ready to venture “outside my comfort zone”!
I felt sorry for the trees, as we descended the powder fresh tree line. A twig here, a branch there; we became close friends. Too close sometimes; but the bindings, in alpine mode, released with great aplomb! At the bottom it occurred to me, that while my colleagues made light-work of the tree line, it was I that was fully testing the bindings – as I ‘crashed’ my way down!
It’s been an interesting season so far in Colorado, USA. It’s had record low snow fall, record high temperatures, snowpack instability, and winds ripping through the valley – not what the locals have come to expect from this staggeringly vast, peak fill, snow playground in the Rockies!
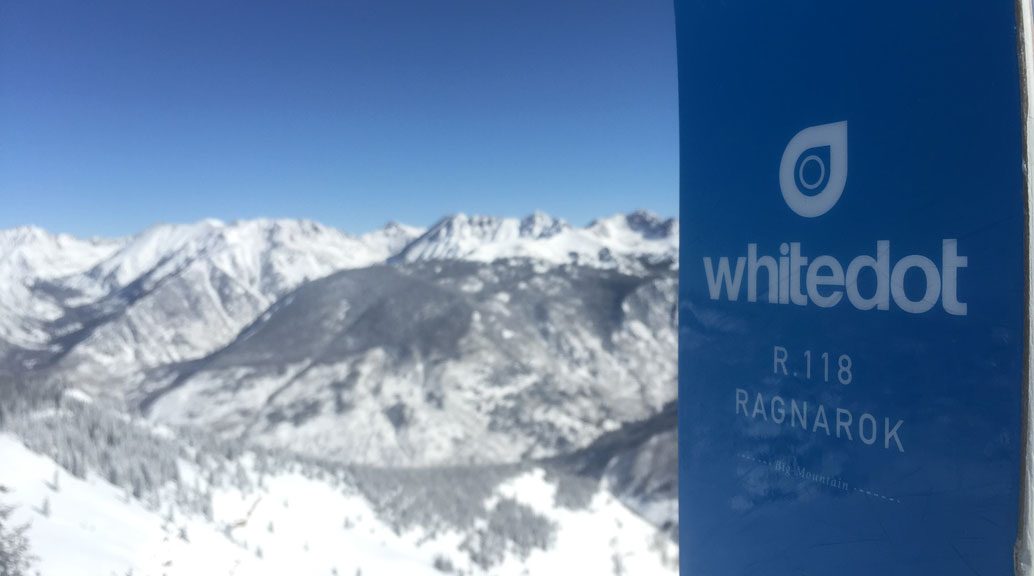
The Whitedot Ragnarok is the brainchild of Fred Syversen; and after a quick ‘Google Search’ it becomes very clear why these skis just want to charge everything you put in front of them! Originally the Ragnarok was a super stiff , but this second generation Ragnarok is a little more playful. With 118mm under foot, 143mm up front and 130mm in the rear the ski is definitely designed to float, and to charge face-first down powder lines and steep faces. Just looking at the skis; they scream “powder day”!
Just looking at the skis; they scream “powder day”!
However, like I said, “it’s been an interesting season”. So the deep powder days have been few and far between (although the snow is starting to come more regularly now) leaving sunny, chopped up half powder/half mogul filled runs, which isn’t really what most of us would call ‘ideal skiing’, but the Ragnarok has a different opinion. If you can manage to blank out the bumps, and your knees will let you, the Ragnarok will ‘smash’ through whatever you put in front of them.
But it’s not all ‘smash and grab’! The stiffness helps to add a fun ‘pop’ to the exit of hard turns; the minimal camber under foot is enough to carve corduroy with the best of the ‘short ski groomers’, and the rocker (both tip and tail) will make these big skis scrub their turns, through tight trees, with ease! Whitedot gave this ski its own category “The Fun Charger” and they hit the nail square and true on the head.
It’s as if the people at Swiss Army Knives gave the guys at Whitedot a pep talk before they designed this ski; it does everything!
I cannot say enough about how versatile this ski is; and that’s me having put standard alpine bindings on them! The Ragnarok has had me cruising Vail’s vast inbound powder fields, to boot packing out-of-bounds on East Vail’s endless selection of rolling pillow lines, open bowls, cliffs and tight trees. And not once did they disappoint! It’s as if the people at Swiss Army Knives gave the guys at Whitedot a pep talk before they designed this ski; it does everything!
And if you go for the Carbonlite Ragnarok, with a pin binding setup, those steep, remote exposed lines in your dreams will become a reality.
So it turns out us Brits, who live on an island, with a maximum height of 1,345m, and relatively little snow, make one-hell-of-a ‘big mountain’ charging ski.by
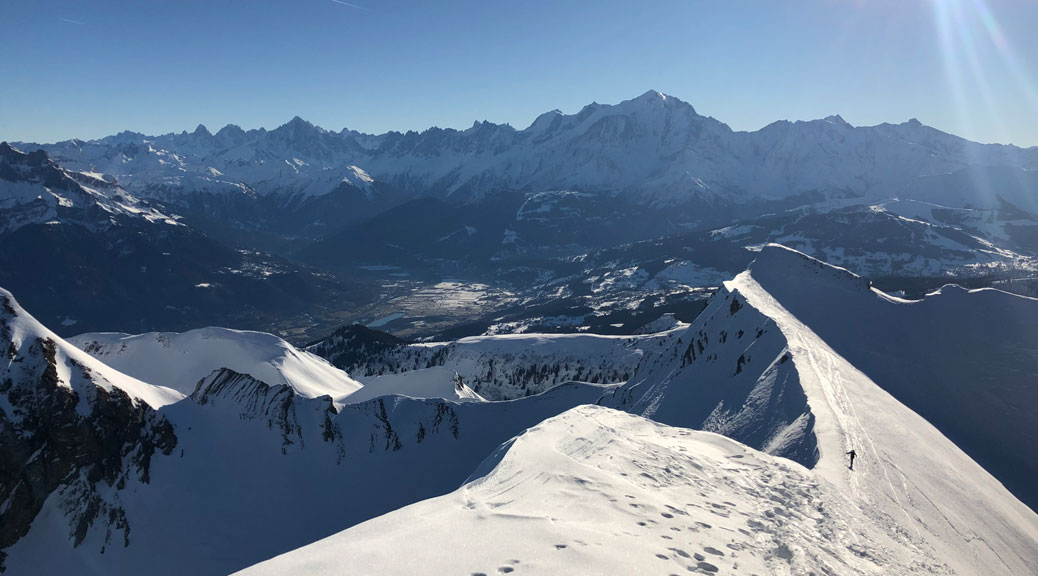
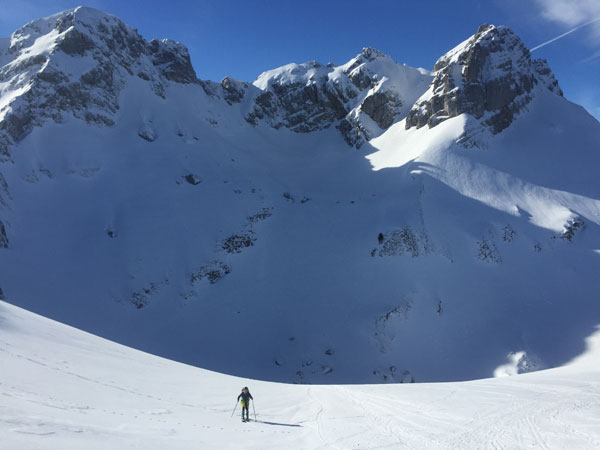
The day began with a big bowl of bircher muesli (oats soaked in apple juice) and a peanut butter and banana smoothie. Once all packed and ready to go we skied straight out of the front door to get the car and headed to the Col du Colombiere. With the col closed in winter, the tour begins with a nice a steady climb following what is usually the road. Perfect to get the legs warmed up before the steep top. The temperature at dawn was -14C, which made it bitterly cold on the hands when putting on our skins. Hence it was in our interest to get moving quickly.
The sunrise confirmed the forecast of a crystal clear sky, and highlighted the mountain peaks with a orange glow. Once around the first corner we were pleased to see a group of five, about 15 minutes ahead, sluggishly putting the tracks in for us. Perfect! After starting from the car all still wrapped up with gloves, down jacket and a head band, we were starting to warm up nicely. Knowing what lied ahead, the pace was gentle.
We made it to the top of the col with ease, but we knew from there the real climbing would begin.
We made it to the top of the col with ease, but we knew from there the real climbing would begin. Without wanting to get damp from sweating, and with the sun coming up over the mountains, we thought this was the perfect time to shed some layers, have a sip of water and get the sunnies on. To be efficient in the mountains, we always try and plan our stops and make the most of each rest break. This saves energy as well as time.
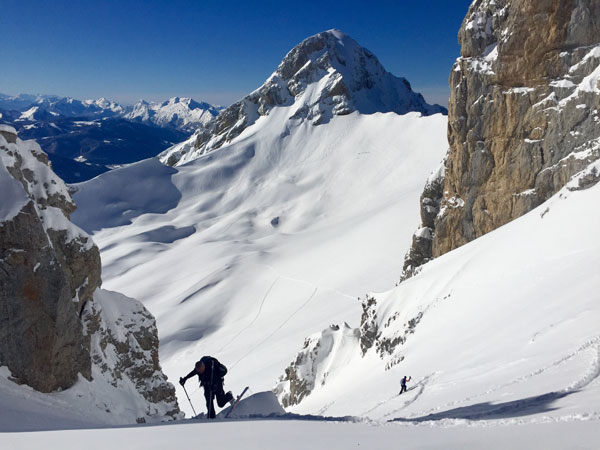
With the other group still in front, we were cruising along in their tracks all the way up to the point our couloir was in view. We cut off right, which gave us a good feel of the fresh snow, and got excited for the decent. After a steady climb of nearly 900 vertical metres we reached the couloir to the peak of Pointe du Midi. At which point two other skiers, coming from a different direction, had skipped in front. We weren’t complaining! Having been here before on an icy day, when we used our crampons to boot pack up to the top, today was a real treat. Soft and stable snowpack with a couple tracks up already meant we were able to stay on our skis and kick turn all the way up.
Soft and stable snowpack with a couple tracks up already meant we were able to stay on our skis and kick turn all the way up.
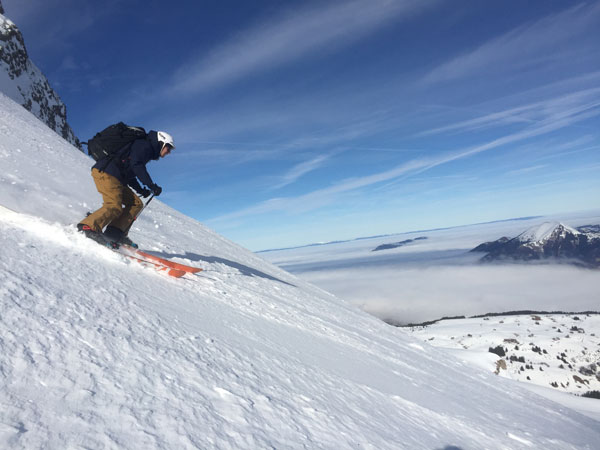
Quick tea break and a speedy transition from skins to downhill and we were off into La Combe Sauvage (the Wild Valley). The ski down was without a doubt one of the best descents I’ve done so far. Everything came together to make it perfect. No wind, blue sky, a foot of fresh ice cold snow on top of a solid base, combined with a 40 degree couloir. We were in heaven.
No wind, blue sky, a foot of fresh ice cold snow on top of a solid base, combined with a 40 degree couloir. We were in heaven.
And it didn’t stop there! With huge smiles on our faces and after a quick look back up at our tracks we were in to transition number two. Skins back on, down jacket off and we were back to climbing. This time only a 300 metre ascent but taking us to a second peak with clear views of Lake Geneva in one direction and Mont Blanc towering the endless peaks of the Alps in the other. It was time to tuck in to our still warm veggie tagine and admire the views.
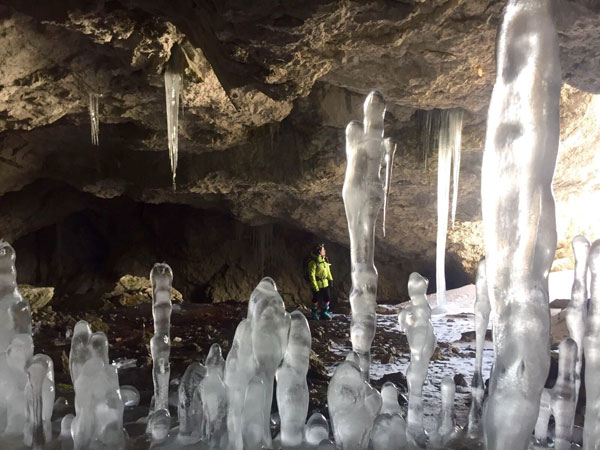
Inside were beautiful icicles from the floor to the ceiling, bigger than two of me.
Transition number three done and we were in downhill mode. Having read about ice stalagmites in a cave nearby, we headed over to an opening of a cave and lucked out. Inside were beautiful icicles from the floor to the ceiling, bigger than two of me. The ice stalagmites were just as impressive, growing up from the ground as tall as 6 feet. With the day warming up we were keen to get a move on, so after taking a few snaps we were back on our skis and had the rest of the descent to enjoy. Perfect snow, super fun terrain and the sun still shining.
The final push was a long but steady traverse of only 100 metres of vertical but around 3km in distance back to the car. We had two more transitions of skins on and off, by which point we were getting faster and wasting less and less time. Our total ascent was 1320m. We covered around 7km in distance. And our circular journey took us 5hr 45min. For us it was the perfect day!