In a nutshell alpine ski bindings are a vital piece of equipment; not only securing your ski boots to your skis but also giving you additional safety features to prevent dreaded injuries. Getting the correct bindings is important and is specific to your skill level as heavier more aggressive skiers require bindings with a higher DIN whereas lighter beginners would require a lower rating.
Various binding manufactures have different safety features that help release your boot in the event of that embarrassing crash that you hoped nobody saw; from vertical toe release and sliding anti friction pads. On top of the safety aspect bindings form the bridge between you and your skis transferring every little movement directly to the skis. There are two way to mount your bindings:
Track (Rail) Mounted Ski Bindings
The most common way of mounting bindings is either on a track or rail where the heel and toe piece simply slide on, generally found on Piste orientated skis. These bindings are mounted onto the skis at the factory meaning they are ready to be used straight away.
Pros
Mounted and adjusted numerous times
Generally allows the ski to flex more naturally
Cheaper than buying drilled bindings
Cons
Makes your set up heavier
Less choice with bindings
Generic binding position
Drill Mounted Ski Bindings
The drill mounted method although less popular is becoming the way to go with many people turning towards all mountain skis as riders start to venture off Piste into the powder fields. A qualified technician would then fit these bindings to the ski with a few additional pieces of information which this guide will cover later.
Pros
Wider choice of bindings
Can be tailored to your ability and ski
Lighter and sometimes stronger
Choose where the bindings are mounted
Can be customised with ramp angles
Cons
Have limited amount of times it can be repositioned
Tends to work out more expensive over track mounted bindings
Less adjustment for varying boot sizes
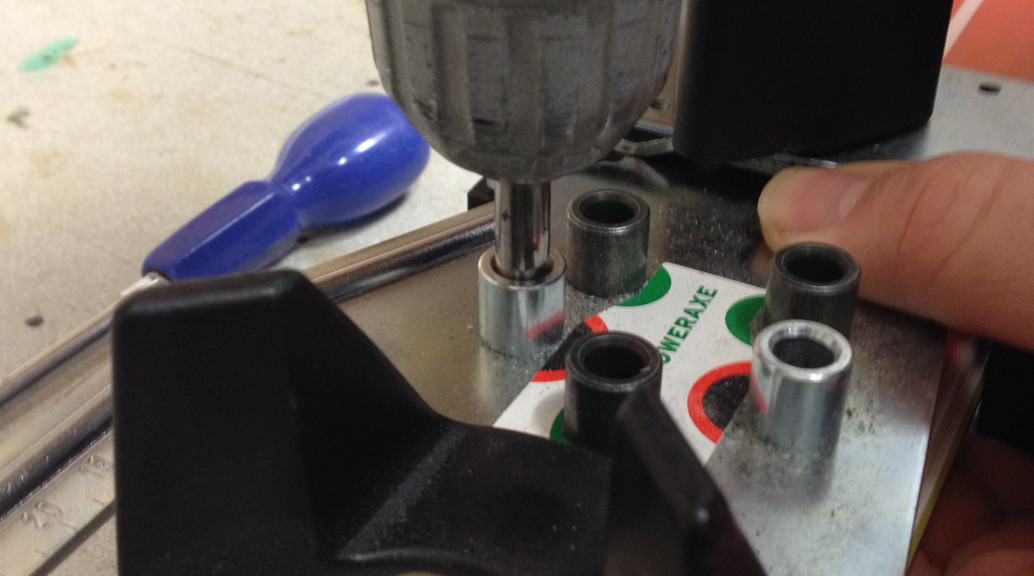
Process of Drilling Skis
The process behind drilling skis is relatively straight forward for a trained technician; and before you ask “no we don’t drill freehand”. We use special jigs and drill bits that come directly from the binding manufacture to ensure the correct drilling, every time! The technician will use your ski boot to adjust the jig length and then that crucial decision of where to have your binding mounted ski centre, ski forward or ski back. We know this can be a hard decision to make so below we go into detail on the different positions.
Choosing The Binding Placement
So you have chosen the ski and bindings now it’s time to make another decision where to mount your bindings! There are lots of different factors that need to be taken into consideration and questions to be answered. The first question to ask yourself and one that requires an honest answer is ‘what terrain am I going to be skiing on?’ Generally the answer will be all mountain, in this case its best to follow the ski manufactures recommended position.
This recommended position will have been determined by many extensive tests and gets the best all round performance out of the ski. Although this is the ‘recommended position’ you don’t have to follow this; for example the Line Afterbang can be mounted further back if you will be riding all mountain.
Park and powder skiing are two extremes where the correct mounting position is vital. Park skiing generally requires the bindings to be mounted ski centre due to completing aerial tricks where equal balance is important to performing the trick successfully and safely. Whereas powder skiing requires the bindings to be mounted back from the centre allowing the front of the skis to remain elevated naturally floating on top rather than under the snow.
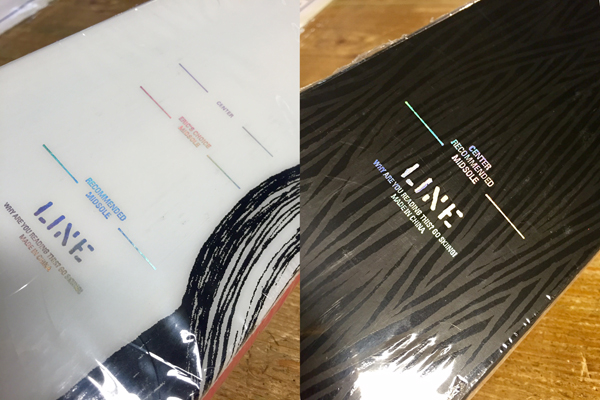
Using Line Skis as an example it’s easy to see how they believe there skis should be mounted. Above on the left we have the Mr Pollards which is a powder ski and on the right we have the Afterbangs ideal for park rats. You can see on the Mr Pollard that there are three mounting lines: at the front ski centre, in the middle Eric Pollards preferred line*, and at the back we have Line recommended. However on the Afterbang there is only one line, the centre line.
*Eric Pollard prefers his mounting line to be slightly forward due to his unique skiing style. He likes to use this ski in the freestyle category, back country and for touring.
The brands, in their own way, will mark on the ski where the centre of the ski is and also the recommendation for drilling. Where it gets interesting is when the question is asked “I want to buy this big ski but want to ski it all over the mountain including the powder, piste and possibly use it in the park” The short answer is that it is possible but you won’t get the full benefit. In an ideal world, you would have a powder, piste and park set of skis but in reality this is not the case.
At Tallington Lakes Pro Shop we have highly knowledgeable staff that are passionate about snow sports. They are always on hand to assist and advise, so why not pop along and have a chat with us? We also boast an extensive workshop with highly trained technicians that can get those skis and bindings mounted to get you on the slopes ready for this season!