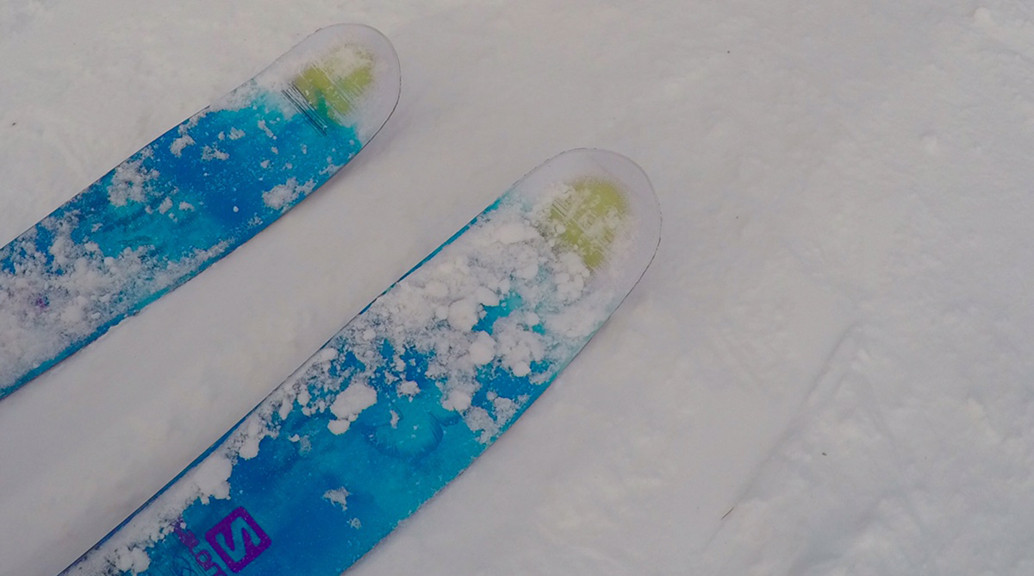
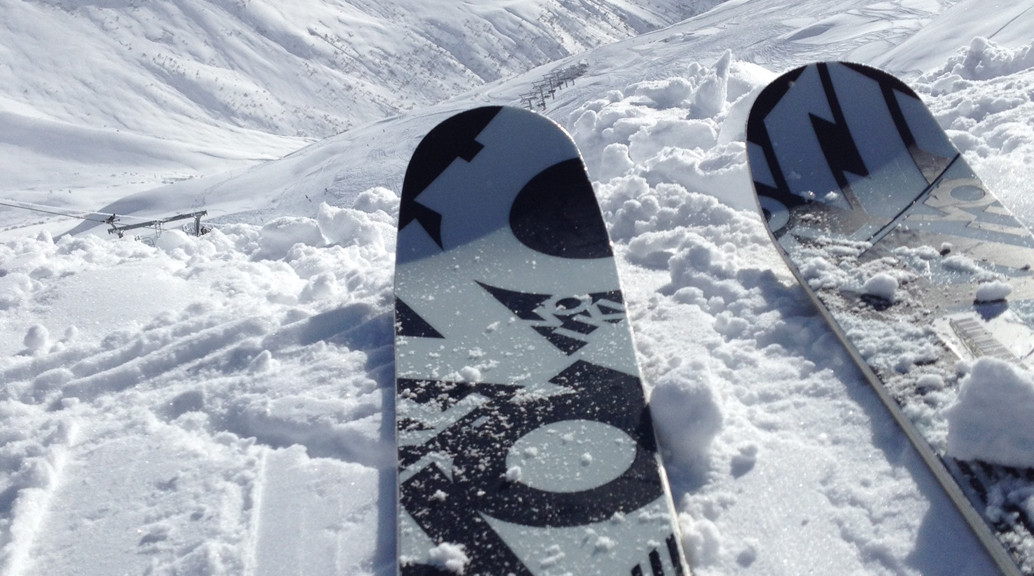
The women’s Salomon Q-83 Myriad all-mountain skis.
Recently it was that time in your life that every skier loves; time to purchase a new set of skis! I have skied several times around Europe, in different conditions, but whenever I am asked “what kind of skier I would class myself”, I’m not sure! I enjoy blue and red runs, and will go down blacks – if I have too. I’m learning to better my technique in the soft stuff, but most comfortable on piste. I enjoy my skiing, and to me, that is the main thing.
I’m learning to better my technique in the soft stuff, but most comfortable on piste. I enjoy my skiing, and to me, that is the main thing.
Salomon Q-83 Myriad Women’s Skis
Personally, there are loads and loads of skis out there and, maybe as I am girl, I’m not one of these people who will do hours and hours of research. I summed up my requirements, to my other half, I wanted an easy turning ski that looks nice and will help me progress. He gave me a few options but the one that stood out most, and seemed to suit my ability, was the Salomon Q-83. As I said, I’m not very technical, so my boyfriend wrote the next part:
The Salomon Q series has proved a huge success and offers a vast range of skies for different abilities and types of skiing. The Q-83 is aimed at female intermediate skiers; that are looking to progress into skiing powder (the softer stuff) for the first time. It offers early wide edges (you’ll notice the bulge) and a hook free taper on the tip to allow for easier turning on piste. Basically this makes the ski shorter, and therefore easier to turn! The ski has a full wood core so will easily ski at speed and will still maintain plenty of control on piste. The ‘honeycomb’ in the tip dampens any vibrations. Finally, The ski has a utility rocker tip and tail which allows the ski to float easily in the softer ‘fluffy’ stuff.
The first point that I really noticed about them from the skis that I have previously used was how easy it was to turn. I have struggled previously with turning skis of this length but found my Salomon’s very easy. Thankfully, this helped with my confidence and when the time came and I decided to head off into the powder: lets just say it didn’t exactly go to plan the first time but after a few falls into the soft fluffy snow I started to gently get the hang of it which is something that I have never been confident enough to do.
The ski has a utility rocker tip and tail which allows the ski to float easily in the softer ‘fluffy’ stuff. Or not!
Back on the piste, I felt that I was getting a little quicker and more confident the more I skied them. By the end of our trip, with the help of my boyfriend I was starting to learn to carve the skis. To me, the skis were exactly what I wanted. They were soft and easy to ski but seemed to be responsive when I started to pick up a little speed. My turning has improved dramatically and I even managed to gain a little confidence skiing in the powder. Overall, I really enjoyed these Salomon Q-83 Myriad skis and glad I went for them. I am looking forward to skiing them next year.
Finally, the fact that they are really pretty sums everything up but I need to remember not to look at them whilst skiing.
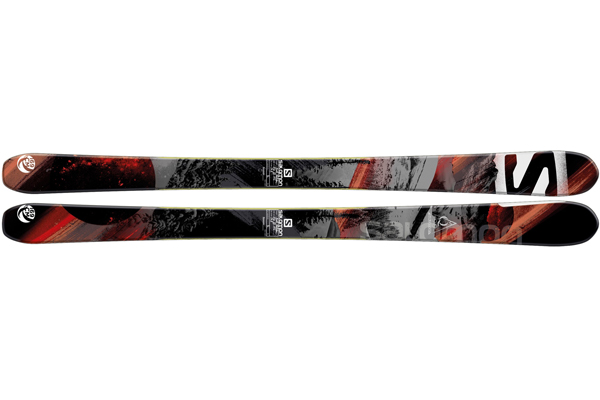
Why I purchased the Salomon Q90 skis. In the past I have just gone with the flow and hired my skis, but now I’m at a skill level to know what I want ‘performance wise’ from a set of skis! At first the shear amount of choice was overwhelming but after reading reviews and watching videos I chose the Q90 2014 model; mainly for its all mountain performance and being aimed at intermediate to advanced level riders. I class myself at an intermediate level, consequently, these skis will be suitable as my skills progress.
Salomon Q90 skis (2014).
Key Ski Facts:
Full wood core
Semi sandwich construction
Hook free taper
Pulse pad
Gentle rise tail (partial twin tip)
Wide edges
Carve zone
Total edge reinforcement
Utility rocker
169cm (130mm tip + 88mm waist + 116mm tail)
Turn radius 15.5m
Awards (skiing magazine official selection)
2014 Model
1510g (per ski)
Intermediate – Advanced
After picking the Q90 skis I wanted a binding suited to a mix of riding styles. The best one available at the time was the Marker Griffon 13, which is geared towards the ‘freeride’ market! This binding not only looks amazing but has the performance to match. My recent trip to Les Arc 1800 was the first time I tested these bindings and all I can say is amazing, they didn’t ejected when riding hard and no matter how much snow built up on my boots or skis these always engaged correctly unlike previous bindings I’ve used.
Marker Griffon 13 ski binding.
Next seasons Marker Griffon 13 ID bindings recently achieved the ISPO Segment Award for its compatibility with not just alpine but touring boots too which just shows the quality and advancement Marker has made in the past few years! So what is ISPO you ask?
Now back to the skis! The Salomon Q90 is a fantastic all mountain ski its full wood core made it extremely responsive on piste and helped to reduce chatter at high speeds giving me the confidence to push myself further.
Due to the wide design of this ski I thought the skis would struggle on piste when it came to carving, but no, it handled short and long carve turns extremely well; probably due to the integrated ‘carve zones’ which increases power and edge grip along the traditional cambered section. Unfortunately most of the off Piste was tracked and therefore only got to ride powder in a few places where it floated effortlessly due to the wide tip and tail.
Overall this whole set up is perfect for those wanting to explore new terrain giving the option for a mix of both on and off piste when the conditions are there. I give both the Q90 and Marker Griffon 13 five stars!
How aware are you about the risk of avalanches? One of our guys jumped at the chance to improve his knowledge with Salomon Mountain Academy. Their website offers a theoretical course of eight modules for just €29, but they do the first introductory chapter for free. So it would be foolish not to check it out. Here’s his thoughts:
The chapter took around 15-20 mins to complete, and each subsection was a mixture of video, text and pictures. It gave me enough information to realize how ignorant I actually am when I go to a resort; and actually how lucky I have been in the past, blindly following better skiers than me around off the sides of runs etc. Its what we all do to get better and push ourselves right?
Some of the bits will be pretty self explanatory to people that have skied a few times, however there are some very interesting bits of information. One of the biggest statistics, that opened my eyes, was that 55% of Avalanche deaths happen with a Level 3 Avalanche Risk, and only 1% on Level 5. Basically most of us are sensible enough to know not to venture off the pistes in a Level 5 but a Level 3 seems to be an acceptable risk, being middle of the scale, despite it officially translating as “Considerable Risk“.
The chapter finished with a multiple choice quiz, which had some questions in which I guess are covered in other parts of the course. Again opening my eyes to how little I know. Consequently, I’ll be reading up on the whole course before heading off next week!
On a side note, Epic TV are doing an short video series on ‘off piste skiing’ with Graham Bell from Ski Sunday. Also worth a look! The series aims to explain how to prepare your gear and yourself before heading into the mountains for your backcountry adventure.
So what does a quinquagenarian, recreational skier think of the Volkl Kendo skis? Volkl kindly provided a pair for me to review on my annual ski holiday to La Rosierre, France.
Quinquagenarian Recreational Skier
I taught myself to ski at the Lecht, Scotland in the 80s and had a few lessons, in Austria, while the children were in ski school (the only way to convince them to go was to say we were all having lessons)! I go skiing once a year, and look forward to six days of fun sliding down a mountain. I’d class myself as an intermediate to advanced skier, but fully aware that purist would pull my technique to pieces. I’m happy that I can control my skiing, at speed (which means I think it’s fast, but my sons tell me otherwise), down red and some black runs! Historically I would hire what are considered piste or all-mountain skis. And when I say all mountain, they are 80% piste 20% off piste.
Fortunately most holidays have been groomed pistes (corduroy), until last year when knee-deep powder on the piste took a little fun out of the sliding down a mountain! I wasn’t very good in knee-deep powder; was it me or was it the skis. Whatever it made me think; I go skiing for six days a year, what type of skis should I buy? Piste or something suitable for powder? If money was no object, I’d have one of each.
The Kendo skis are a 50-50% piste off-piste ski, for an advanced to expert skier, so may be ‘punching above my weight’ with these skis!
The first thing I noticed was how much wider the skis felt, the waist was in fact 10mm wider at 90mm compared to my old skis. The ski also had a much larger rocker at the tip which helps push the ski up on to the powder rather than slicing through it. And the bindings were drilled onto the ski, rather than the usual rail system I was familiar with.
So it was in at the deep end (literary) because there had been plenty of snow in the resort! I would have like a few groomed pistes to find my ski legs, but that wasn’t an option, so the first morning wasn’t great. However after a stern talking to myself, and a few pointers from my son, the afternoon was better; and I began to embraces the conditions and what the Kendo skis offered!
During my week’s skiing we had over a metre of snow, and poor visibility, so not quite the conditions I had hoped for, but never-the-less ideal conditions to test the skis.
La Forte, La Rosiere France
So what did I think? A bit like the skis 50-50. The skis were a lot stiffer than I am use too, because they are designed for someone of a higher ability, and turn radius was bigger than previous skis at 20.8m; so I found myself having to work extremely hard down the slope. The poor visibility didn’t help! I also struggled a little on the ice, but that may be more down to technique and not fully engaging with the ski. However, what I did find, is that the skis floated through the powder, which had hampered me before.
When the visibility improved, it was a different story. With greater confidence I carved with gusto down the piste. The skis just ploughed through the powdery ‘crud’, that had built up from other skiers, thanks to the ‘rocker’; and the large turning radius no longer hindered my progress, as I zig-zagged down the slope. I had fun!
I now understand where the guys in the Pro Shop were coming from; a ski for all conditions because the weather and snow conditions cannot be guaranteed for the six days I am in resort. And these Kendos certainly ‘cut-the-mustard’.
I think I had ‘bitten-off-more-than-I-can-chew’ with the Kendos, though, but I certainly like that style of ski. Perhaps a similar all-mountain ski that is more suitable for my ability, such as the Line SuperNatural skis would be my choice. And this is an important point to note when buying skis – be honest!
When the visibility improved, it was a different story. With greater confidence I carved with gusto down the piste.
Epilogue: there isn’t a right or left ski, but I found I skied better when I could read ‘Volkl’ across the tips of the skis 🙂
Here’s our expert guide to this seasons best snow jackets and pants; for men and women.
Picture Dayton Jacket
Gone are the days of just 10K/10K jackets, today Picture have produced this awesome technical jacket with a rating of 20K/15K allowing defence against anything that the mountain may throw at you. What I love about the Dayton is the ability to add in a mid layer and connect it via a zip turning it into one continuous item and best of all is extremely warm perfect for those of you that feel the cold much more!
Generally I would pick a tailored fitting jacket despite the Dayton being a freestyle orientated fit it still felt great with the medium being the ideal size for me allowing more layers if needed. The material feels extremely hard wearing only time would tell how well it stands up to the rigours of riding through trees etc but my initial thought is it will be great, not only that but Picture have incorporated recycled polyester into the shell material giving you piece of mind that the lack of snow at the start of the season isn’t down to you.
What I love about the Dayton is the ability to add in a mid layer!
Pros:
Internal Atlas mid layer connects seamlessly
Good fitting adjustable hood
1 Large mesh pocket with 1 smaller zipped pocket
Durable hard wearing material
Extremely warm especially when combined with the Atlas mid layer
Fully waterproof taped seams
Soft lined chin area helps to prevent chaffing
Good waterproof rating 20K
Good breathability rating 15K
Thermal dry system
Cons:
Wrist gaiter feels too tight around my hand
Not a tailored fit
Small non slip shoulder pads
Slightly too loose around the neck/chin area (for me)
Fit: Medium jacket was a good fit not too baggy despite not being a tailored fit, looks great especially when the Atlas mid layer is added. (My details 180cm Tall, 32” Waist, 37” Chest, 75kg)
Picture Books Pant
This is the ultimate addition to the Dayton Jacket in combination these Book pants look awesome! Unlike any other snow pant these come equipped with its own powder skirt that is extremely stretchy, fitting my waist perfectly just giving an extra layer of protection against the powder.
The inside has a super soft fleece liner that feels great and I found help wick some moisture away from my legs perfect for a long days riding. What I didn’t like was there were no reinforced cuffs to guard against sharp ski edges but if snowboarding this wouldn’t be a problem. As with fit I wasn’t a big fan of the baggy look but if you are after a freestyle look these would be perfect.
Pros:
Warm and soft fleece liner
Large inside thigh vents with contrasting lime green netting
Extra stretchy waist powder skirt
Tags to attach the Drayton jacket
Metal boot hook
Good waterproof rating 20K
Good breathability rating 15K
Cons:
False cargo pocket
Doesn’t have reinforced cuffs
Slightly baggy feel and look
Fit: Medium pant was a good fit around the hips and waist with a slightly baggy/freestyle look but some people may like this. (My details 180cm Tall, 32” Waist, 37” Chest, 75kg)
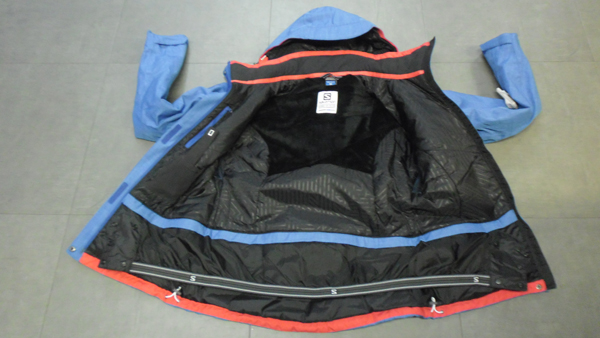
Helly Hansen Progress Jacket
First off Helly Hansen have really progressed their technology and design with this jacket, personally it is my favourite mid ranged jacket we sell not only is the price great but it has the tech to match with its 15K/15K waterproof and breathability ratings! Unlike others with the same ratings the Progress Jacket has a soft stretchy outer fabric which adds another dimension to this already awesome jacket.
Although not tested up in the mountains the added Primaloft makes this a very warm jacket in temperatures around 0 degrees with enough room for added mid/base layers for colder conditions. My only negatives with this jacket are that the zips aren’t taped only a real issue in extreme heavy rain and there are no wrist gaiters which would allow snow to get into the jacket sleeve when riding through deep powder.
The Progress Jacket has a soft stretchy outer fabric!
Pros:
Large cuff openings
Internal media pocket
Large fully adjustable hood
Soft external shell material (slightly stretchy)
Large side pockets
Good underarm mesh venting
Lightweight with Primaloft insulation
Good waterproof rating 15K
Good breathability rating 15K
Cons:
No wrist gaiters
Slightly short in the length
Zips aren’t taped
Fit: Small jacket was a good tailored fit with good length in the arms yet comes up slightly short in the body but once combined with the pants shouldn’t be an issue. (My details 180cm Tall, 32” Waist, 37” Chest, 75kg)
Helly Hansen Legendary Pant
This is the perfect addition to the Progress Jacket, if I hadn’t already got a complete set up I would definitely get this pant after trying it on and the integrated tech it has! What I like about this Legendary Pant is 3 keys points; reinforced cuffs which perfect for skiers like myself helping to prevent unwanted cuts, 2 way stretch Helly performance fabric gives excellent levels of protection against the elements and finally the tapered fit around the knees helping minimise the bulky look you sometimes get with snow pants.
I forgot to mention the additional internal clip that helps stop the traditional single button from popping open when you sit down or are riding hard which has happened to me many times in the past. My only real concern with these pants is the small thigh vents which could cause you to get too hot during the warmer spring months.
Pros:
Reinforced cuffs
Taped pocket zips
Soft external shell material (slightly stretchy)
Lightweight
Great fit/length
Dual button clip waist closure
Good waterproof rating 15K
Good breathability rating 15K
Primaloft insulation
Cons:
Slightly small thigh vents
Single rear pocket
Fit: Medium pant was a good fit around the waist with a tailored fit that narrowed towards the knees. (My details 180cm Tall, 32” Waist, 37” Chest, 75kg)
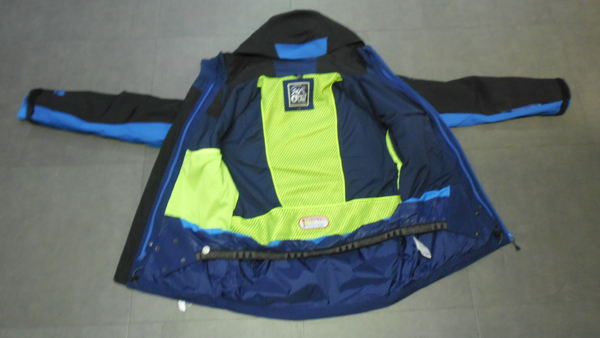
Roxy Sassy Women’s Jacket
First off trying on this jacket it felt slightly baggy around the shoulders but a good fit around the waist despite this it was extremely comfortable and felt really warm in the zero degree conditions we tested it through. What was unusual with this Sassy jacket was the contrast between the textured grey material and the smooth yellow giving this an edge in the looks department.
For the brief time wearing this jacket we are confident it will meet and excel your expectations up in the mountains the only two negatives to consider are the button on hood rather than a zipped one and also no thumb hole in the wrist gaiter which can ride up when putting on gloves. Overall a great piece for the 2016 winter season with 10K/10K waterproof and breathability rating.
The Sassy jacket it felt slightly baggy around the shoulders but a good fit around the waist!
Pros:
Mixture of hard wearing textured and smooth material
Fully adjustable hood
Good mesh lined venting
Fully insulated
Fleece lined rear back pad
Jacket to pant attachment
Soft fleece lined chin guard
Cons:
Button on hood rather than zip
No thumb hole in wrist gaiter
Fit: Medium jacket was a good fit around the waist but felt slightly baggy around the shoulders doesn’t feel like a slim fit more like a regular higher up. (My details 170cm Tall, 30” Waist, 36” Chest, 66kg)
Roxy Winter Break Women’s Pant
Heading away on the winter break of a lifetime? After testing this pant we think this is the one for you! Overall the pant felt amazing easily providing comfort for a whole days skiing or snowboarding. The velcro adjustable waist gave me the ability to fine tune the fit whether I had layers underneath or not it coped well.
When riding hard I have had previous pants pop open but I found the triple button/clip closure was bulletproof with the added ability to expand the cuffs to accommodate my ski boot with ease. A nice feature was the lift able cuffs helping to reduce the risk of getting covered in dirt when walking across car parks or roads. The only real negatives were the rear velcro pockets which could pick up snow and also this colour could show dirt fairly easy. Overall a great pant.
Pros:
Adjustable velcro waist
Triple button clip waist closure
Heavy duty zips
Smooth hard wearing fabric
Button up cuffs when walking
Mesh lined venting
Expandable cuffs
Cons:
Velcro rear pockets
Colour could show dirt easily
Fit: Medium pant nice fit around the waist with a more relaxed fit and feel over the Salomon fantasy. (My details 170cm Tall, 30” Waist, 36” Chest, 66kg)
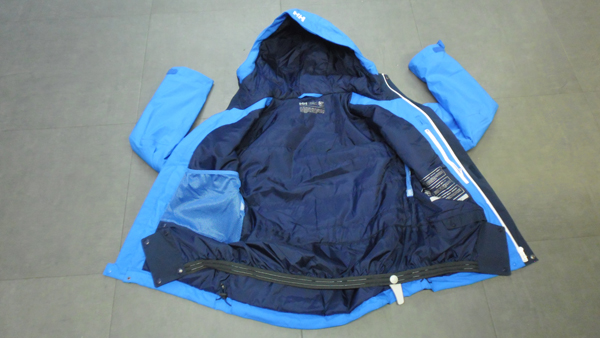
Salomon Fantasy Jacket
What an amazing jacket certainly covering all my desires and fantasy’s I would want from a ski jacket whilst up in the mountains! First off trying this jacket on sends me into another world the fit is perfect and also comes with a fleece lined back which is both soft and provides excellent levels of warmth.
On those snowy days the fully adjustable hood will be perfect giving an extra level of protection. Having this on for just a few minutes raised my body temp but no problem as it has large under arm vents which cooled me down in a matter of minutes. My only real negative is the tech specs are slightly low to what I’m use to but still perfectly adequate, with 10K/10K waterproof and breathability rating, and the wrist gaiter doesn’t come with a thumb hole which slides up when putting gloves on.
Certainly covering all my desires and fantasy’s I would want from a ski jacket whilst up in the mountains!
Pros:
Fleece lined internal back
Lightly insulated hood with peak
Soft fleece chin guard
Fully adjustable hood
Hard wearing textured material
Large under arm vents
Internal media pocket + strap
Taped zips
Cons:
No thumb hole in wrist gaiter
Couldn’t find any more
Fit: Medium jacket was the right length in both the arms and body with a tailored fit hugging the body. (My details 170cm Tall, 30” Waist, 36” Chest, 66kg)
Salomon Fantasy Pant
Shell pants are great but don’t offer the insulation many people want, whereas this Fantasy pant is fully insulated tested outside around 0 degrees these pants were extremely warm and felt great due to the soft internal fleece lining. The external twill material is extremely hard wearing standing up to branches and sharp ski edges with the reinforced cuffs.
With this pant there isn’t an expandable cuff but not a big issue due to being quite wide anyway but when it comes to spring or those warmer blue bird days there is no mesh venting to help cool you down so requires removing layers. Overall this is a great pant at a good price!
Pros:
Fully Insulated
Adjustable velcro waist band
Dual button clip waist closure
Hard wearing textured material
Internal soft fleece liner
Multiple front pockets
Reinforced cuffs
Cons:
Tight waist
No expandable cuffs for boots
No mesh vents
False rear pockets
Fit: Medium pant was a little tight around the waist but fits great everywhere else, the slim fit doesn’t feel too tight good movement overall. (My details 170cm Tall, 30” Waist, 36” Chest, 66kg)
To see our full range of technical snow jackets, please click here, and for snow pants click here.
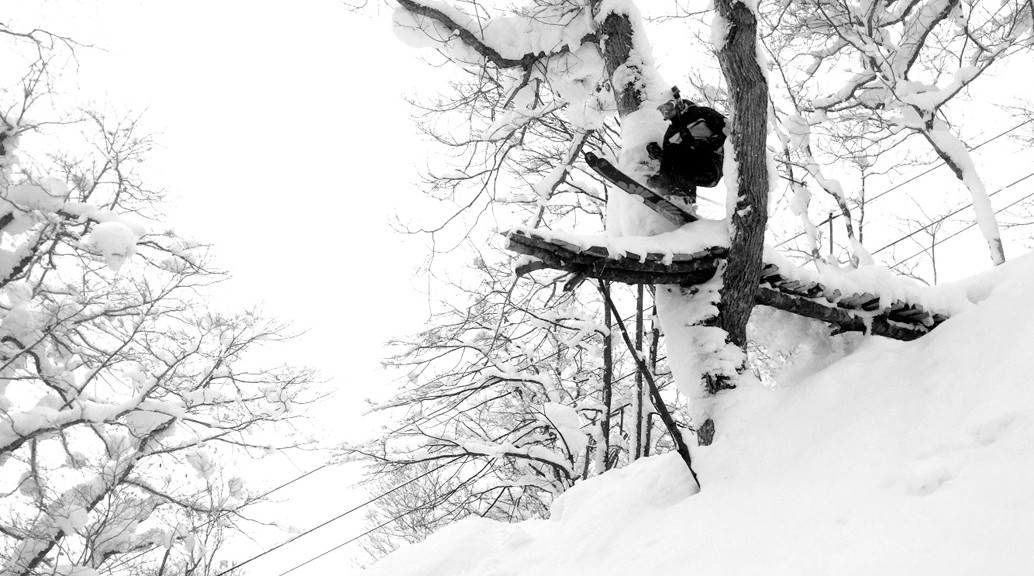
Rusutsu is located on the other side of Mount Yotei and takes about 40 mins to get to from Hirafu where we are based. It is somewhere I have wanted to ski since seeing an article a few years ago about some locals who have built a side country park in the forest. It is built solely from fallen wood and was built in the summer season before the snow came in the winter. It has created a truly unique ski environment which fuses both elements of park and the backcountry. With all this in mind I was stoked to be on the bus heading towards Rusutsu.
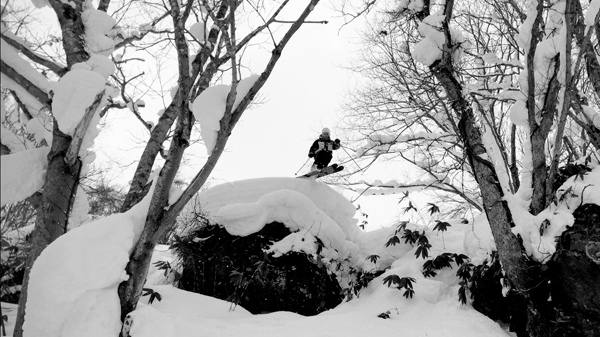
When you arrive in Rusutsu it is a bizarre winter wonderland, the resort consists of just one large hotel and that is situated next to a huge closed theme park. It makes for an amazing scene with ferris wheels and roller coasters coated in deep pillows of snow with a serene almost eery ambiance created by the lack of people in the area. It is the biggest ski area in Hokkaido with three separate mountains but few people stay here and the only visitors seem to be the people day tripping on the bus. This makes for one of the most incredible resorts I have ever been to. We arrived to waste deep fresh powder and were doing lap after lap without seeing anyone.
The terrain is the best I have seen in Japan yet, with longer vertical and a really fun spacing in the trees making for an epic day. We found some good pillows early in the day just under the chairlift and spent the morning sessioning them, before moving over to the side country park.
The side country park is an incredible feat allowing you to ski features you could only dream of in back country terrain accessed by a chairlift. There are rainbow trees, tree gaps and man made pillows made from scaffolded platforms. I had a couple of hours checking out the features and can’t wait to return on a big powder day as there are endless options for progressing your skiing. By the end of the day it was hard to think of a better day skiing. We had ridden empty powder for the best part of eight hours without seeing anyone in some of the most playful terrain you could think of. I will no doubt be calling Rusutsu my second home now!
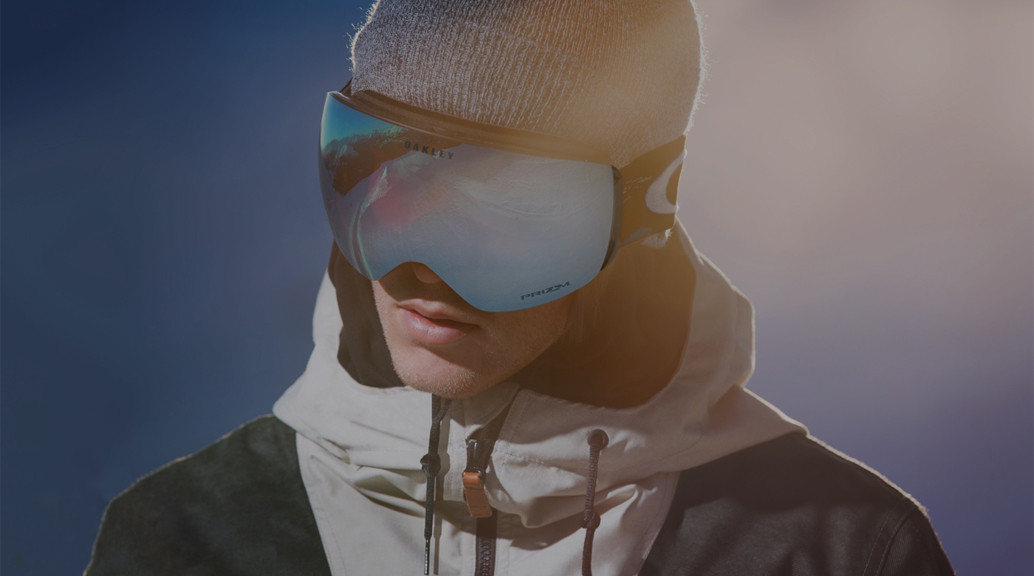
When you look for your next set of snow goggles; what do you consider: style, do they match my outfit, price, when am I going to wear them (all of the time or just in the low light), do they fit my helmet?
However, perhaps the biggest oversight is the use of goggles as a vital piece of protection! We protect our head (well we certainly advise you to do so), and some go that extra step and wear body protection. But I imagine few of us choose a set of snow goggles on the basis of eye protection.
Eye Protection
Since working at Tallington Lakes Pro Shop my understanding and approach to eyewear has dramatically changed. During my first years skiing I had very standard snow goggles, no massive brand name, I just brought cheap with the mindset I only use them once a year. And truthfully I brought my first set of Oakley Crowbar goggles on style, with little thought for anything else, via the internet and I was lucky they fit me and my helmet well.
So after different goggle brand training, I purchased my second set of Oakley Splice goggles in store after trying numerous ones on with my helmet. I found they fit better than other brands, the peripheral vision was far superior, and the level of protect Oakley offer made them an obvious choice.
That being said I would like to point out that all goggles we sell online and in store are CE approved, and perfectly suitable for all your wintery needs. Oakley, like in their sunglasses, has taken that testing/certification one step further and as they put it: “this level of testing is absolutely unnecessary”. The standard test to CE approve a lens, whether it be goggles or sunglasses, is to resist the impact of ball bearing dropped on it. Oakley didn’t feel this was enough and with the leading cause of eye damage to the London Eye Hospital being sunglasses shattering into people eyes, as the result of car airbags, they looked to improve this. The answer, Plutonite, developed by Oakley not only to be optically pure but also much more durable than other lenses. Oakley lens test – fire a metal spike at their lenses and the lens must not crack, but absorb and resist the impact. What is considered unnecessary by others is mandatory to Oakley. You can read about Oakley’s eyewear impact test here.
This technology has been around for some time; so in store we do highlight the pros of using goggles as a piece of protection. So what has prompted this article?
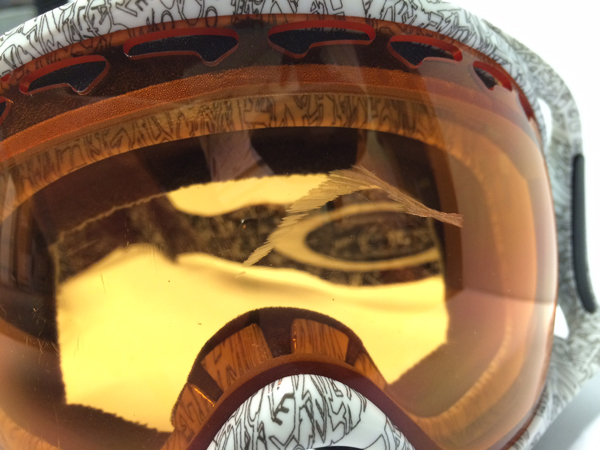
I was lucky enough to be in the French Alps recently, when as many of you will know the powder conditions where amazing, however avalanche risks where high, so the powder was to be skied in the safety of the trees. Great for snow pack confidence, however, with trees come roots, fallen branches and uncertainty under the seeming flat smooth snow. After a great run through the trees I popped out into a little clearing and put a few turns in, and up to this point my poles where disappearing half way into the powder. However my next pole plant found something a few centimetres of snow: perhaps a branch or a rock. Needless to say my pole didn’t disappear as far as expected and I ended up head butting the top of the pole grip. Yes I felt the impact but I finished my run, and it wasn’t until the chairlift back to the top that I noticed the rather deep scratch running across the lens of my goggles.
It wasn’t until the chairlift back to the top that I noticed the rather deep scratch running across the lens of my goggles.
It’s hard to say what might have happened if I was wearing sunglasses or a low specification pair of goggles. Certainly in the case of sunglasses I would have been looking at a broken nose and some fetching black eyes. In the case of a less durable lens, the lens could have cracked possibly causing eye damage.
All I can say definitively is that CE approved (or better) snow goggles, which ever brand you choose, should be a serious consideration and not a last minute ‘fashion’ pick up.
So take the time to come in store with your helmet and try on some snow goggles; or give us a call. Make sure they fit and are comfortable, including wearing your helmet. Make sure the lens tint is right for the conditions you except to ski in; so that when you walk out onto the slopes you have the peace of mind that whatever happens your eyes are well protected!
On the 2nd of December 2015 I left the UK heading for the northern island of Hokkaido in Japan. The region is known for having some of the biggest recorded snowfalls in the world and offering fantastic tree lined powder skiing. Skiing in Japan has been a dream for the last ten years and I cannot wait to explore the skiing and culture of Japan this winter.
Skiing in Japan has been a dream for the last ten years!
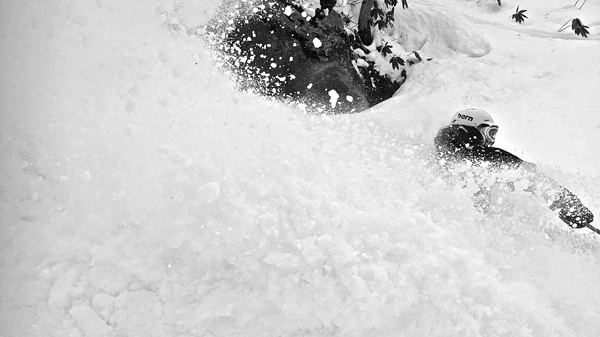
Arriving in Grand Hirafu at the base of Mt Annupuri you cannot help but be overwhelmed by the amount of snow that has already fallen. Tree branches and buildings appear to be frozen in time whilst storms just continue to roll through this remote region. The first 5 days of our trip we rarely got to see past the first 20m due to the snow and certainly didn’t get a view of the surrounding valley. The snow itself is unlike any powder I have skied, it has an incredible spring to it that projects you out of each turn. The first few days were amazing we hadn’t started work and enjoyed fresh snow everyday.
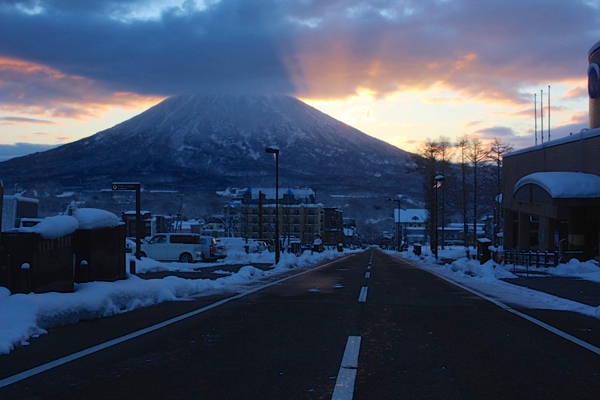
When the storm finally passed we were able to see the dominating view of MT Yotei that towers over the valley; it is an active volcano that rises from 200m above sea level to 1800m. It is by far the biggest peak in the area and is commonly referred to as Little Fiji, in Japan. This peak will be one of the goals for my touring this season, in the right conditions you are able to climb the peak and ski down into the crater of the volcano a truly once in a lifetime experience.
Land of the rising sun; Mt Yotei.
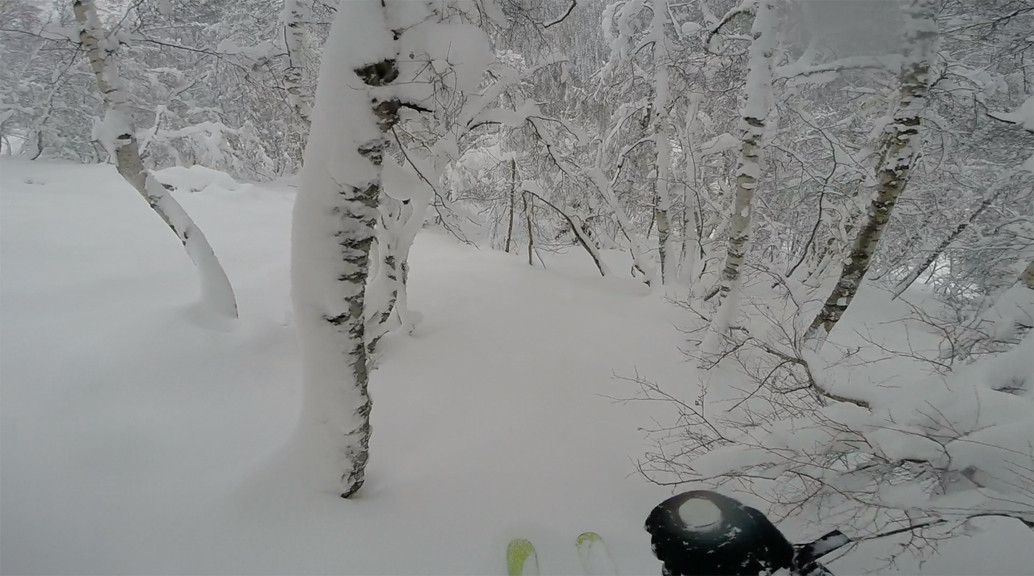
The following clear days we took some treks out to the base to explore the National Park and started to get our legs ready for the first tour of the winter. Having seen most of the fresh snow ‘skied out’ in resort we decided to head into the backcountry. We set off at the resort of Annupuri and ventured into the valley behind the mountain with the aim of getting to the peak a solid 1000m vertical warm up. Touring is actually easier here due to not having to deal with high altitudes and we enjoyed cruising up through the bamboo and silver birch forest to the first ridge. With the peak in our sight we estimated we had maybe another two hours to go, however, another blizzard rolled in making the final 200m some of the snowiest conditions I have been in. Despite the conditions, and with some good route planning, we found the refuge on the peak and sheltered from the storm. It was impossible to go back the way we came due to the weather so dropped back over the front down to resort. It was great to get the legs back in but a shame we didn’t get to do the descent we wanted. However it certainly opened our eyes to the quality and expansiveness of the terrain in this area.
The storm that hit us on our tour stuck around for four days so we have been again enjoying fresh turns every morning. The consistency of snow here gives you a different perspective on skiing as you can wake up everyday knowing that you will be riding powder. The potential to improve that side of your riding is amazing and I hope this winter I will be able to do just that; skiing in Japan.
I will keep you all posted on the Japanese adventure in the coming months, Rob.
The British Association of Snowsport Instructors (BASI) have a qualification structure for skiers who aspire to work, as a ski instructor, in the ski industry. The Alpine Level 1 course would be the first step to enter into this type of career, and is aimed at experienced skiers who feel they are at a level where they can start to teach beginners of the sport.
Before You Start The Course
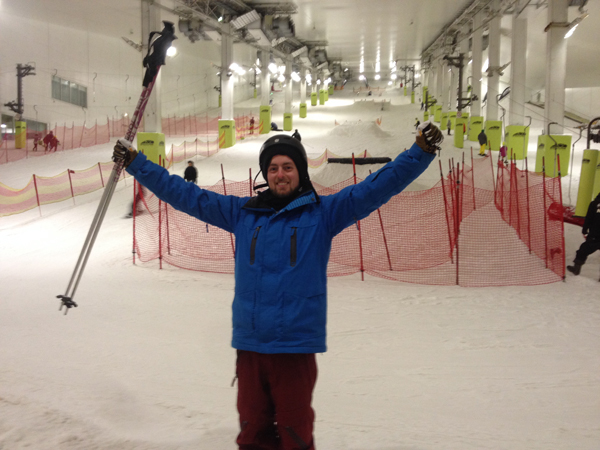
Your skiing level is the most important thing to work on before starting the course. I would recommend talking to someone you know who has passed the BASI Level 1 course, and getting them to have a look at your skiing and tell you if you are at the required level. If you don’t know anyone, book a private lesson at any of the dry ski slopes or snow domes in the UK (and make sure your instructor has at least the BASI Level 1 qualification).
You don’t need to own your own skis yet as it’s possible to hire a pair (this was the case at Milton Keynes SnoZone – it would be best to check with the slope before arriving). However, I would highly recommend buying your own boots. There is a huge difference between a hired pair and your own – your own boots can be heat moulded to the shape of your foot, and custom-made foot beds can be added, to give excellent performance and comfort.
Day One
Our group (nine of us) met our instructor in the cafe next to the ski slope at 9 am. The skiing kicked off immediately with some rider improvement exercises, which covered body positioning over the skis, different types of turns (short rotational turns and longer carved turns), and how to use the feet to push on the skis and improve turning.
After lunch, we were briefly shown the Central Theme, which is the name given to the steps BASI instructors use to teach new skiers from beginner level, up to turning using parallel turns. There are seven steps, which were explained to us, told why they were useful to the student, and shown how to demonstrate them. We also practised the demonstrations ourselves, which in my opinion also helped my own skiing.
For the last hour we continued with more rider improvement exercises, in which we focused on torso positioning in short radius turns – in which the torso must be facing downhill while our legs turn beneath us; and larger carved turns – in which we looked again at pushing down with our feet while turning.
The skiing finished at around 4:30 pm, at which time we went into a small classroom to discuss the day’s activities. We were then set a task of planning a very short lesson (around 15 minutes) to teach the next day, and given some questions to answer at home regarding class safety.
Day Two
We met again at 9 am in the classroom, where we talked through the homework questions given to us the day before, which took no more than half an hour. Straight afterwards, we went onto the slope, and each of us gave a 15 minute practice lesson to the rest of the group – the one we had planned the day before. My lesson was looking at turn sizes and how they affect speed: smaller turns make skiing slower whilst larger turns make skiing quicker.
We had some rider improvement, similar to day one, which was related to our short radius turns. For myself, the main aspects I was trying to improve were my posture and my upper body position. After going through a few drills, we each had a run of short radius turns filmed by our instructor. After lunch we watched the videos of our short radius turns, and the instructor slowed them down to give us detailed and personalised feedback.
The Central Theme was briefly run through again, with a few new possible tactics shown to us which could be used in lessons.
The rest of the day on the slope was used to practice the larger carved turns. The main parts of our turns worked on were keeping the skis the same width apart throughout the turns, and managing pressure with our legs during the turns. Again, we had some large carved turns filmed by the instructor, and the day was finished with some video analysis.
Day Three
Day three was much the same as day two: rider improvement, including video analysis, took up most of the day; running through the Central Theme aspects was also a major part of the day.
Near the end of the day we went into the classroom to plan the lessons that we were to give during day four. These lessons form the teaching portion of the assessment for our Level 1 Ski Instructor exam.
Celebration! Jake passed BASI ski instructors course.
Day Four
This day was the teaching assessment day, in which we each “taught” our peers in a 20 to 30 minute session. We were given some time the day before to plan our lessons, which were to be any part of the Central Theme. I chose to teach snow-ploughing, which is the first step in learning speed control.
Most of us were quite nervous on this day as it’s quite daunting knowing you will be pretending to teach advanced skiers the basics. Even though I have been teaching snowboarding for a few months, I was still not looking forward to it. However everyone’s lesson went well enough to pass. When assessing the teaching sessions, the main criteria were that we understood the Central Theme; had an effective way in which we got the information across to the students; managed our students in a safe and efficient way; gave relevant feedback; and moved on to further exercises relevant to the feedback.
Day Five
The final day of the course! For myself this was the most important day, as it was the assessment for our skiing ability. At this point I was still ironing out some aspects of my short radius turns, however by the end of the day they were at the required level to pass – what a relief!
Other aspects of the the skiing ability we were assessed on were the longer radius, carved turns, and our demonstrations of beginner turns (for when teaching the Central Theme).
This day was the shortest of the week, and we finished at around 2 pm, once we had been given our results (all of us passed!). We went back into the classroom, where our instructor gave us a de-brief of the week. This included running through with us what we needed to do next for our BASI Level 1, possible future courses and training we could enrol on, and general information regarding life as a ski instructor.
After The Course
Once the course has been completed, there are a few other small things that are needed from BASI before you receive your Level 1 certificate:
35 hours of snowsport experience: this can include shadowing ski lessons, working in the ski hire area, or even on reception at a ski school.
First Aid Certificate: Must be a minimum of a 12 hour course
Working with Children module: an online course
Criminal Record Disclosure: available online
Oakley is arguably one of the most recognised sports gear and eyewear brands the world has ever seen with its history dating back to 1975. Defying all the sceptics Jim Jannard started his own company with $300 with one simple goal; make products that work better and look better than anything else. Based in his garage Jim developed a new style of motorcycle grip that increased grip with sweat, capturing the notice of many top riders.
With the company orders in decline it led Jim to create the O Frame goggle that was praised for its clarity and wide peripheral view being used in MX for the new 17 years. Drawing on his previous innovations Jim set himself the challenge of reinventing sport sunglasses creating the ‘eyeshades’, a revolution in eyewear design becoming a vital piece of equipment for world class competitors.
Decades of research and development has been focused on a single, unwavering goal; to provide snow athletes the highest level of protection and optimum visual clarity possible. This goal has allowed Oakley to find that perfect blend of art and science leading to 600 patents awarded worldwide. Today Oakley is seen as the go to brand for sophistication and performance within the sportswear industry!
Oakley Goggle Technology
HDO (High Definition Optics)
Ever wanted a truer picture of the world? Oakley’s HDO technology gives a lens virtually free of distortion and fine tuned with patented technologies that retain extremely high levels of clarity at any angle and any condition.
The American National Standards Institute put Oakley lenses through three rigorous tests:
Clarity (measures sharpness of images view through the lens)
Refractive power (measures how inferior lenses distort vision by magnifying images)
PRISM, not to be confused with Prizm, (measures how lenses bend light to make objects appear shifted from their true position)
These tests prove how inferior lenses can compromise your vision. Don’t compromise, stick with Oakley lenses!
Impact Protection
Oakley lenses don’t just meet, they exceed ANSI impact-resistance standards! These lenses have undergone high-speed and high-mass tests, giving the ability to be pushed to its limits with no risk of breaking.
Anti-Fog Technology
Plutonite lenses are an innovation in their own right, combined with Oakley’s unique F3 anti-fog coating allows the inner lens to absorb a minimum of 2ml of moisture to help preventing fogging during the most intense physical activities.
Lens Coatings
Iridium
A lot of people think the composition of the lens itself is iridium, but in fact it’s a standard lens with a special metal oxide coating that gives the lens a unique set of properties. This Iridium coating allows you to tailor your goggle to any condition you may face up in the mountain.
Oakley provides a large variety of lens compositions and colours allowing you to fine tune; glare, reflection, light absorption and light transmission. The ability to fine tune how much light reaches your eye makes this exclusive coating a favourite with riders around the world.
Polarised
Ever get that uncomfortable glare in bright sunlight? Oakley polarized lenses are made from an exclusive permeate Plutonite material coated around an integrated polariser. The unique combination of coatings helps to provide clear vision, minimises deformation and helps protect the filter from everyday wear and tear.
Additionally Plutonite performs extremely well as a barrier against harmful UVA, UVC and UVB rays as well as harmful blue light protecting your eyes even on the brightest of days.
Ever felt the urge to clean your lens with anything other than the cloth supplied? Resist the urge! Tissues, tops and sleeves are highly abrasive and if used will permanently scratch your lens. The supplied cloth is a special microfiber material that will clean but not scratch.
Your lens will no doubt get wet during its use but it is advised that you only clean your lens when dry. So even if you take a fall in the snow, allow your lens to dry first.
One last piece of advice you may not heard of is try to avoid wearing goggles on your head. Many goggles have anti fog and venting properties but the heat and moisture from the top of your head increases the chance of this still occurring.
Following these simple but important rules will ensure your Oakley goggles stay high performing and scratch free for years to come.
Vents
Due to the amount of moisture your face emits goggle ventilation is important in helping to reduce fogging. Although Oakley goggles feature an anti-fog coating more ventilation is always better when it comes to goggles. Be sure to check the compatibility with your helmet as the vents can sometimes be covered reducing the performance of your goggles.
Foam Layers
Getting a perfect seal around you face is important for reducing fogging and adding comfort. Oakley has designed their goggles with a triple layered polar fleece foam which ensures the cold and snow stay out whilst following the curvature of your face without giving uncomfortable pressure points.
Glasses Compatible
If you have prescription glasses finding the right goggle can be a challenge! Some Oakley goggles feature OTG (Over the Glasses) technology which means you can still wear your prescription glasses underneath without the expensive need for prescription goggles.
OTG goggles tend to be deeper than regular goggles and feature a channel to allow your goggles to fit perfectly with no movement or pressure points.
Helmet Compatible
It’s important to have a good fitting goggle and helmet for both aesthetics and performance. Known as the goggle gap this gap between the helmet and goggle is best avoided through a helmet compatible goggle as it can give you brain freeze.
Oakley produce goggles with varying levels of helmet compatibility with many of their designs featuring strap outriggers to give a better strap position when wearing a helmet.