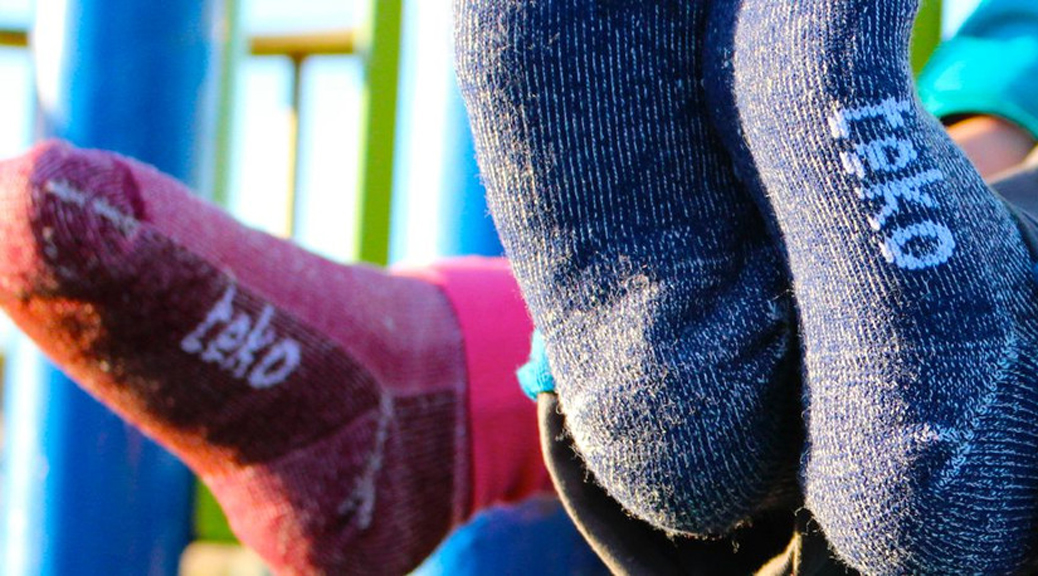
You might think that ski and snowboard socks are very much the same, and while this can be true some of the time, when it comes to well known snow sport brands they then start to vary with different features, materials and construction. Below is a short guide on the different socks and how they are tailored to a specific sport.
When it comes to choosing that sock, whether skiing or snowboarding, the two following statements are important:
Look at the material and make sure you don’t choose one with cotton in. Although it’s great for a nice looking shirt it doesn’t have very high moisture wicking properties causing your feet to stay damp from sweat in turn getting cold.
Some say the thinner the sock the better but this is really down to personal choice, some agree with this statement and others don’t.
Sock Size
Choosing the correct size is paramount as a sock that’s too big can sag giving an uneven feeling in your boot whereas a sock too tight can cut the circulation to your feet causing them to become cold which nobody wants. To help determine the correct size go off your ski boots or have your feet professionally measured.
As a general rule of thumb when it comes to choosing the weight (thickness) of your sock its probably best to go with either a medium or light weight sock as the thicker higher density socks combined with the insulation from your boot could create too much sweat and heat.
Materials
Wool – Merino wool in particular is a natural fibre which has excellent levels of warmth and moisture wicking properties keeping your feet warm and dry. Being a natural fibre means it doesn’t have high levels of elastic memory causing the sock to lose shape overtime yet doesn’t absorb odours which is great for a week’s holiday needing only a couple pairs of socks.
Synthetic – There are numerous synthetic materials the more common materials are polyester, nylon, acrylic and elastic. These materials retain their shape very well, have moisture wicking properties and give high levels of comfort.
The Perfect Blend – Many modern day ski and snowboard socks are a blend of natural and synthetic fibres combining the best characteristics from both worlds for the ultimate sock.
Ski Socks
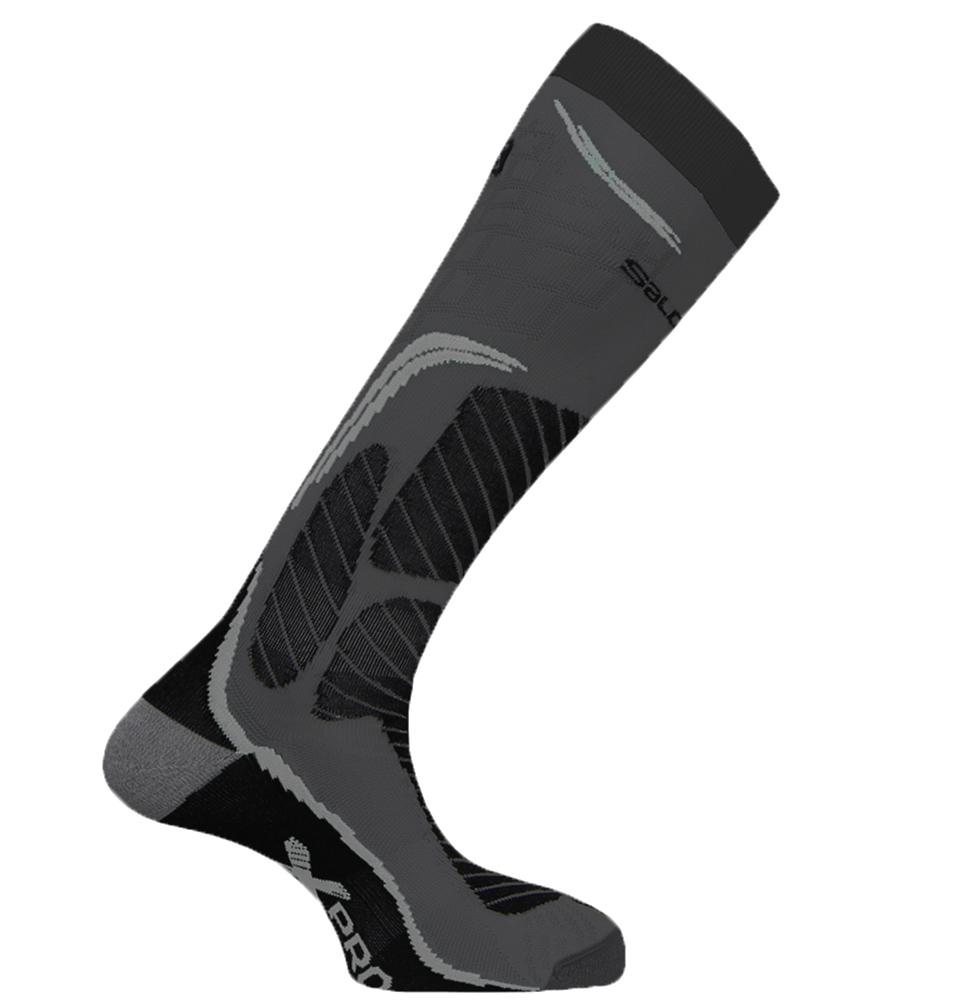
Ski socks tend to be much taller (over the calf) in height so to accommodate the much higher profile of ski boots. Modern ski socks have additional padding in areas such as the shins due to the increased pressure from pushing on the boot tongue and in other areas it’s much thinner for a more performance orientated fit and helps prevent blistering around the heels.
These Salomon ski socks have additional padding in areas such as the shins due to the increased pressure from pushing on the ski boot tongue.
Snowboard Socks
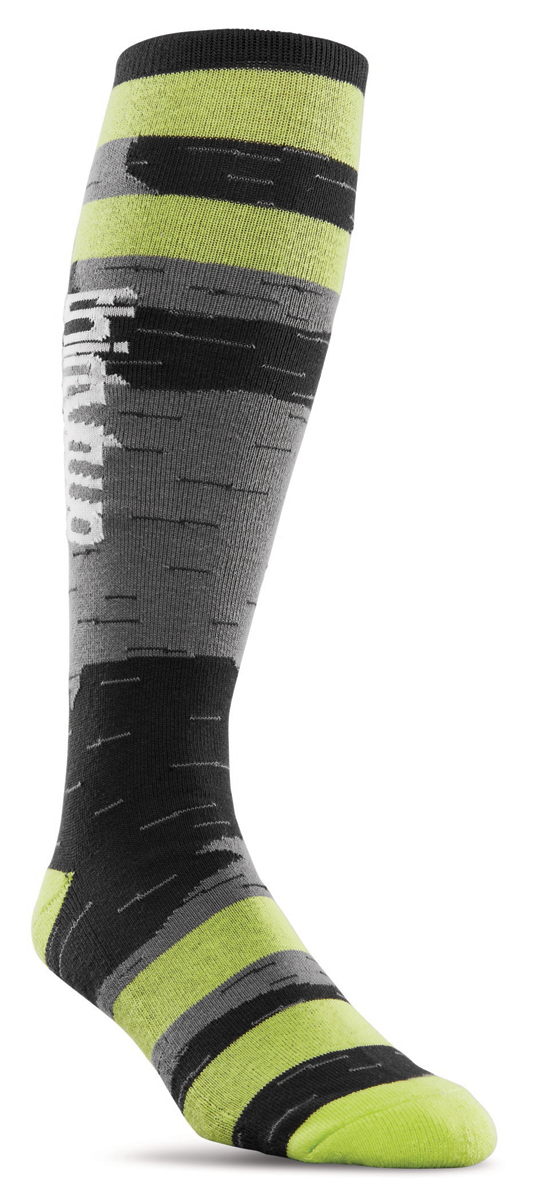
Many snowboard socks have been specially designed to have forward lean built in which helps prevent the sock from bunching under foot giving a much more comfortable days riding. Unlike ski socks snowboard socks tend to have more uniformed cushioning rather than smaller specific areas due to going from toe to heel edge on a regular basis.
These ThrityTwo snowboard socks tend to have more uniformed cushioning.
If your still unsure as to what type of sock you need after reading this blog why not pop into store where our passionate and highly qualified staff can give you some advice.
In a nutshell alpine ski bindings are a vital piece of equipment; not only securing your ski boots to your skis but also giving you additional safety features to prevent dreaded injuries. Getting the correct bindings is important and is specific to your skill level as heavier more aggressive skiers require bindings with a higher DIN whereas lighter beginners would require a lower rating.
Various binding manufactures have different safety features that help release your boot in the event of that embarrassing crash that you hoped nobody saw; from vertical toe release and sliding anti friction pads. On top of the safety aspect bindings form the bridge between you and your skis transferring every little movement directly to the skis. There are two way to mount your bindings:
Track (Rail) Mounted Ski Bindings
The most common way of mounting bindings is either on a track or rail where the heel and toe piece simply slide on, generally found on Piste orientated skis. These bindings are mounted onto the skis at the factory meaning they are ready to be used straight away.
Pros
Mounted and adjusted numerous times
Generally allows the ski to flex more naturally
Cheaper than buying drilled bindings
Cons
Makes your set up heavier
Less choice with bindings
Generic binding position
Drill Mounted Ski Bindings
The drill mounted method although less popular is becoming the way to go with many people turning towards all mountain skis as riders start to venture off Piste into the powder fields. A qualified technician would then fit these bindings to the ski with a few additional pieces of information which this guide will cover later.
Pros
Wider choice of bindings
Can be tailored to your ability and ski
Lighter and sometimes stronger
Choose where the bindings are mounted
Can be customised with ramp angles
Cons
Have limited amount of times it can be repositioned
Tends to work out more expensive over track mounted bindings
Less adjustment for varying boot sizes
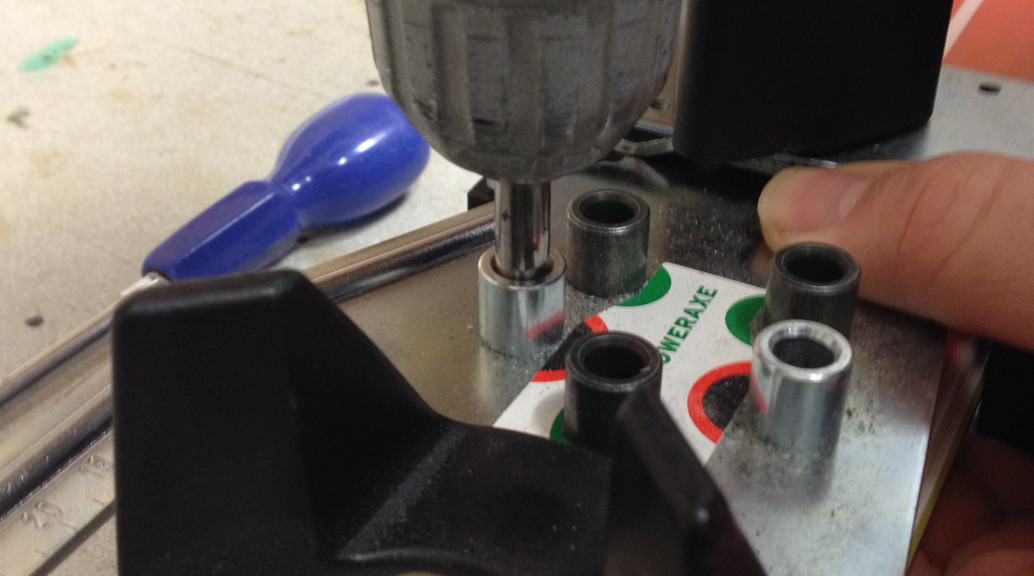
Process of Drilling Skis
The process behind drilling skis is relatively straight forward for a trained technician; and before you ask “no we don’t drill freehand”. We use special jigs and drill bits that come directly from the binding manufacture to ensure the correct drilling, every time! The technician will use your ski boot to adjust the jig length and then that crucial decision of where to have your binding mounted ski centre, ski forward or ski back. We know this can be a hard decision to make so below we go into detail on the different positions.
Choosing The Binding Placement
So you have chosen the ski and bindings now it’s time to make another decision where to mount your bindings! There are lots of different factors that need to be taken into consideration and questions to be answered. The first question to ask yourself and one that requires an honest answer is ‘what terrain am I going to be skiing on?’ Generally the answer will be all mountain, in this case its best to follow the ski manufactures recommended position.
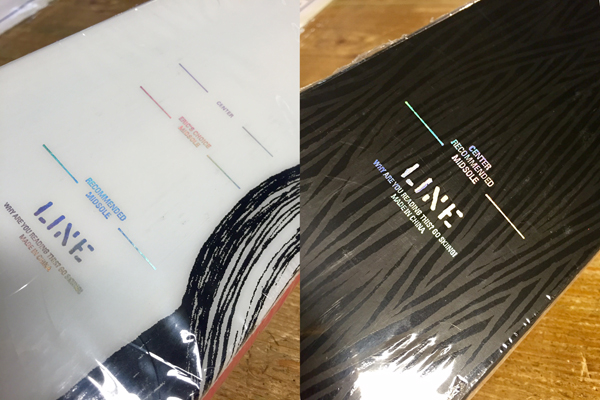
This recommended position will have been determined by many extensive tests and gets the best all round performance out of the ski. Although this is the ‘recommended position’ you don’t have to follow this; for example the Line Afterbang can be mounted further back if you will be riding all mountain.
Park and powder skiing are two extremes where the correct mounting position is vital. Park skiing generally requires the bindings to be mounted ski centre due to completing aerial tricks where equal balance is important to performing the trick successfully and safely. Whereas powder skiing requires the bindings to be mounted back from the centre allowing the front of the skis to remain elevated naturally floating on top rather than under the snow.
Eric Pollard (left) prefers his mounting line to be slightly forward due to his unique skiing style. He likes to use this ski in the freestyle category, back country and for touring.
Using Line Skis as an example it’s easy to see how they believe there skis should be mounted. Above on the left we have the Mr Pollards which is a powder ski and on the right we have the Afterbangs ideal for park rats. You can see on the Mr Pollard that there are three mounting lines: at the front ski centre, in the middle Eric Pollards preferred line*, and at the back we have Line recommended. However on the Afterbang there is only one line, the centre line.
*Eric Pollard prefers his mounting line to be slightly forward due to his unique skiing style. He likes to use this ski in the freestyle category, back country and for touring.
The brands, in their own way, will mark on the ski where the centre of the ski is and also the recommendation for drilling. Where it gets interesting is when the question is asked “I want to buy this big ski but want to ski it all over the mountain including the powder, piste and possibly use it in the park” The short answer is that it is possible but you won’t get the full benefit. In an ideal world, you would have a powder, piste and park set of skis but in reality this is not the case.
At Tallington Lakes Pro Shop we have highly knowledgeable staff that are passionate about snow sports. They are always on hand to assist and advise, so why not pop along and have a chat with us? We also boast an extensive workshop with highly trained technicians that can get those skis and bindings mounted to get you on the slopes ready for this season!
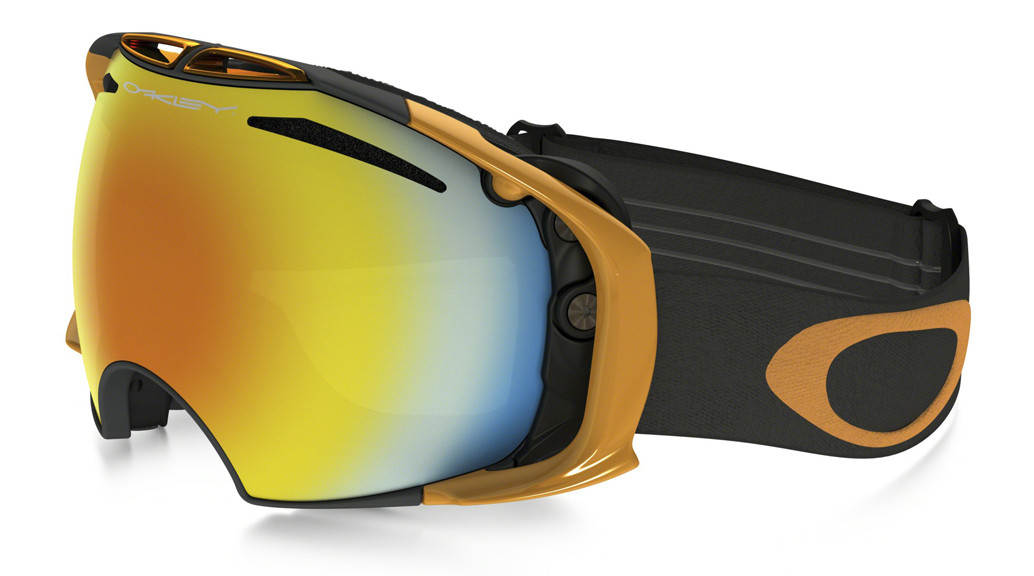
Quite simply the hottest goggle on the market right now! This is truly a performance goggle from Oakley with its new innovative Switchlock Technology allowing you to adapt to any environment with quick, hassle free lens changing.
The Airbrake is the perfect package coming standard with two lens tints to cover any condition the mountain gods may throw at you with the added Plutonite lens material to give 100% protection against all UV. Oakley have designed the Airbrake goggle to fit medium to large faces incorporating triple layered foam with a flexible face plate and a rigid exoskeleton frame, giving added performance without compromising on comfort.
Oakley has engineered the Airbrake to provide even pressure across the face with or without a helmet through the integration of strap outriggers.
Key Features:
Switchlock Technology
Rigid exoskeleton frame
Flexible face plate
Triple layered foam
Helmet compatible O Matter outriggers
Dual vented lenses with F3 anti-fog coating
100% protection against UVA/UVB/UVC and harmful blue light up to 400nm
Spherical lens shape
Includes two lens tints and case
Available with Prizm lens technology
Medium to large fit
The Airbrake is pictured above.
Flight Deck
Oakley has taken inspiration directly from the high speed world of fighter pilot helmet design giving you a goggle that not only looks great, but maximises your field of view to ensure you can see any obstacle and plot that perfect route through the snow.
The frameless design gives this goggle a wide range of helmet compatibility with the added comfort due to minimised frame mass. This really is the ‘top gun’ of snow goggles!
Key Features:
Rimless lens design
Lens sub-frame attachment
Frame/lens support for unrestricted airflow
Streamlined frame
Helmet compatible outriggers
Discreet frame notches giving compatibility for most prescription eyewear
Max dual pane lens with F3 anti-fog coating
100% protection against UVA/UVB/UVC and harmful blue light up to 400nm
Available with Prizm lens technology
Medium to large fit
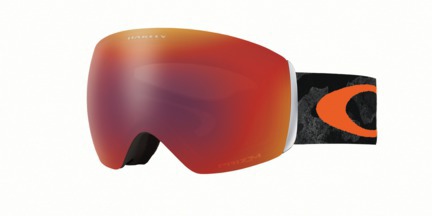
Oakley Flight Deck Snow Goggle.
Flight Deck XM
New for 2015 the Flight Deck XM is a total redesign of the old Splice. Oakley has taken inspiration directly from the high speed world of fighter pilot helmet design giving you a goggle that not only looks great, but maximises your field of view to ensure you can see any obstacle and plot that perfect route through the snow.
The unique design of the Flight Deck XM sitting closer to your face gives you back your peripheral vision normally lost with many goggle designs, allowing you to spot dangers and obstacles faster. Many goggles suit a larger face but Oakley realized this and has downsized the original Flight Deck to this new model now suitable for small to medium faces.
Key Features:
Rimless lens design
Lens sub frame attachment
Frame/lens support for unrestricted airflow
Helmet compatible O Matter outriggers
Discreet frame notches giving compatibility for most prescription eyewear
Dual vented lens with F3 anti-fog coating
100% protection against UVA/UVB/UVC and harmful blue light up to 400nm
Available with Prizm lens technology
Small to medium fit
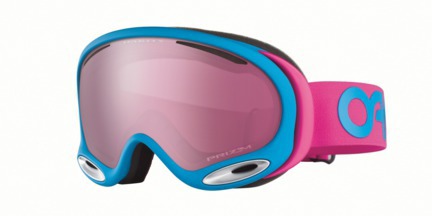
A Frame 2.0
Do you crave extra ventilation in your goggle? The Oakley A Frame 2.0 features 2 large surge ports that maintain lens ventilation helping to blast away any moisture along with a dual lens with F3 anti-fog coating produces one of Oakley’s most fog resistant goggles.
True A Frame followers will be pleased to know that the upgraded 2.0 version still features outriggers giving balanced strap pressure, triple layered fleece foam and ANSI Z87.1 impact rating. All combined provides a top pick goggle for male and female winter athletes alike.
Key Features:
Sleek and compact frame design
Dual surge port frames vents
Articulating helmet compatible O Matter
Flexible O Matter chassis
Triple layer polar fleece foam
Dual vented lens with F3 anti-fog coating
100% protection against UVA/UVB/UVC and harmful blue light up to 400nm
Available with Prizm lens technology
Small to medium fit
Oakley A Frame 2.0 Snow Goggle.
Canopy
Experience the Oakley Canopy with its exceptional super-sized lens enhancing your peripheral vision with tunnel vision being a thing of the past. Oakley’s design engineers have created a low profile frame design whilst expanding lens volume giving a wide open view and excellent downward vision.
Do you find many goggles restrict your breathing? Don’t panic Oakley have you covered! Patented O-Flow arch design reduces nose bridge pressure allowing for easier breathing.
Key Features:
Large lens design
Patented O-Flow arch
Streamlined frame design
Full helmet compatibility
Discreet frame notches giving compatibility for most prescription eyewear
Dual vented lens with F3 anti-fog coating
100% protection against UVA/UVB/UVC and harmful blue light up to 400nm
Available with Prizm lens technology
Small to medium fit
Oakley Canopy Snow Goggle.
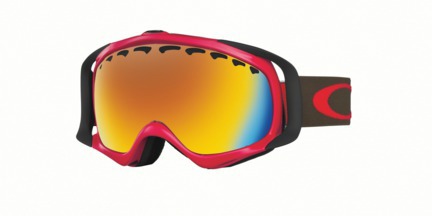
Crowbar
The Crowbar is Oakley’s first ski goggle that features outrigger struts to perfectly balance and distribute frame pressure across the face for an even and more comfortable fit. The increased lens size with its specific curvature opens your peripheral and downward view combined with HDO maintains excellent clarity at any angle.
Key Features:
Streamlined frame design
Flexible O Matter chassis
Rigid O Matter strap outriggers
Triple layer fleece foam
Dual vented lenses F3 anti-fog coating
100% protection against UVA/UVB/UVC and harmful blue light up to 400nm
Available with Prizm lens technology
Medium fit
Oakley Crowbar Snow Goggles.
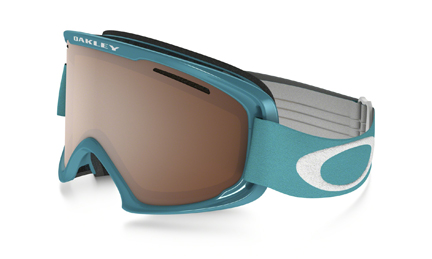
O2 XL
What do you get if you mix super wide views and excellent value…the Oakley O2 XL goggle! This features a low profile frame helping to fit over prescription glasses and helmets comfortably. With the expansion of your peripheral vision the O2 XL expands the upwards and downwards vision to give a better all round view of the mountain.
Key Features:
Streamlined frame geometry
Flexible O Matter chassis
Moto style strap for helmet compatibility
Triple layer polar fleece foam
Discreet frame notches giving compatibility for most prescription eyewear
Dual vented lens with F2 anti-fog coating
100% protection against UVA/UVB/UVC and harmful blue light up to 400nm
Available with Prizm lens technology
Medium to large fit
O2 XM
What do you get if you mix super wide views and excellent value…the Oakley O2 XM goggle! This features a low profile frame helping to fit over prescription glasses and helmets comfortably. With the expansion of your peripheral vision the O2 XM expands the upwards and downwards vision to give a better all round view of the mountain.
Key Features:
Streamlined frame geometry
Flexible O Matter chassis
Moto style strap for helmet compatibility
Triple layer polar fleece foam
Discreet frame notches giving compatibility for most prescription eyewear
Dual vented lens with F2 anti-fog coating
100% protection against UVA/UVB/UVC and harmful blue light up to 400nm
Available with Prizm lens technology
Small to medium fit
Oakley O2 XM Snow Goggle.
O2 XS
Following on from the success of its predecessor the O Frame, the junior specific O2 XS gives you unrivalled performance at a very affordable price. The lightweight O Matter chassis maintains excellent flexibility even in the extreme cold, while the added triple layer polar fleece is moisture wicking keeping your face dry and warm.
Key Features:
Flexible O Matter chassis
Moto style strap for helmet compatibility
Triple layer polar fleece foam
Discreet frame notches giving compatibility for most prescription eyewear
Dual vented lens with F2 anti-fog coating
100% protection against UVA/UVB/UVC and harmful blue light up to 400nm
Small fit
E Frame
This is Oakley’s entry level goggle featuring a dual lens construction giving you fog reduction whilst increasing the durability. Suitable for use as a unisex goggle the E Frame contains lens venting to further reduce moisture and an adjustable wide strap for extra comfort.
Key Features:
Flexible urethane frame
Wide adjustable elastic strap
Single layered face foam
Dual vented lens with F2 anti-fog coating
Lens venting
Suitable for juniors or women
Airwave
Have you ever wondered what speed you travelled down that last run? Or wondered how much air did I just get off that last insane kicker? The time has come! Oakley has introduced the most technological advanced goggle on the market.
The Airwave features a built in head up display will give you features such as GPS, Bluetooth and more sensors than your average space shuttle. This goggle provides you with all the need to know information whether your carving up with piste or riding some powder in the backcountry.
The head up display provides crisp, widescreen graphics using none other than prism technology to give the effect of a 14 inch monitor viewed at a distance of 5 feet. The Airwave is the only goggle you will need featuring Oakley’s Switchlock technology allowing lenses to be changed dependent on the light conditions.
Key Features:
Speed
Trip viewer
Jump analysis
Navigation
Buddy tracking
Music
Smartphone connectivity
Smart lock technology
Durable O Matter frame
Patented O Flow arch
Dual vented lens with F3 anti-fog coating
There’s no doubt Oakley produce some of the most technologically advanced sports eyewear in the world! Experts at Oakley have discovered unique links that allow our brain and eyes to process light, leading to the development of the Prizm lens. The result? A tailored lens specific to the way your eyes work!
15 years of research, development and testing has led to the introduction of the new, much anticipated Prizm lens! During this period Oakley has found our eyes are extremely sensitive to detail in certain colours; blue and orange light to be specific.
In the past have you struggled to pick the perfect route though the white gold? Prizm technology helps tackle these problems through filtering ambient full-spectrum light entering the lens, fine tuning the specific colours to give; enhanced detail for perfect route selection.
This lens will be sure to enhance not only your experience but vision on the mountain. Prizm lenses have been proved to reduce eye fatigue giving you endless hours of fun on the slope. After 15 years of heart ache Oakley have emerged the other side with a product that will change the way we ‘view’ snow sports in future.
The Black Iridium snow lens has a 5-10% visible light transmission rating great in medium to bright light (very sunny conditions). To reduce glare features an Iridium coating.
Prizm Jade Iridium
The Jade Iridium snow lens has a 11-20% visible light transmission rating great in low to medium light (sunny to overcast conditions). To reduce glare features an Iridium coating.
Prizm Torch Iridium
New for 2015 the Torch Iridium snow lens has a 11-20% visible light transmission rating great in low to medium light (sunny to overcast conditions). To reduce glare features an Iridium coating.
Prizm Sapphire Iridium
The new release for 2015 the Sapphire Iridium snow lens has a 11-20% visible light transmission rating great in low to medium light (sunny to overcast conditions). To reduce glare features an Iridium coating.
Prizm Rose
The Rose snow lens has a 21%+ visible light transmission rating perfect for flat to medium light (sunny to snowy conditions).
Black Iridium, Sapphire Iridium, Jade Iridium, Torch Iridium and Rose Prizm lenses.
Standard Lenses
Years of technological advancements has led Oakley to develop a wide range of standard (non-Prizm) lenses suitable for any condition the mountain may throw at you. The table below provides key information on each individual lens to help tailor your equipment to cover all bases.
Lens Tint
Description
Visible Light Transmission
Protection Index
Suitable Conditions
%
Clear
Very low light. Neutral transmission for truer colour perception
90
0
Night time
High Intensity Yellow
High contrast lens for extremely low light conditions. Features an Iridium coating to further enhance contrast
81
0
Flat to very low light
High Intensity Permission
Filters blue light to boost contrast and increase depth perception in a wide variety of conditions. Features an Iridium coating to further enhance contrast
63
1
Flat to low light
Permission
Filters blue light to boost contrast and increase depth perception in a wide variety of conditions
62
1
Flat to low light
Pink Iridium
Enhances depth perception and increases visual acuity in a wide variety of conditions
57
1
Flat to medium light
VR50
Filters blue light with a subtle tint to enhance visual acuity and improve depth perception
50
1
Flat to low light
VR50 Emerald Iridium
Utilizes a contrast-enhancing VR50A lens tint with a unique Iridium coating to further tune contrast and reduce glare
30
2
Low to Medium light
G30
Rose base with subtle Iridium coating to improve contrast and depth perception in a wide variety of conditions
30
2
Low to Medium light
Blue Iridium
Utilizes a contrast-enhancing VR28 lens tint with an Iridium coating to further tune contrast and reduce glare
30
2
Low to Medium light
VR28
Filters blue light to increase contrast and improve depth perception in a wide variety of conditions
28
2
Medium to bright light
High Amber Polarized
High contrast lens that cuts blinding glare while enhancing visual acuity. Features an Iridium coating to balance light transmission and further tune contrast
25
2
Medium to bright light
Gold Iridium
Excellent all-purpose contrast-enhancing lens for sunny conditions. Features an Iridium coating to reduce glare
20
2
Medium to bright light
Black Iridium
Excellent all-purpose high contrast lens for sunny conditions. Features an Iridium coating to reduce glare
18
3
Medium to bright light
Fire Iridium
Improves visual acuity. Features an Iridium coating to further tune contrast and reduce glare
16
3
Medium to bright light
VR28 Black Iridium
Filters blue light to increase contrast and improve depth perception in a wide variety of conditions
14
2
Medium to bright light
VR28 Polarized
Cuts blinding glare while filtering blue light to increase contrast and improve depth perception in a wide variety of conditions
14
3
Medium to bright light
The protection index varies from 0-3 giving your eyes varying levels of protection against the sun, 0 being no protection and 3 being the highest perfect for those bluebird days.
VLT (Visible Light Transmission)
Many ask the question what is Visible Light Transmission and how can it help. The colour of your lens helps to filter and intensify colours in your vision whilst this colour and coating also effects how much light reaches your eye also known as Visible Light Transmission.
Lighter lens tints have a higher VLT as more light is able to pass through reaching your eye. Yellow, gold, green and rose coloured lenses have a higher VLT perfect for those snowy, overcast days.
Darker lens tints have a lower VLT as more light is bounced back preventing it reaching your eye. Brown, grey and copper coloured lenses have a lower VLT perfect for those bright bluebird days.
So you’ve treated your skis or snowboard to its yearly service, however, you may wish to give them a basic service while you are on your trip. Maintaining your skis or snowboard bases and edges is vital to getting the best out of your gear, so have a read of this guide if you want to keep them in tip-top condition!
(We do not accept any responsibility for any damaged caused whilst following this guide. You should be comfortable in completing the work before starting)
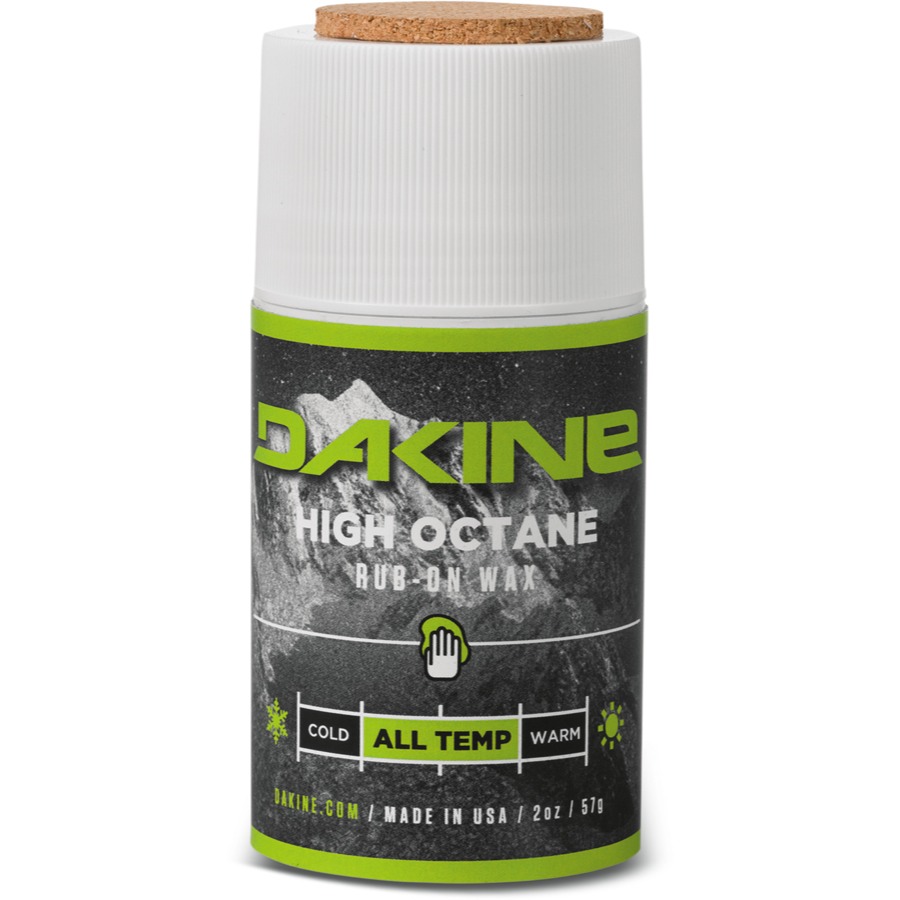
Rub On Wax
If you don’t have access to a waxing iron or the time to use ‘melt on wax’ then a rub on wax is the next best thing, with Dakine doing their own High Octane Rub on Wax! So your gear has had the full works but many melt on waxes only last 3-5 days so to maintain this improved performance all holiday why not use a rub on wax either apply it in your hotel or better yet on the mountain for a workshop with a view.
Dakine Rub-on-Wax for skis and snowboards.
Generally many rub on waxes are suitable for all temperatures and the process is simple, just rub into the base then buff it out with either a nylon brush or the attached cork on the Dakine applicator. This immediately improves/maintains performance for around one day where the process would then need repeating. All in all this option is simple and so easy anyone no matter your experience can do!
Melt On Wax
Despite modern advances in ski and snowboard base design these still dry and wear out over time and in turn reduce performance! It’s key to wax your gear on a regular basis before, during and after your trip if you really want, with hot (melt on) waxes being the best as it allows the wax to penetrate deeply into the base structure for added durability.
These melt on waxes or ‘glide’ waxes help increase the speed you can ride through creating a thin layer of water between the snow and base with different waxes suited to varying temperatures throughout the winter season and generally last between 3-5 days of normal riding.
All temp Waxes (Suitable for a mix of warm and cold conditions)
To apply this type of wax you will need to get a specific wax iron, plastic scrapper, base cleaner and nylon brush (don’t use your household iron as the holes will become clogged with wax) after treating yourself to this equipment you’re then ready to follow these steps:
1. Firstly retract your binding brakes and position the ski or snowboard in a clamp or 2 high back chairs.
2. Prepare your base for waxing using a base cleaning compound which removes all the old wax and dirt.
3. Rub the wax by hand onto the base like your colouring the base with a crayon (adds another layer of protection against the heat of the iron)
4. Melt the wax on a low temperature (120-140oC) in zig zag movement across the entire length of the ski or snowboard.
5. Then you run the iron over the wax melting it and spreading evenly over the base (ensure you don’t stay in one place as it can damage the base though becoming too hot move 1-2 inches per second)
6. Allow the wax to cool at room temperature for a few hours, overnight if possible.
7. You’re now ready to remove the excess wax, so grab your plastic scraper and use the sharp edge to scrap the wax working from the tip to the tail of the ski or snowboard. (also remove any wax from the edges)
8. You need to make sure you have removed enough wax and to test this scrape the base with your fingernail and if little or no wax comes off your ready for the next step.
9. Then starting with a stiff nylon brush work from tip to tail with medium strokes until you have a shinny glossy look to the base.
10. Finally use a soft nylon brush working from tip to tail to finish the waxing process.
This might sound like a long process but once you have done it a few times it will become second nature and you will get a great sense of achievement of waxing your own gear and over time will save you money!
Edge Tuning
You may have heard of edge tuning amongst your snow sport friends, it’s basically the adjustment of the metal edges that run around your board or ski and has a big impact on how your equipment performs. Up in the mountains the conditions can change day by day so the option of fine tuning your skis or snowboard to suit the conditions appeals to a lot of riders with the following guide giving a basic understanding of the process.
Dakine Edge Tuning Tool for skis and snowboards.
There are two types of edge a base and a side, with the side edge being the one normally adjusted as the base generally stays at 1o as any lower and you will constantly catch an edge when riding. The following side edge degrees show the advantages and disadvantages of varying degrees:
1o (Gives a 90o edge profile and is the strongest combination possible great for a neutral feel for a range of riders but isn’t great on hard pack snow and ice)
2o (Gives an 89o edge profile and will require slightly more tuning over 1o yet is much better on hard packed piste’s giving improved edge grip when carving yet beginners may find this option hard as it requires more lean to engage the edges)
3o (Gives an 88o edge profile which is generally found on high performance Piste skis with this combination offering excellent edge hold on packed snow and ice requiring the user to be much more aggressive to engage the edges)
So once you’ve determined which edge angle is best for you use a high quality edge tuning tool such as the Dakine Mini Edge Tuner. To get the perfect fine tuned edge follow the steps below:
1. Firstly retract your binding brakes and position the ski or snowboard in a clamp or 2 high back chairs.
2. Pull the file towards you working from tip to tail (short overlapping strokes)
3. For beginners you can use a black pen on the edges so you know where you have edged as the metal will go from black to shinny metal.
4. Then polish with a diamond stone blue (coarse) then red (fine) then finish with green (extra fine)
Now you have completed a full wax and edge tune your sure to have a fun filled high performance time on the slopes. For any more details on servicing we offer give the Pro Shop Team a call on 01778 347000 where the experienced staff with be more than happy to help.
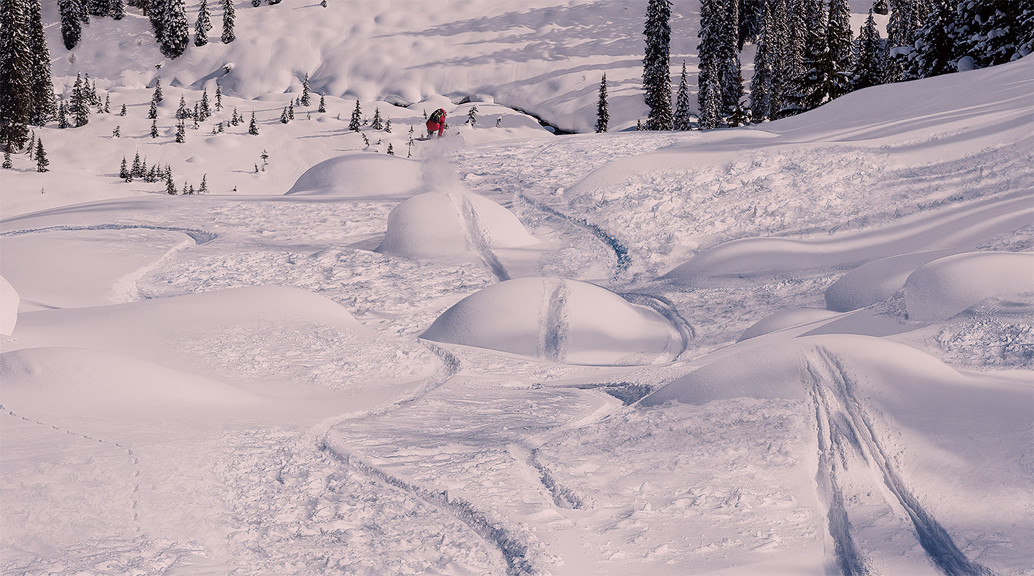
So you might be thinking to yourself what is freeriding? It’s basically skiing or snowboarding on natural, un-groomed runs which have no set course or specific set of rules. Many riders it is called off-piste or backcountry depending where about’s in the world you’re from!
The thought of riding this challenging terrain is what appeals to so many people, combining numerous skill areas such as freestyle and piste riding into one all mountain style giving you the freedom to take on any terrain you encounter. With any snow sports there are associated risks but these are amplified significantly when freeriding but on the other hand you get to experience untouched areas of the mountain challenging your skills with such varied terrain.
Back in the 1940’s freeriding was in its infancy and wasn’t until the 1970’s where gear had improved to such a level that freeriding attracted audiences on a global level. Closely following the French were the Americans where a group of young enthusiastic riders took on the steep terrain of the Rockies and Sierra Nevada mountain ranges.
This influx of new riders really set the scene for the first ever freeride contest, the ‘World Extreme Ski Championships’ WESC held in the beautiful Wasatch Mountains, Alaska! Not forgetting the snowboarders the ‘World Extreme Snowboard Championships’ was established in 1992 which soon transformed into the widely recognised King Of The Hill competition still running today.
For many years these two disciplines remained completely separate before a crazy business man by the name Nicholas Hale Woods launched the Verbier Extreme in 1996 with 2004 marking the year when ten of the world’s top freeride skiers were invited to take part, revolutionising the sport as we know it!
Today this pioneering man Nicholas Hale Woods plays a crucial part in the organising and running of one of the world’s most extreme snow sport competitions the Freeride World Tour! Featuring five stops in five countries riders battle against each other in search of worldwide recognition. Below we delve a little deeper into the five 2016 resorts!
Located in the northern valleys of Andorra the Arcalis is a smaller slice of the much larger Vallnord skiing area. This resort features stunning views and multiple tree lined runs and is categorised into the most alpine resort in the Vallnord skiing area due to being north facing and its numerous steep slopes.
Handpicked from other resorts the Arcalis is home to some of the best off Piste skiing in Andorra holding on to its powder much longer due to receiving less sun. Here are some key facts about the resort:
30km Pistes with 27 runs
442 Hectares of skiable area
One terrain park
Longest run 8km
33% Beginner + 22% Intermediate + 37% Advanced + 7% Expert
Summit 2625m / 1940m Base
6th February 2016 (Chamonix Mont Blanc, France)
Located on the border of France, Switzerland and Italy this well known resort is at the base of the highest summit in the Alps, Mont Blanc featuring some amazing alpine skiing. Many people believe that Chamonix was the birthplace of alpine skiing with its claim to fame being the resort to host the first winter Olympics back in 1924.
It’s perfect mix of runs appeals to a wide range of riders and also features the world renowned 20km (12mile) Valley Blanche which is an extremely high off Piste run that circles the entire resort, a challenge for any aspiring expert skier. Here are some key facts about the resort:
119km Pistes with 106 runs
308 Hectares of skiable area
One Terrain Park
Longest run 20km
14% Beginner + 34% Intermediate + 38% Advanced + 14% Expert
Summit 3275m / 1042m Base
6th March 2016 (Fieberbrunn Kitzbuheleralpen, Austria)
Part of the much larger Triol skiing area the Fieberbrunn is a large resort in its own right with many of its runs tailored towards the intermediate rider yet still features runs for the more advanced rider.
Alot of the terrain here is extremely enjoyable with perfectly groomed runs with the option to head into the wide open powder fields to test your skills. Fieberbrunn is seen as a hidden gem within the Alps and one to visit during your riding career, below are a few key facts about the resort:
35km Pistes with 26 runs
34 Hectares of skiable area
One Half pipe
35km Cross Country
13km Blue + 22km Red + 3km Black
Summit 2020m / 830m Base
17th March 2016 (Haines, Alaska)
Haines, Alaska features some of the world’s best heli skiing terrain with over 5000ft of vertical drop and scenic powder runs that will keep you wanting more testing your skills to the very edge.
The mountain ranges surrounding Haines have a dry snowpack with some of the most stable weather systems found anywhere in Alaska. The sleepy community and picturesque landscapes makes this a centre for wilderness adventures in Alaska.
World’s largest non polar ice cap
5000ft of vertical drop
Situated at one of Alaska’s great fjords
Verbier is in the centre of one of one of the largest ski areas in Europe, the four valleys! The exciting terrain combined with scenic views and abundance of snow makes this resort a sure fire bet for late or early season riding.
Two recently open lifts has made accessing the four valleys area even easier and with the right conditions is host to a trail of 15km descending over 2500m making it one of the biggest and best vertical runs in the world. Below are a few key facts about the resort:
177km Pistes with 37 runs
162 Hectares of skiable area
36% Intermediate + 37% Advanced + 27% Expert
Summit 3330m / 1500m Base
Event Feeding Into Products
This world renowned event has become so successful numerous snow sport companies are incorporating the name into some of their products for example Teko Freeride World Tour sock and Dakine Freeride World Tour Backpack both available at the Tallington Lakes Pro Shop both in store and online.
The innovations in point of view (POV) cameras in the last five years have changed the way we are able to capture our favourite action sports. However it seems sometimes that the footage people get from there action camera doesn’t quite live up to there expectations. I thought I would write a short blog on how to film skiing with a GoPro and get the professional looking results you are hoping for.
The first step in making a great edit is having a clear idea of the shots and footage you want before even leaving the house. The gift and the curse of POV cameras is that they are capable of shooting anywhere and anything, this means we can end up with hours of footage on the memory card much which will never be used or even replayed. Having a concise vision of what you want to film can save hours of trawling through your memory card waiting for a useable shot. Angles to shoot from are endless with a GoPro but where they excel is from a close intimate angle as the fish eye lens captures images at such a wide angle. With this in mind the key to getting consistently good results is making sure the camera is close to the point of action you are trying to capture. This can be achieved by the huge variety of GoPro mounts which are available and allow you to self film but is more critical if you filming somebody else.
So once you have a clear idea in your head you can go out and get the shots you want this is where a basic understanding of the camera settings comes into play. The latest GoPros are able to shoot at 120 fps (frames per second) in 1080HD or 60 fps in 4K however there are a variety of different shooting modes beneath these. So what setting should you use when, basically the highest quality shot will require shooting in 1080HD or 4K on the newest models. This setting will mean the cameras is taking in the most information it can,providing the highest image quality when replayed. However shooting in this mode means you will compromise the fps rate. This is where having an idea of what you want to achieve is important. The higher the frame rate the better the quality if you want to slow the shot down, so to achieve that super slow motion effect used so often in GoPro videos you need to be shooting in the highest frame rate – ideally anything above 60 fps will you good results when slowed down.
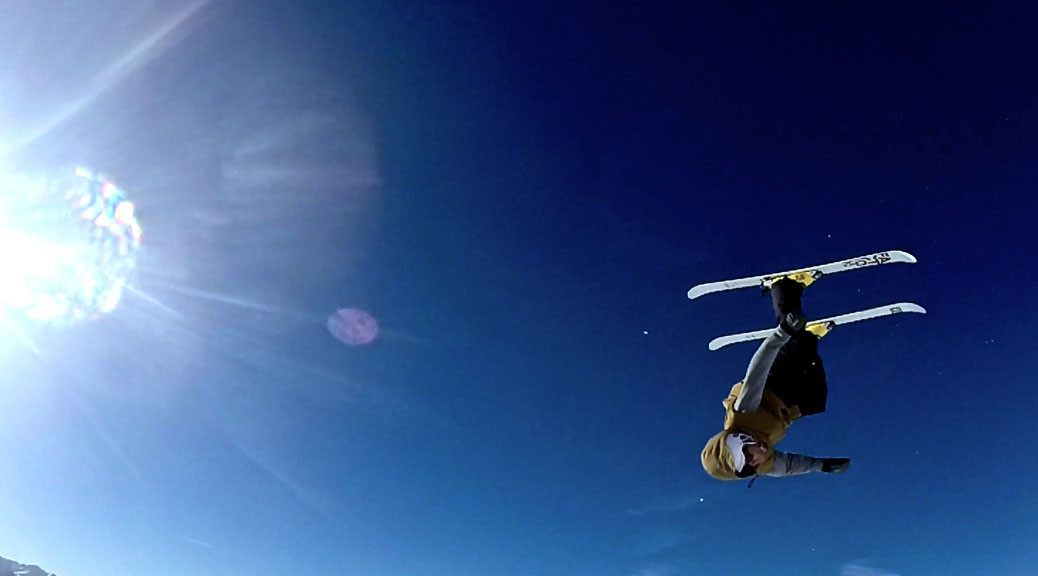
In regards to getting the best results in slow motion there are a couple of things to consider when actually filming. Firstly try and keep ‘camera shake‘ to a minimum; there are a vast selection of accessories to help with this from pole mounts to tripods. I recommend making the small investment as it will really improve the quality of your images. Secondly reducing the ‘background’ noise in the frame means it is easier for editing software to link the frames when slowed down. So try to film the action with a blank background for example if someone is doing a jump try to make the backdrop the sky this will result in smoother images when slowed down.
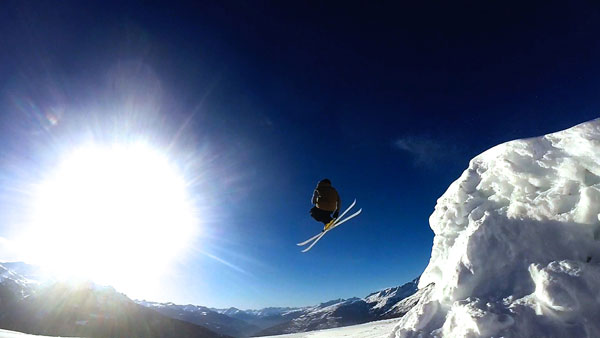
A final thought in regards to getting the most from your GoPro is choosing the days you film and how you film. If you look at any of the professional GoPro clips online you will see a common theme they are all shot on the brightest days. The images on these days will always have better contrast and will really come alive on your screen. However skiing isn’t always blue skies and sunshine if you do end up wanting to capture that epic white out powder day you will need to do some after editing. To achieve that same definition in your images you will need to increase both contrast and saturation whilst reducing exposure. The free GoPro Studio is a great bit of software to start learning the basics of editing and improve your film making skills. It also has fantastic compressor which will reduce the final file size of your edits, due to the quality of GoPro footage quite often files can be large so this a great feature especially if you like sharing you edits on social media.
Hope this has been useful and you enjoy going out and capturing your next big adventure!
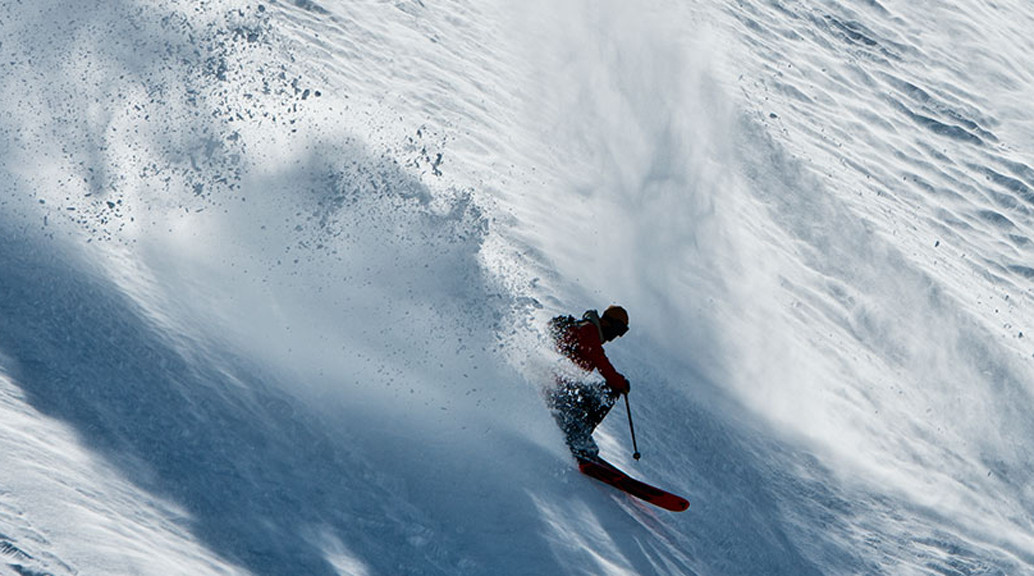
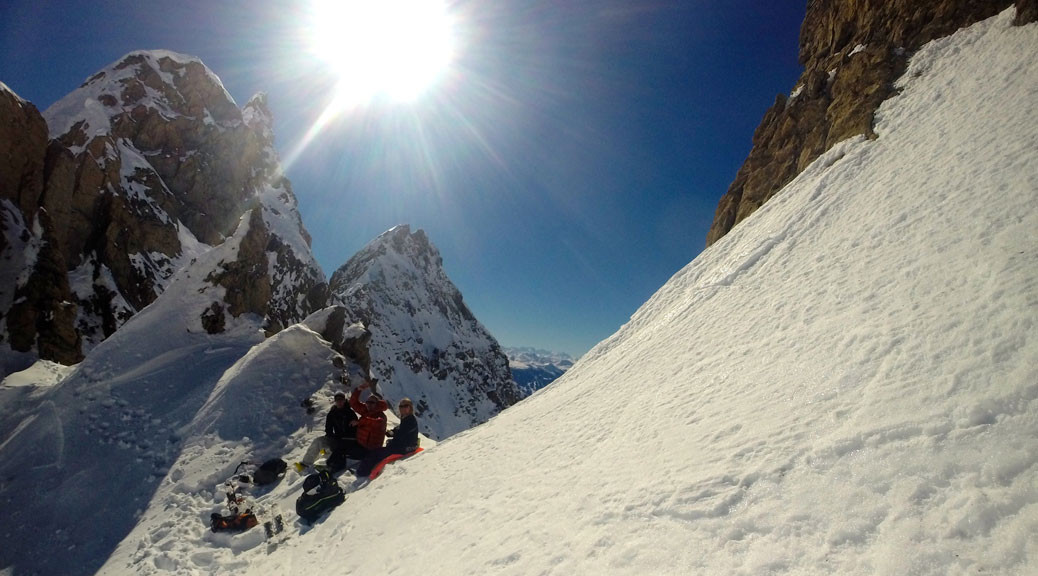
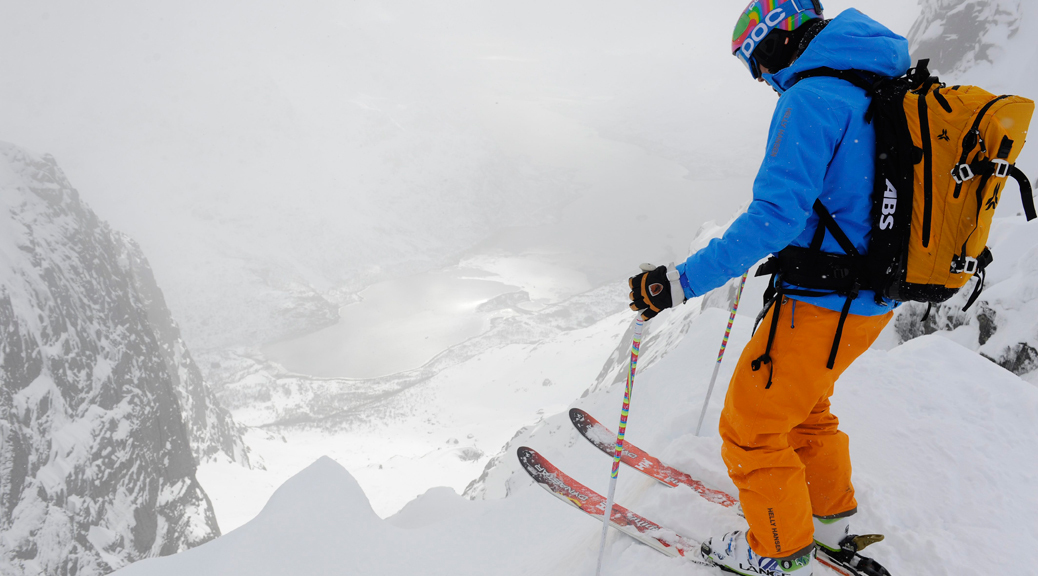
I have spent the last eight years wanting to ski the Bec Rouge couloir, and could hardly contain my excitement when we set off at 6am! The
conditions were epic with blue skies as far as you can see, a foot of fresh snow and temperatures set to stay at -10°C all morning.
Halfway through the two hour climb we had the privilege of meeting Marcel Gaidet; who ended up joining us for the remainder of the tour. Marcel’s son Manu was a three times World Freeride Champion. The wealth of knowledge that Marcel has of these mountains was phenomenal and I learnt so much in the remainder of the day.
Marcel Gaidet (left) a true inspiration.
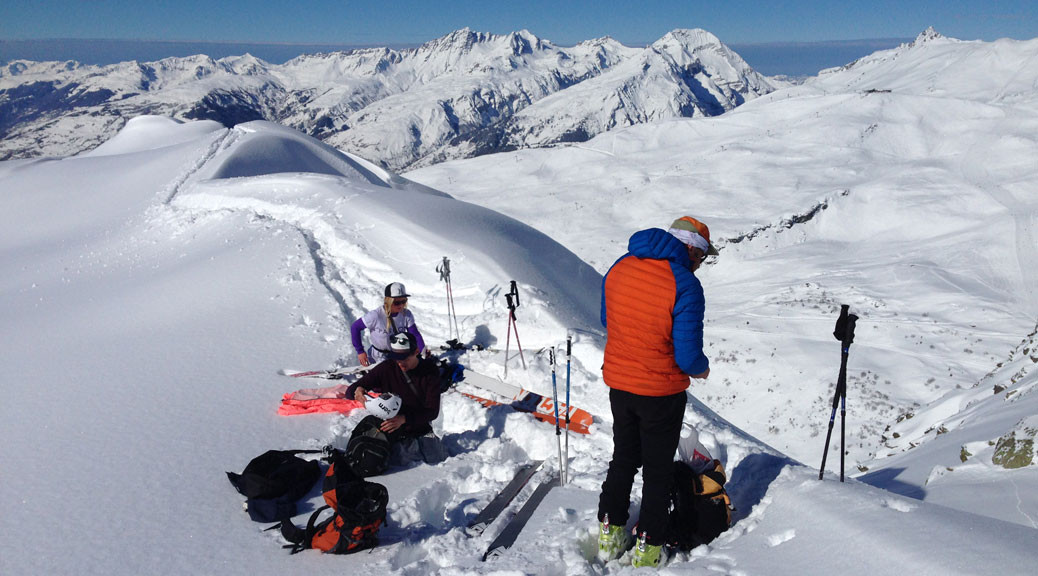
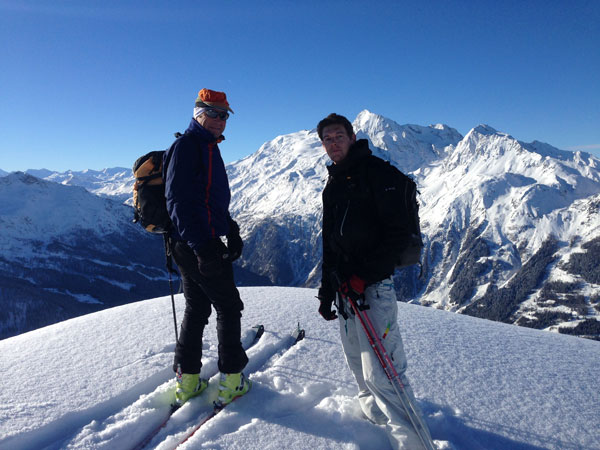
Marcel is 67 this year and has had a hip replacement; however he still put in the first track near enough all the way to the top – his level of fitness was truly awe inspiring. To put it in to perspective he averages 50,000 vertical metres of climbing a winter compared to my usual of 10,000. To be around Marcel for the day was amazing. He is just out there doing it and enjoying himself; I can only hope that I am still skiing lines like this when I am in my sixties.
“You have waited so long for all the elements to come together there is so much that goes into it.”
After eight years of waiting the couloir couldn’t of had better snow conditions. It is hard to put into words what it feels like on days like this; you have waited so long for all the elements to come together there is so much that goes into it. It is probably the one side
of the sport that I feel as a whole people don’t appreciate. You have to be so patient, nature dictates the small windows of opportunity you have to ski these lines.
So when you get the chance, you are almost over whelmed. It is just incredible that so many variables can fall into place and that is what makes it so special, I just hope I don’t have to wait another eight years to do it gain!
Sometimes it can be hard to get involved in competitive skiing but I would recommend it to everyone. Whether it is competing in gates at your local dry slope, or attending the many events on at
the snow domes or on the piste in Europe there are plenty of ways to get involved for all abilities. For myself it had been several years since I had competed and it made me realise the ways it can benefit your skiing.
Park Contest
The format for the contest required two qualifying runs which would determine the top five through to the final run, where the overall winner was decided. The event had a great atmosphere with a good standard of local French riders. My two qualifying runs went well
and my second a backflip to 540 followed by a successful completion of the rail section on the course got me through to the final.
Unfortunately I fell in the final on my first jump a natural 720 and finished fifth overall in the event. Despite just missing out on the prizes I had such a good day. By competing it pushes you to ski to the best of your ability and naturally encourages progression – this can only be beneficial to all skiers.
On route to the finals!
When I was at University I competed a lot and I remember how much people progressed in that environment. So I would recommend looking into your local ski clubs and dry slopes to see what is available and get involved.
With severe cold spells striking the ski resorts this season, have you found that your jacket is no longer up to scratch? This week we have seen a rise in post-skiing purchases with bargain buys falling short once outside the relatively mild UK. It appears that quality branded snow jackets are fighting back.
Are you looking to the latest technology jackets to help beat the cold next time round? Found that the -10 temperatures and fierce winds cut through your jacket and despite your numerous layers you ended up leaving the slopes early?
If your jacket has failed you this season, keep these three key features in mind and buy one that will stand the test of time.
Does it have a 10,000mm/10,000g waterproof to breathability rating?
Does it have critically or fully taped seams?
What added insulatory features does it have? Powder skirt? Wrist guards?